Baking tray storage ideas only work when they match the cabinet you actually have, not the one in the catalog photo. A vertical organizer that slides in neatly on paper can block the door swing or waste six inches of shadow space if you measure the opening instead of the inside faces. One homeowner spent $34 on a rolling cart before a $12 over-the-door shoe organizer solved the same problem.
Corner Organizers
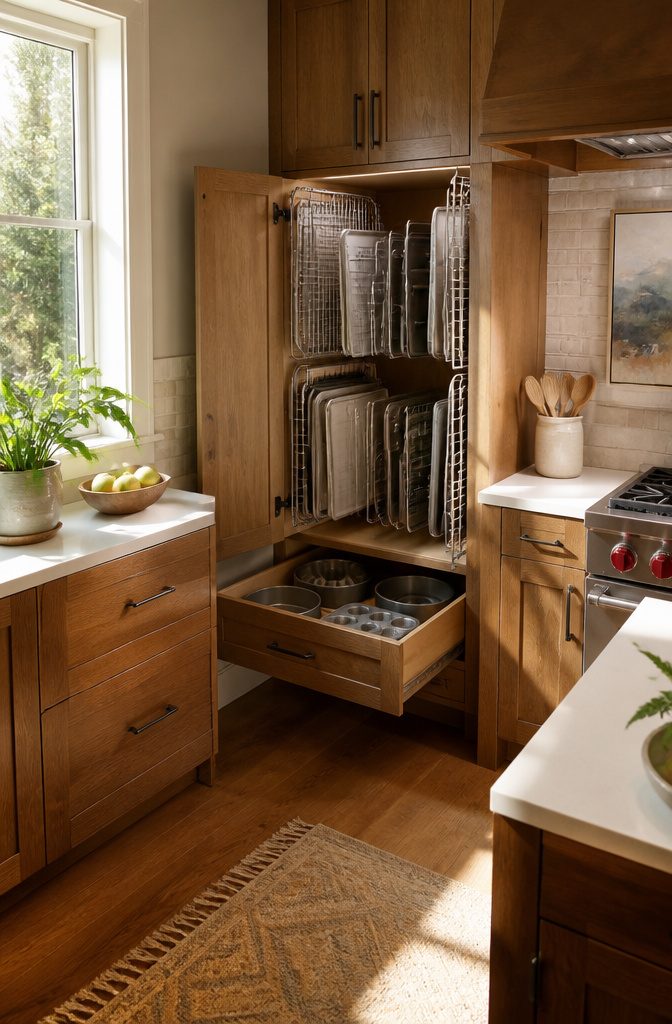
Corner organizers slide right onto standard cabinet shelves without any drilling, which matters when the lease says you can’t modify anything. The ones I kept reading about come as flat wire frames that sit on top of the shelf or below it, and they lock together at the corners so you can build out a grid as deep as your cupboard allows. Stacking them vertically against the cabinet wall leaves the full depth of the shelf open for something else, or you can run them flat and create shallow, stable layers for cake pans that would slide around if you piled them.
What sold me on the vertical arrangement was hearing from someone who raised her shelf and ran the corner units up the full height. She went from what she called an avalanche cabinet to pulling out a single cookie sheet without touching the rest. Flat stacking forces you to lift half your collection to reach the bottom piece. Vertical corner slots let you scan and grab. The same organizer handles muffin tins, shallow cake pans, and even a bundt pan if you leave one slot wider. For a few hours and roughly the cost of a takeout dinner, the whole cabinet starts working the way it should have from the start.
Vertical Organizers
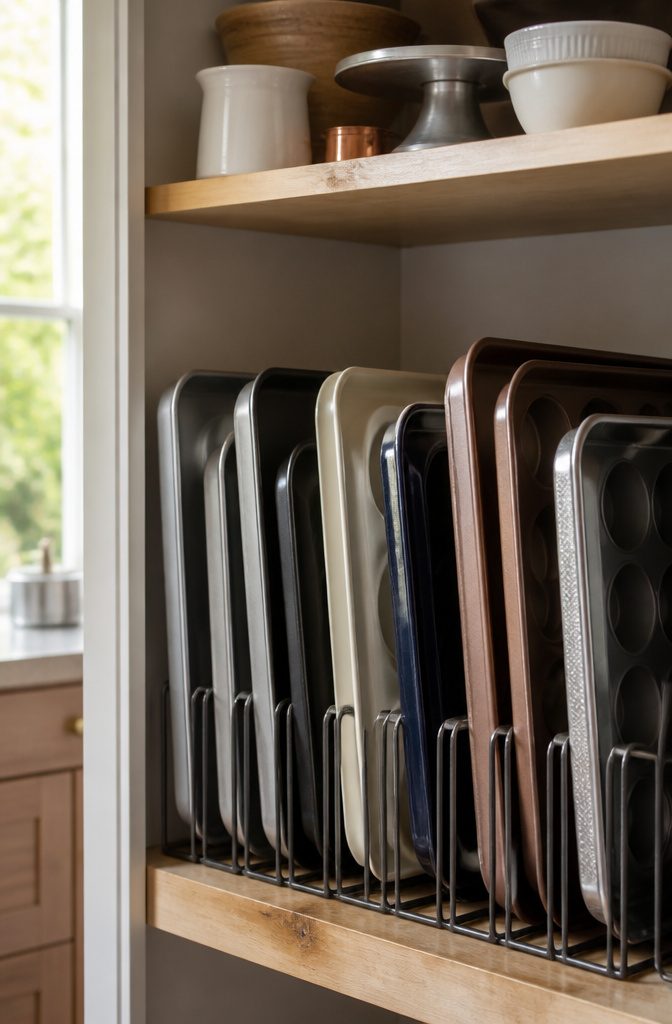
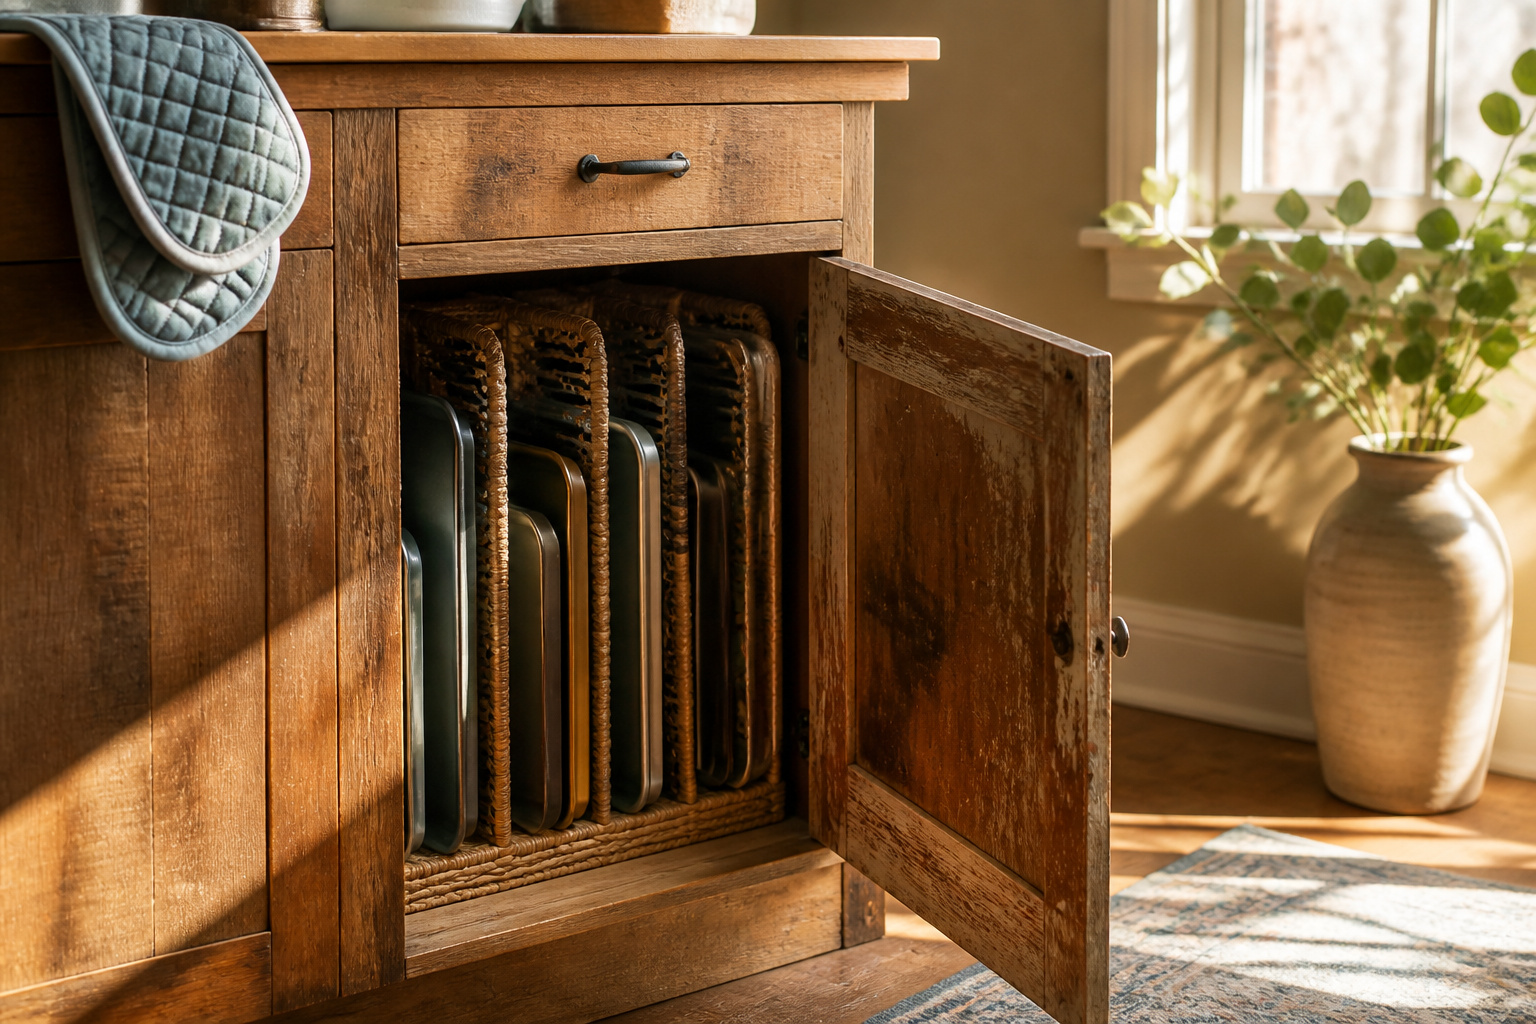
Stacking baking trays looks tidy until you need the sheet on the bottom. Vertical storage puts every pan in reach without unstacking. I gave up on the pile method after one too many clattering avalanches every time I wanted a single cookie sheet.
Side-standing organizers, whether cabinet-mounted dividers or repurposed office sorters, let muffin tins, 9×13 pans, and cutting boards each slide into their own slot. The slots can be sized to whatever you own, and similar shapes nest inside each other to save space. One cabinet redo I read about involved simply raising the shelf and adding vertical organizers from a basic online order, turning what the owner called an "avalanche waiting to happen" into grab-and-go storage.
The real advantage is daily friction. When every pan has its own channel, you pull out exactly what you need and put it back without thinking. That is the difference between a system you maintain and one you abandon by February.
Pull-Out Shelves
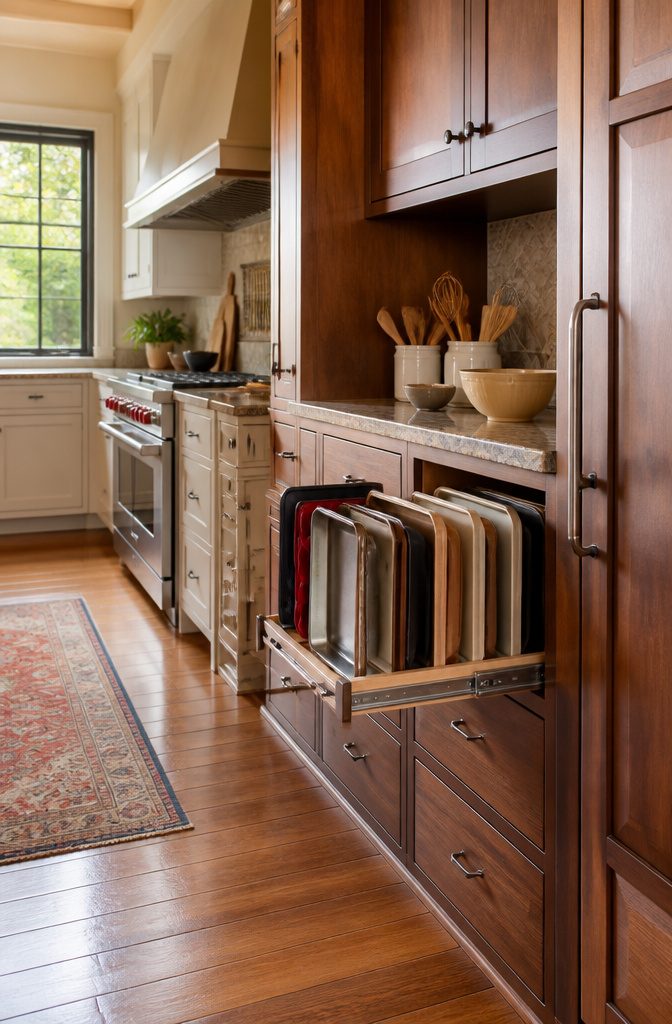
Pull-out shelves change the game because the tray comes to you instead of you crawling into the cabinet after it. A reader named Becca installed dividers that pull out to hold her cookie sheets and other baking items, and the difference is exactly what the name suggests: the whole unit rolls forward so you can lift one pan without unstacking or crouching. That last part matters more than it sounds. One homeowner noted that reaching under the sink for the largest sheet pan got old fast, and if they did the project again they would make the entire unit a pull-out drawer. The lesson is straightforward: if you are already committing to hardware, go full pull-out rather than half measures. Roll-out shelves or deep drawers with adjustable dividers give you the same vertical storage but with none of the yoga.
Built-In Cabinet Dividers
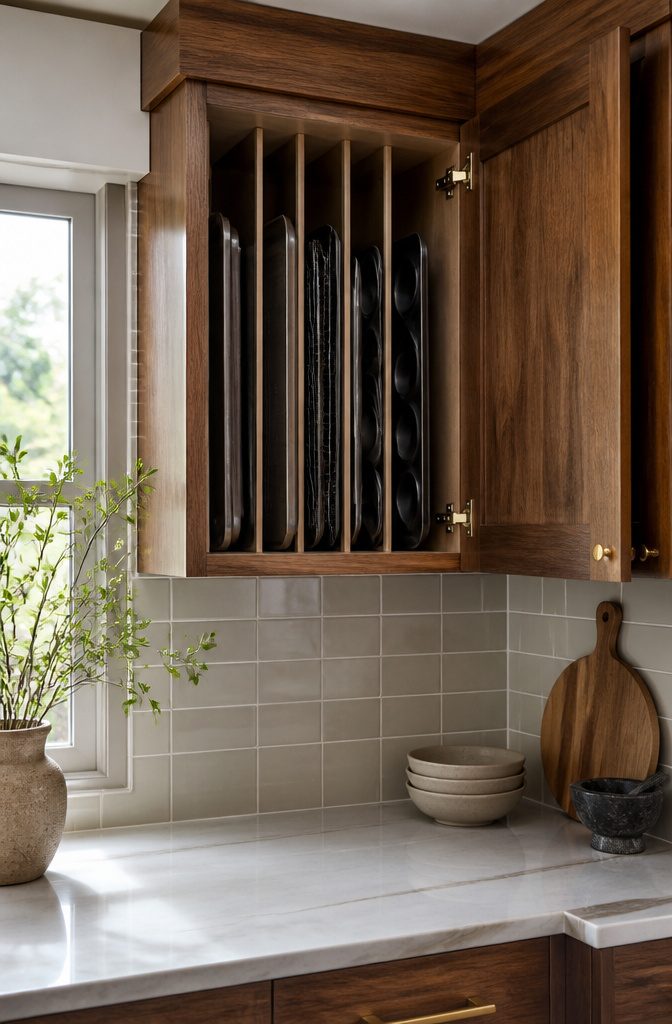
Built-in cabinet dividers turn awkward, deep cavities into usable vertical storage by letting trays stand on edge instead of stacking flat. The classic spot for them is the cabinet above the refrigerator or stove, where depth is generous but height is tight and the whole space risks becoming a black hole for forgotten pans. Those upper cabinets run about 12 inches deep in most kitchens, sometimes more, which sounds generous until you try to reach past the first row of anything lying flat.
A reader named Tammy kept her bakeware in dividers above the oven and noted that the upright arrangement made every piece visible at a glance. The constraint is the cabinet itself: these dividers are fixed in place, so they only work where a cabinet already exists with the right proportions. In a Virginia kitchen, extra-deep refrigerator cabinets got corner shelves toward the back for lesser-used items and vertical organizers across the front, which pulled the whole space into daily use without a full remodel.
The real advantage is no sliding or lifting a whole stack to reach one sheet pan. The tradeoff is that you are stuck with the cabinet location your builder chose, which might mean a step stool for some users or awkward heat exposure near the stove.
Under-Shelf Baskets
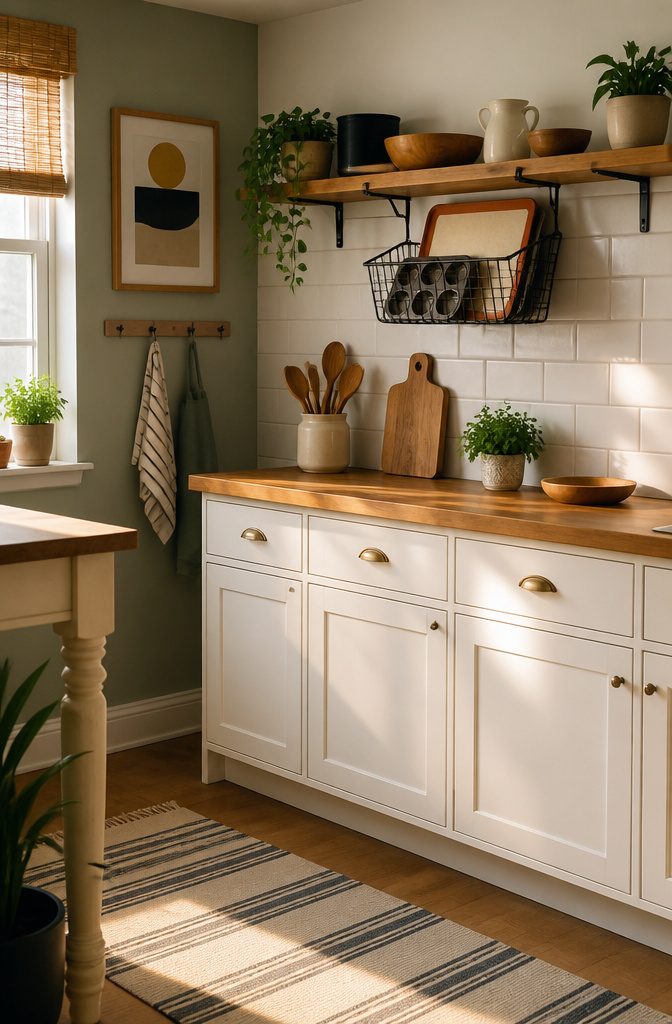
Tall cabinets for baking trays often leave a foot or more of dead air above a single shelf, especially in older kitchens where shelves were set for dinner plates, not half-sheet pans. An under-shelf basket hooks onto that existing shelf and drops a wire platform into the gap, turning blank height into a second surface for muffin tins, cooling racks, or the silicone mats that otherwise slide around and disappear.
The baskets need no drilling, which matters if you are renting or just not ready to commit to a cabinet rebuild. Slide one in and the vertical space starts working immediately; the clearance underneath stays open for the trays you already store flat. Where a full pull-out drawer would eat most of a Saturday and half your project budget, this is a ten-minute fix that costs a fraction.
The tradeoff is weight. These baskets are light wire, meant for lighter gear, not for stacking cast iron. Load them with the flimsy stuff that clutters drawer fronts and they earn their keep. Overstuff them and they sag, scratch the shelf above, and turn into another kitchen annoyance you tolerate instead of use.
Rolling Carts
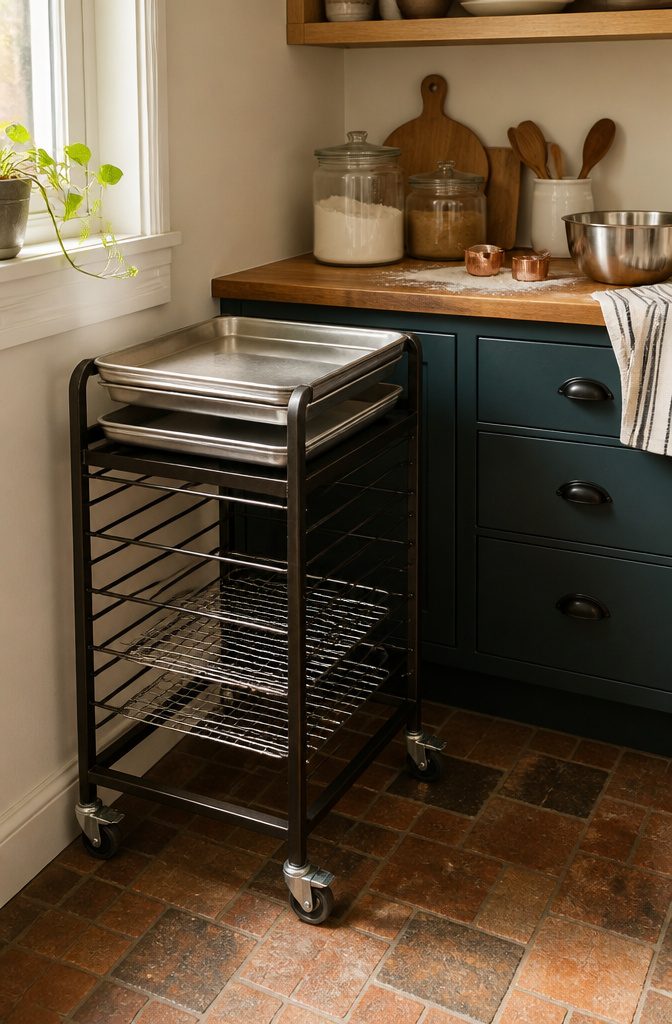
A slim rolling cart can turn dead floor space into a mini baking center that follows you from pantry to counter to stove. In my last rental the cabinet situation was basically a cereal box and a prayer, so I kept a narrow three-tier cart parked beside the fridge. Top shelf held the half-sheet pan I used most, middle for cooling racks and silicone mats, bottom for the muffin tins. When I needed to roll out dough, the whole station wheeled over to the counter so everything was within arm’s reach. The flexibility mattered more than I expected. Small kitchens force you to work in zones that shift by project, and a cart respects that instead of fighting it. Steel frames clean up easier than wire ones if you’re moving flour around; plastic tiers sag after a year under anything heavier than a cookie sheet. Width is the real limit. Anything much past twelve inches starts blocking traffic in a galley layout, and you’ll curse it every time the oven door needs to swing. For renters especially, this is storage that moves with you and costs less than one custom cabinet pull-out.
Toe-Kick Drawers
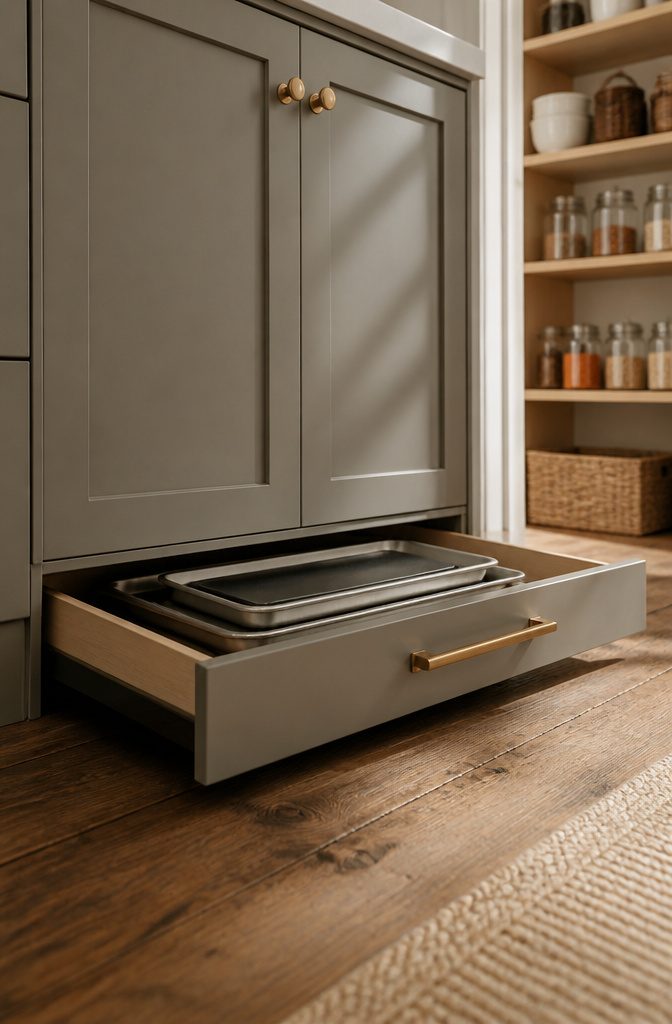
The three inches of dead space under most base cabinets, called the toe kick, sits there doing nothing until you trip on it. A shallow drawer fitted into that gap turns it into flat storage for baking sheets, pizza pans, and cooling racks without touching a single wall cabinet. Most kitchen layouts leave this zone empty because it is an awkward reach, but that is exactly why it works for items you use weekly rather than daily. You will need to bend low to pull the drawer, so keep the heaviest pans elsewhere, and the slim profile means dividers are not really an option, items simply stack or slide. Installation varies by cabinet age; older boxes may lack the structural rail a drawer kit needs, so check the underside before ordering hardware.
Lid Organizers
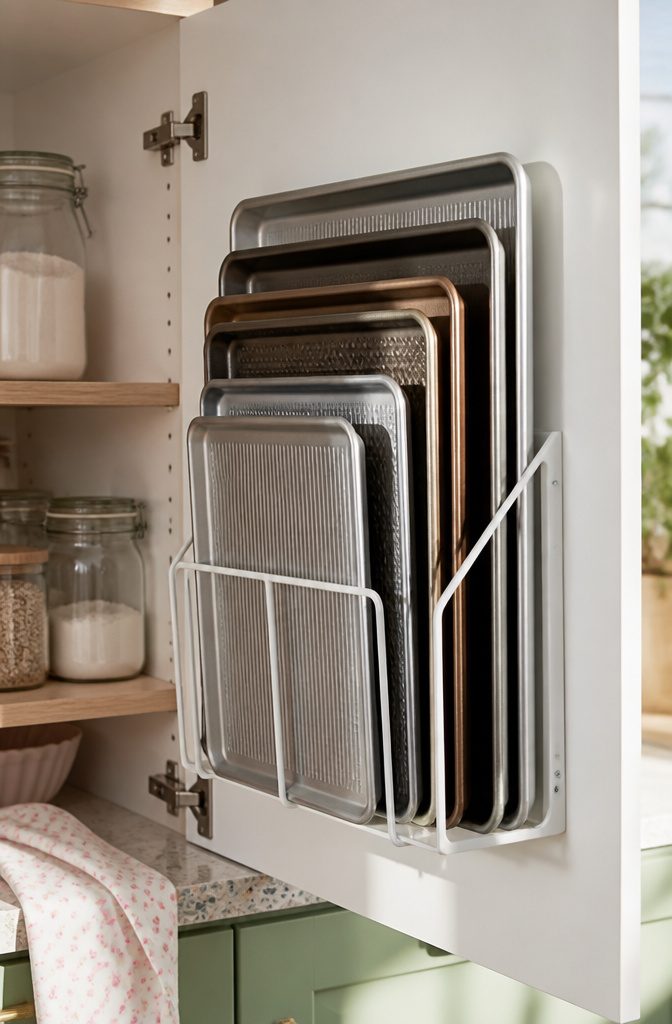
A lid organizer meant for pots can earn its keep a second time in a baking cabinet. The same slots that hold lids upright at an angle will take a half-sheet pan or a quarter-sheet pan on edge, kept from sliding flat into a stack you have to dig through. In my own search for something that would not require a drill or a cabinet swap, this was the crossover that made the most sense: one wire rack, two jobs, no permanent install.
The fit matters more than the label. A organizer with slots too narrow traps a rimmed baking sheet at an awkward tilt; too wide, and a jelly-roll pan or a thin cooling rack flops forward. What worked, reading through a dozen of these setups, was a rack with dividers you can adjust or remove, the kind sold for lid sets that vary from six inches across to nearly fourteen. That flexibility lets you nest two cookie sheets in one slot and set the next divider tight enough to hold a rack upright beside them.
The real limit is height. A standard cabinet shelf leaves about ten to twelve inches of vertical space, and a lid organizer tall enough for stockpot lids will scrape the underside of the shelf above. The shorter models, meant for saucepan lids, sit low enough to clear and still give you four or five slots for pans.
DIY Custom Inserts
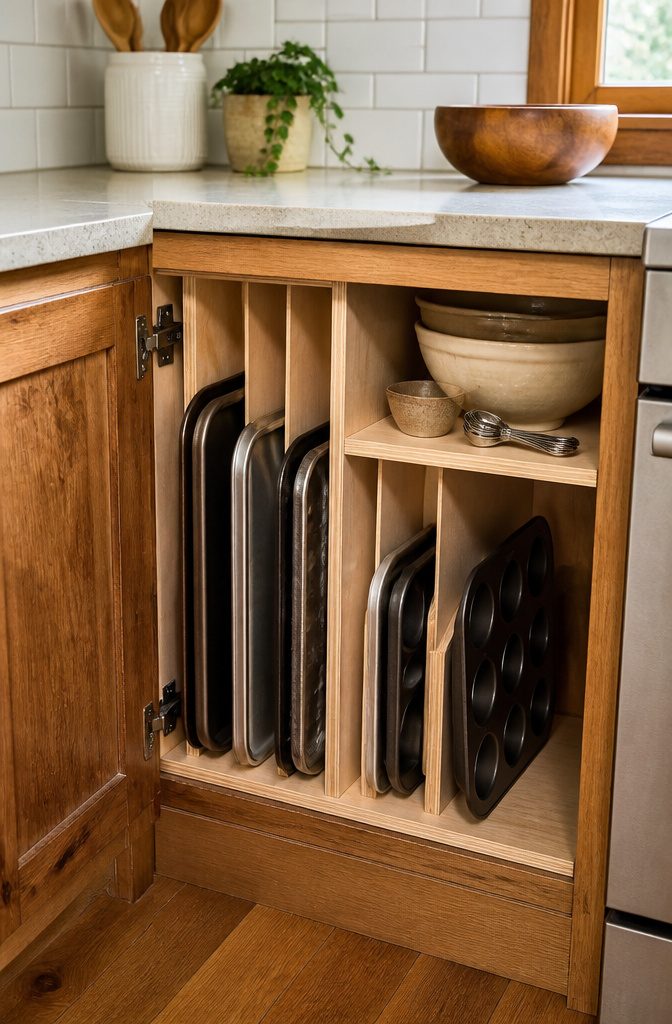
A box built to your cabinet’s exact depth turns dead space into slots that actually fit your pans, not a generic grid that leaves three inches of wobble on each side. One approach that stuck with me starts with four pieces of plywood, no front or back, slid into the lower cabinet like a drawer without the hardware. The dividers themselves are thin quarter-inch plywood, spaced using free paint stir sticks from the hardware store as guides. Nail one stick to the box floor, one to the top rail, slide the divider against it, and that fixed gap becomes your template for the next slot. Work across until you have vertical channels sized for cookie sheets, muffin tins, even silicone molds that would flop over in a wire rack. Sand and paint the whole unit, and the result handles weight better than most store-bought inserts because it was built for that specific cabinet, not averaged across twenty kitchen brands. The tradeoff is an afternoon of measuring twice and a borrowed brad nailer, but the finished box costs little more than a sheet of plywood and patience.
Magazine and Paper Sorter Hacks
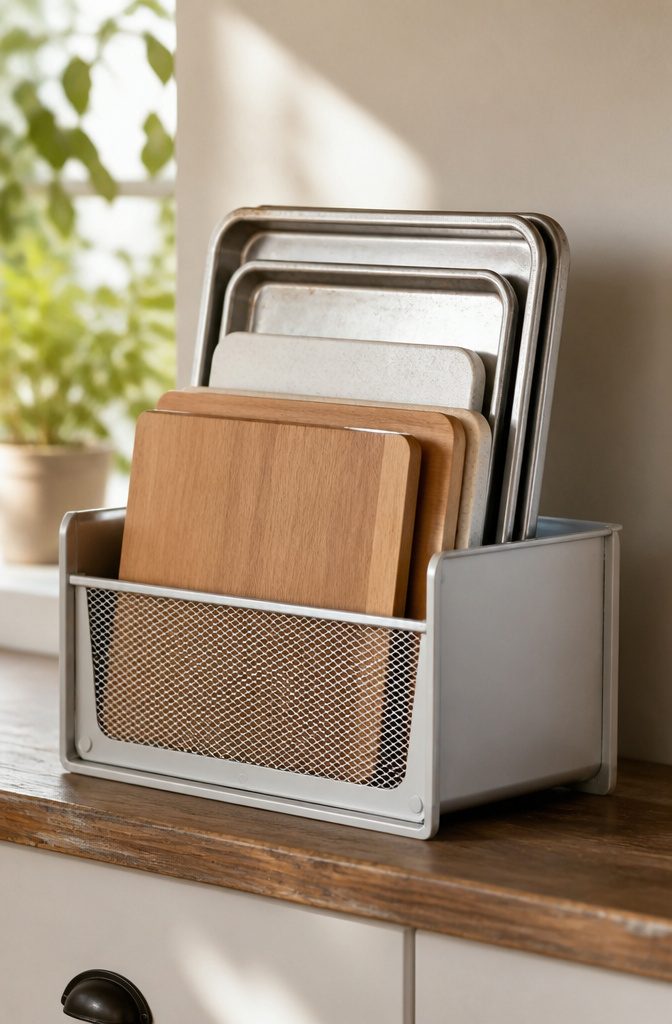
Some of the best baking tray storage ideas come from the office-supply aisle rather than the kitchen department. Magazine holders and paper sorters are built to stand papers upright in tight rows, and that same geometry works surprisingly well for half-sheet pans, muffin tins, and cutting boards. The slots keep everything vertical so you can pull one item without disturbing the stack.
A paper sorter turned on its back or mounted inside a cabinet gives you fixed dividers at a fraction of the cost of bakeware-specific organizers. One reader raised her shelf to fit vertical organizers and went from what she called "an avalanche waiting to happen" to grabbing cookie sheets easily. Another found magazine holders the right temporary answer for odd-sized cupboards where standard racks left an inch of wasted space on every side.
The $3.00 white wire dish rack another homeowner used shows how little this approach has to cost. Office versions tend to run even less, and their lighter weight matters if you’re wedging them into existing cabinets without drilling.
The limits are real, though. Magazine holders are usually plastic or cardboard, so a heavy cast-iron griddle will warp or crush them over time. Tall sides that keep magazines from flopping also make the holder itself harder to clean if grease settles in. For lighter aluminum sheets and occasional-use pans, they hold up fine. For daily workhorses, the wire or coated-steel options sold as paper sorters last longer.
Wall-Mounted Pot Racks
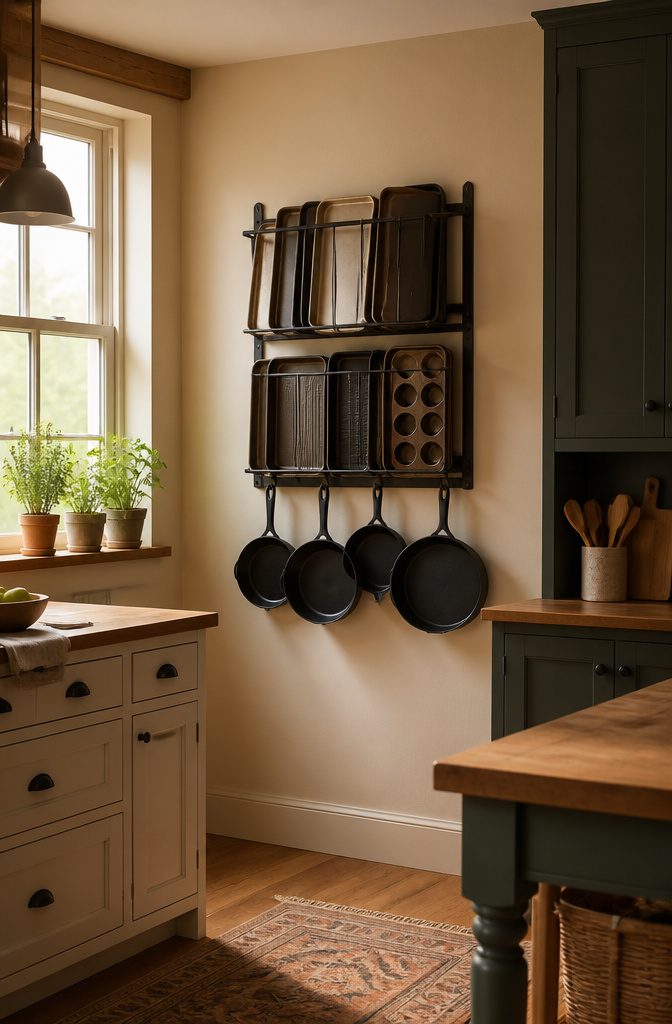
Wall-mounted pot racks pull weight in a kitchen that is short on cabinet depth but has open wall space going to waste. The ceiling version hangs over an island or a stretch of counter, while a wall-mounted rack sits at working height beside the stove or on any blank stretch of drywall. Both free up the cabinet space those pans and lids would otherwise occupy, and they put the grab-and-go items where you can see them without crouching.
The catch is what your wall can actually hold. A loaded rack with cast iron or stacked sheet pans needs studs or solid blocking behind the drywall, not toggle bolts in hollow plaster. If you rent, that means checking your lease on wall modifications or planning to patch screw holes later. A wall rack also eats visual space in a way a cabinet does not, so a narrow galley kitchen can feel busier with pans on display. The ceiling rack avoids that clutter at eye level but demands enough overhead clearance that no one bonks their head reaching for a lid. Either way, you are trading hidden storage for quick access, and the trade only wins if the wall or ceiling is there for the taking.
Storage Above Doorways
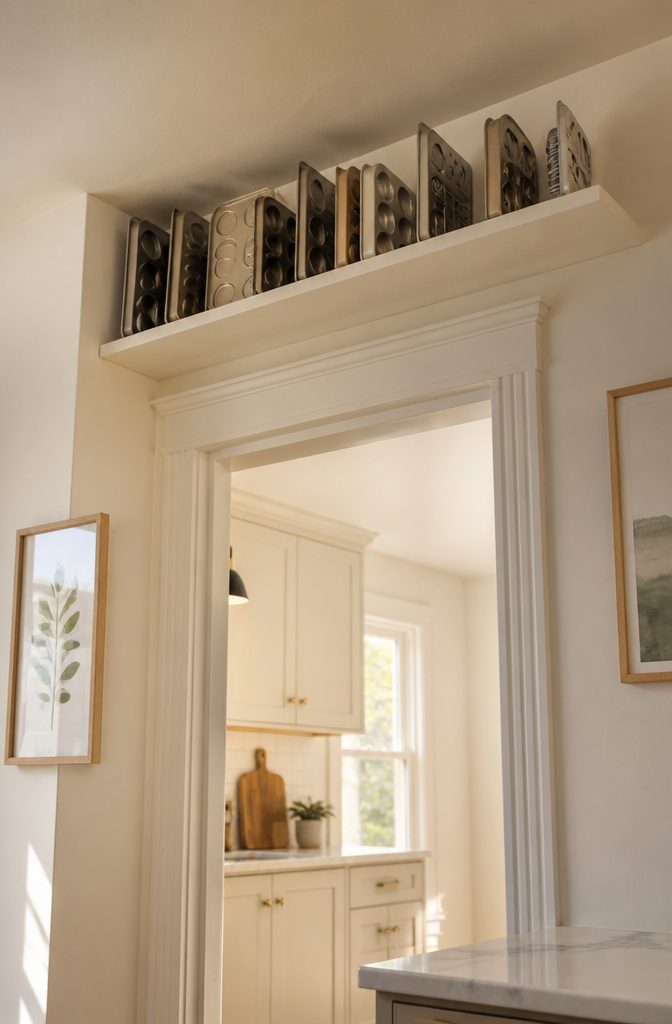
High shelves above doorways or windows sit in that awkward zone where wall meets ceiling, and for years mine held nothing but a dusty ficus and good intentions. The vertical space is real, but the accessibility is not, which makes it a natural home for baking pans that see action twice a year at most. The half-sheet I use for roasting vegetables stays downstairs; the jelly-roll pan that only comes out for holiday yule logs earns its spot near the ceiling.
A pan worth the reach is one whose absence you would not notice in weekly cooking. If you reach for it more than once a season, the climb becomes resentment instead of routine. I keep a small step stool on top of the refrigerator, which sounds like a hassle until you compare it to the alternative: that same pan buried behind cereal boxes where it blocks everything else.
The tradeoff is straightforward. What you gain in freed-up prime cabinet space, you lose in spontaneous use. A bundt pan stored above the door requires planning; one in a pull-out drawer allows a Tuesday evening decision. For renters, these shelves are often already there, which means no installation and no deposit risk. The investment is purely in discipline, deciding honestly which pans have earned exile and which ones are just clutter you have not admitted to yet.
Command Strips for Securing Organizers
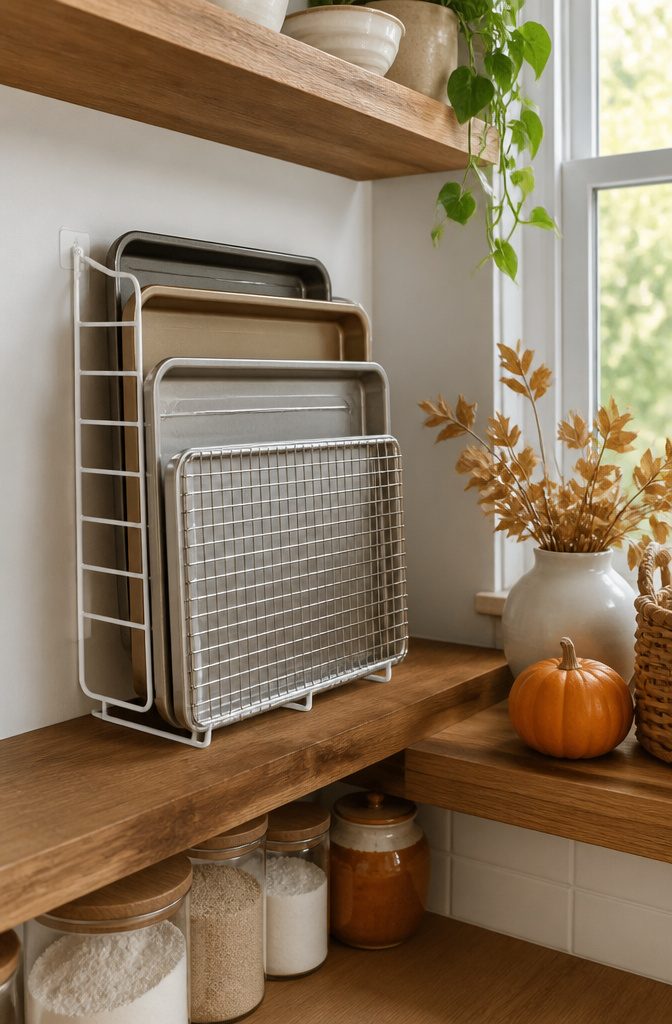
Adhesive strips keep a wire organizer from inching forward every time you slide a sheet pan home. I use the same sticky backing that comes with Command Hooks, cut into small tabs and pressed to the underside of the organizer feet before setting it on the cabinet floor. The grip is just enough to hold position through daily use without committing to screws or shelf liner that bunches up underneath.
The real payoff is on open shelving or mid-cabinet placement where nothing walls the organizer in on either side. Without that anchor, the rack drifts toward you as you load and unload; with it, the layout stays put even when you’re pulling trays one-handed. Removal is clean if you ever reconfigure, which matters more in a rental kitchen than most how-tos admit.
Declutter Before You Organize
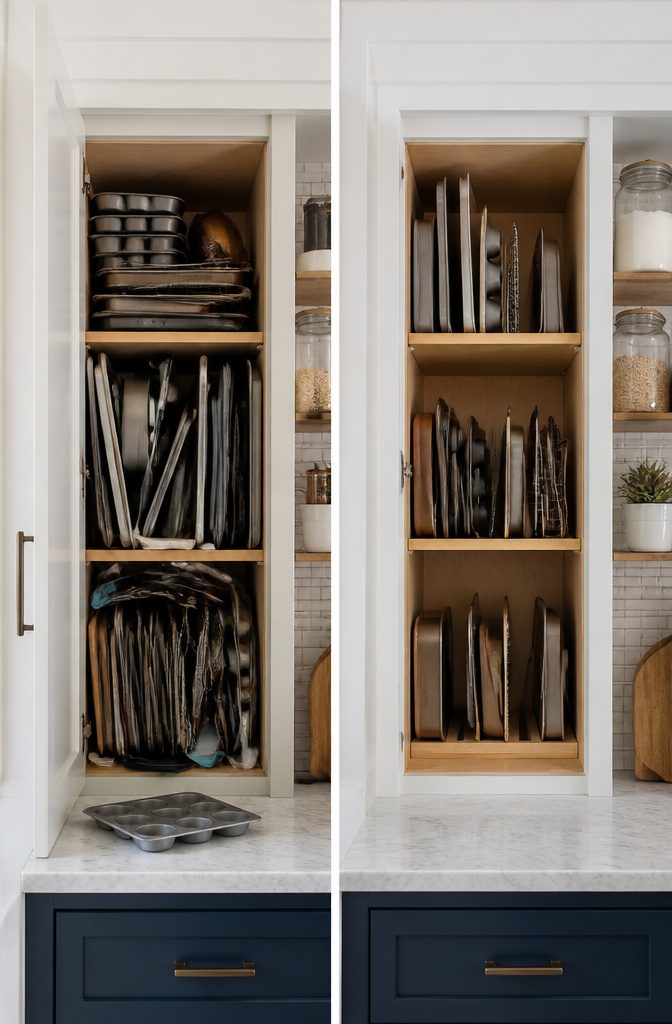
The cabinet under my stove used to hold three muffin tins even though I only bake muffins twice a year. Pulling everything out to reach the one sheet pan I actually needed turned every cookie craving into a chore, and some nights I just gave up.
Removing the unused pieces first is what separates organizing from shuffling. A dozen sources all start here, and after reading through them, the reason clicked: vertical dividers and side racks only work when there is real space between the items you keep. A stuffed organizer still forces you to move three pans to grab one.
What surprised me, reading the before-and-after stories, was how often the decluttering itself changed what people bought. One woman raised her shelf and added vertical organizers only after she realized her "collection" was really three cookie sheets, one cutting board, and a serving tray she used monthly. Another used a simple paper sorter because her remaining pans were few enough to stand upright without tension rods or fitted dividers.
The habit you imagine rarely matches the pans you reach for. That gap between imagined and actual baking is what makes this step worth a Saturday morning before you spend a dollar on storage.
Why Vertical Storage Wins
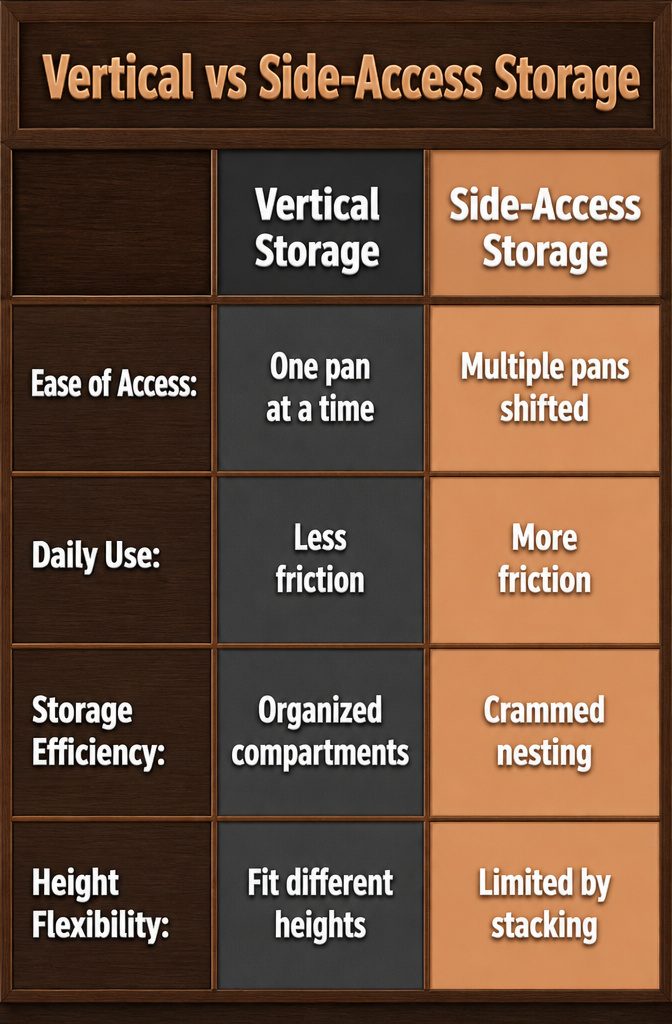
Side-access storage changes how you actually use your kitchen. When pans stack flat, pulling out the cookie sheet buried third from the top means lifting and shifting everything above it, which turns a thirty-second grab into a small project. Vertical slots let you slide out one pan without touching the others, and that difference compounds across a week of cooking.
The real payoff is between everyday meals and holiday baking. On a Tuesday night, nested skillets or stacked sheet pans add friction to a process you already want over with; vertical storage keeps dinner moving. For occasional bakers, the same logic applies to muffin tins, cake pans, and casserole dishes of different heights fitting into their own compartments rather than nesting awkwardly. Even cutting boards and pot lids can slip into the extra space between dividers. The systems that rank well for baking tray storage ideas all share this: they treat the cabinet like a filing cabinet, not a junk drawer, because the pan you need is almost never the one on top.
Matching Storage to Cabinet Real Estate
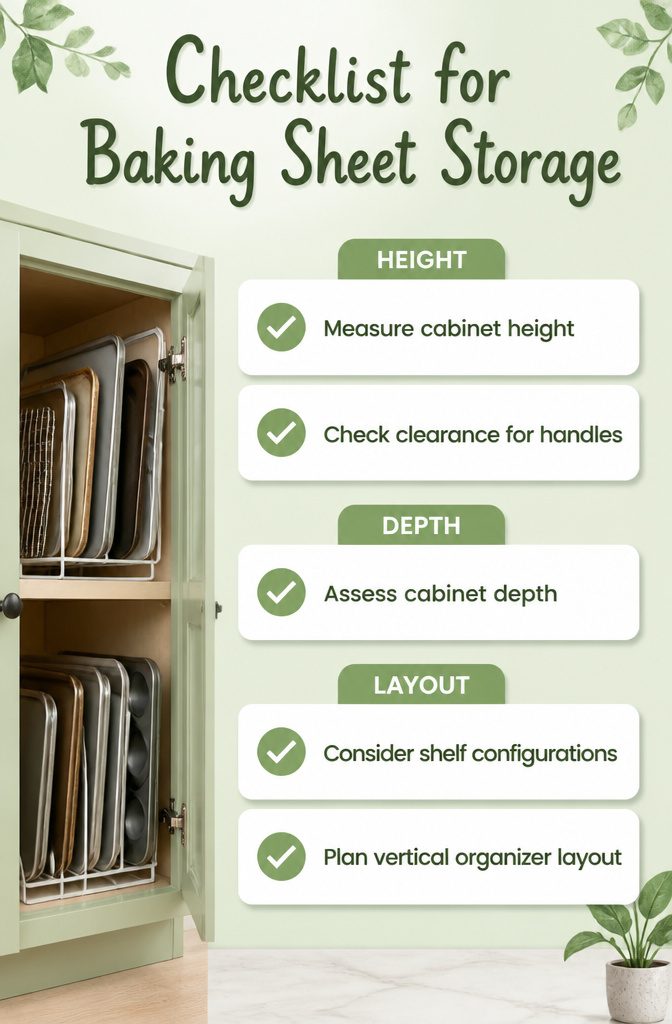
The first thing to know is that a baking sheet standing upright needs about two inches of clearance plus the height of any handle or lip before you can close the cabinet door. That sounds obvious until you are staring at a wire rack that is half an inch too tall for the shelf above it.
Depth matters just as much. A standard builder-grade lower cabinet runs about twenty-four inches front to back, but the door and hinge hardware eat up real estate. A vertical organizer that slides in neatly on paper can end up blocking the door swing if it sits too far forward, or wasting six inches of shadow space at the back if it is too shallow to span the usable depth.
In my first kitchen, I measured width and called it done. The corner unit I bought fit the shelf span perfectly, but I had not accounted for the upper shelf sitting lower than the lower one. The result was two organizers stacked on one side and vertical slots crammed on the other, workable but not the layout I had pictured. When we moved to the new place, I checked every height first, then matched the corner units to the upper shelf and ran the full lower shelf with vertical organizers. Same cupboard style, completely different result. The difference was taking the tape measure to the inside faces, not the opening.
When I Tried Rolling Carts and What Stuck
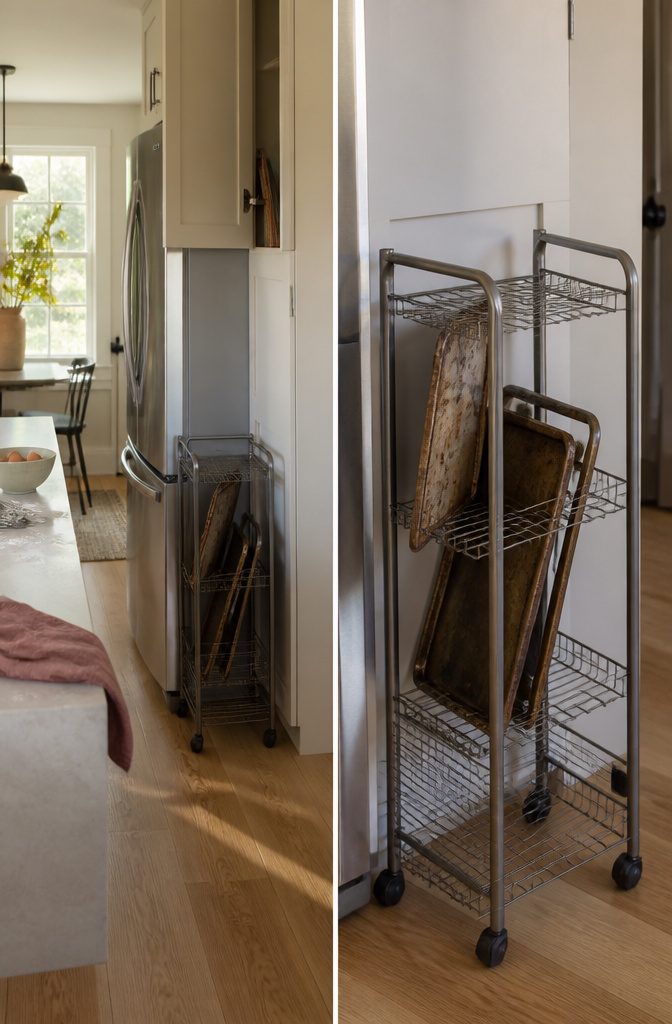
Rolling carts for baking tray storage look promising online, especially the narrow three-tier wire models that slide into gaps beside a refrigerator. I spent $34 on one two years ago, thinking the open sides would let trays slide in and out without fuss. The reality was different. Trays taller than an inch tilted and scraped the frame, and anything with a rim caught on the cross-wires. After six weeks, the cart held cleaning supplies instead, and the trays went back to a cabinet pile.
What stuck was a $12 over-the-door organizer with clear pockets, originally sold for shoes. Sheet pans slide into the deep pockets vertically, half-sheet size fits with room to spare, and the whole thing hangs on the pantry door I already had. The pockets keep rims from clanging together, which matters more than I expected at 6 a.m. The cart now lives in the laundry room, doing actual good there. For baking trays specifically, vertical hanging beats rolling horizontal storage every time, at least in the kitchens I’ve worked with.
Frequently Asked Questions
What are some good storage ideas for baking pans?
Vertical organizers, corner units, pull-out shelves, and DIY plywood inserts all work well. Vertical storage is the standout choice because it lets you pull one pan without unstacking the rest, and corner organizers can be arranged flat or upright depending on your cabinet depth. Built-in dividers above the refrigerator or stove also turn deep, awkward cavities into usable upright storage.
How can I organize baking pans in a small kitchen?
Use vertical organizers to stand pans on edge rather than stacking them flat, which saves depth and keeps everything reachable. Under-shelf baskets reclaim the dead air above existing shelves without any drilling, and a slim rolling cart parked beside the fridge turns narrow floor gaps into a mobile baking station. Wall-mounted racks or over-door pocket organizers also free up precious cabinet space entirely.
What’s the best way to store muffin tins?
Stand them on their sides in vertical organizers or adjustable wire racks so they slide out individually instead of nesting in a stack. One slot can be left wider to accommodate a bundt pan beside them, and similar shapes can nest inside each other within the same channel to save space.
How do I declutter my baking supplies?
Pull everything out and remove the pieces you rarely touch before buying any organizer. A stuffed divider still forces you to move multiple pans to grab one, so the empty space between kept items matters more than the system itself. Many people find their actual collection is smaller than they thought, which changes what storage they actually need.