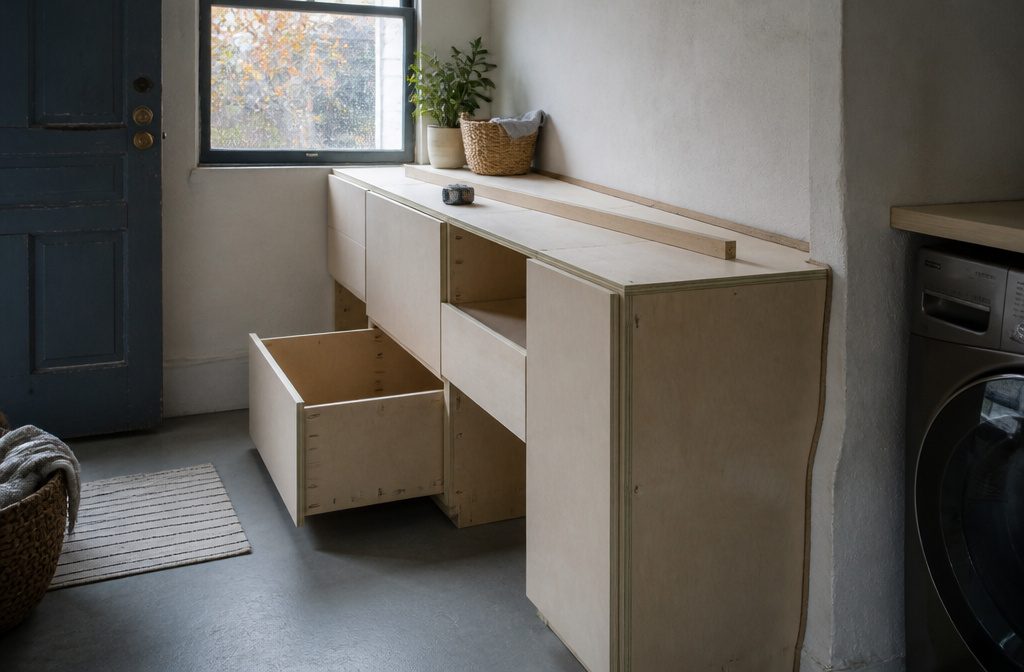
A plywood cabinet built with pocket holes and edge banding costs roughly $200 in materials for a six-foot run and takes a weekend if you measure the space correctly the first time.
Most builders skip the templating step when walls bow more than 1/4 inch over four feet, then spend hours shimming and scribing during installation to close gaps that shouldn’t exist.
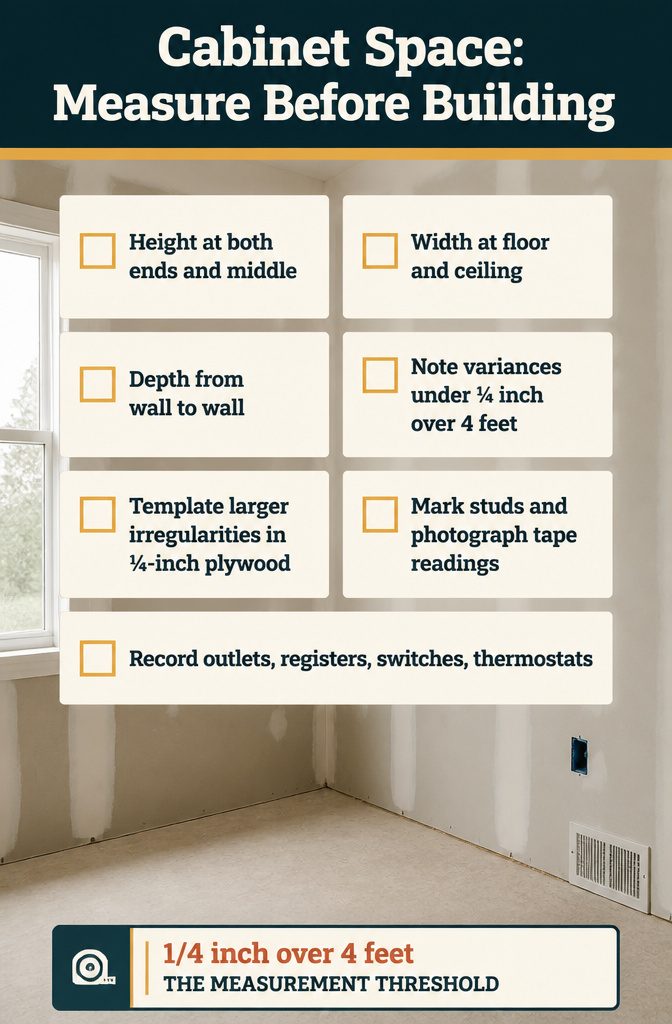
Before you cut a single panel, measure height at both ends and in the middle, check the width at floor and ceiling, and make a plywood template for any wall that’s visibly out of square.
1. Plan, Inspect, and Measure the Space
The first measurement you take is often the wrong one, because the space is never quite as square, level, or plumb as it looks.
I measure the height at both ends and in the middle, the depth from wall to wall, and the width at the floor and again at the ceiling.
Irregularities smaller than 1/4 inch over 4 feet get noted on graph paper so I can shim or scribe-fit during install.
Anything beyond that and I make a template from 1/4-inch plywood, scribe the shape against the wall, and bring it back to the shop.
When irregularities in flat, level, square, and plumb are minor (less than 1/4 in. over 4 ft.), these details can be recorded on your drawings and accommodated by making allowances for shimming or scribe-fitting during installation.
Minor variances are normal; templating lets you account for the big ones without guessing dimensions back at the bench.
Before I leave, I use a stud finder to mark framing for fastening, and I photograph every wall with the tape measure in the shot so I can check dimensions later.
HVAC registers, outlets, switches, and thermostats all go on the sketch.
Some can be relocated, but that decision happens now, not after the cabinet is built. I also measure doorways and hallways to confirm the finished cabinet will actually fit through them.
The planning stage decides dimensions, cabinet style, materials, joinery, door and drawer style, and installation details. Cutting before those choices are locked in is how you end up rebuilding the same piece twice.
2. Choose Your Materials, Tools, and Construction Method
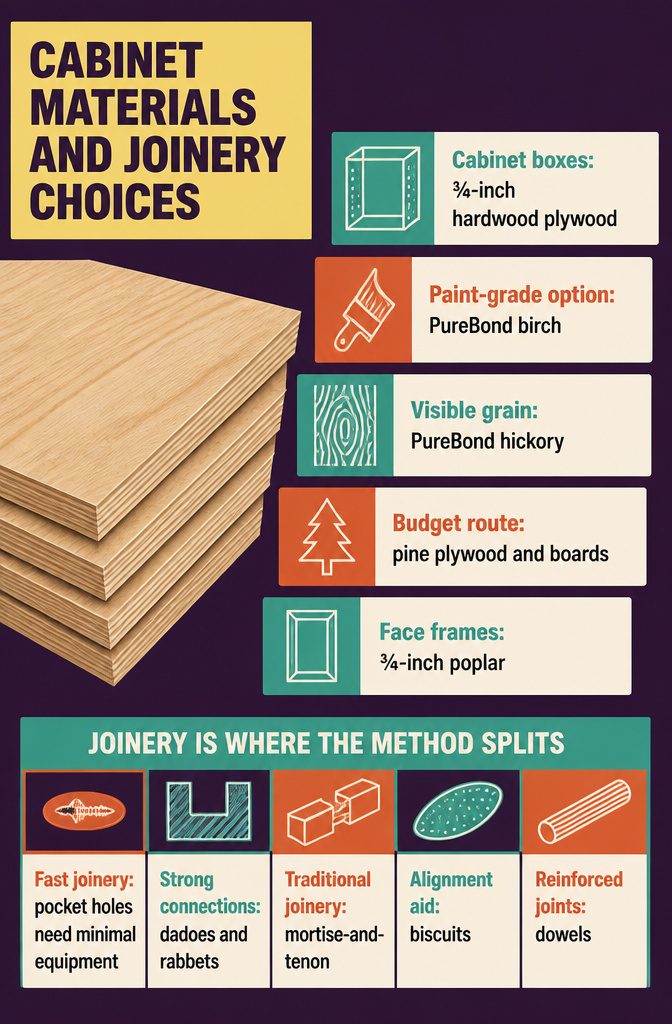
Plywood is the workhorse material here. Hardwood plywood at 3/4-inch thickness forms the cabinet boxes, with options like PureBond birch for painted cabinets or PureBond hickory panels when you want visible grain.
Pine plywood and pine boards are the budget route and still build solid cabinets if you spend time picking flat, straight pieces at the lumberyard.
Face frames typically get 3/4-inch poplar for a clean paint surface, and 1/4-inch plywood covers drawer bottoms and cabinet backs.
Hardwood plywood costs more than construction-grade pine but runs well below the equivalent amount of solid boards, and you skip the milling step entirely since the sheets arrive flat and smooth.
Joinery is where the method splits.
Pocket holes are fast and require minimal equipment, which is why they show up on face frames, side panels, and shelf supports across multiple builds. Dadoes and rabbets cut stronger connections for shelves and backs.
Mortise-and-tenon, biscuits, and dowels all work when the project calls for them. No single method is prescribed because the right choice depends on the tools you own and the load the joint will carry.
3. Make Drawings and a Cut List
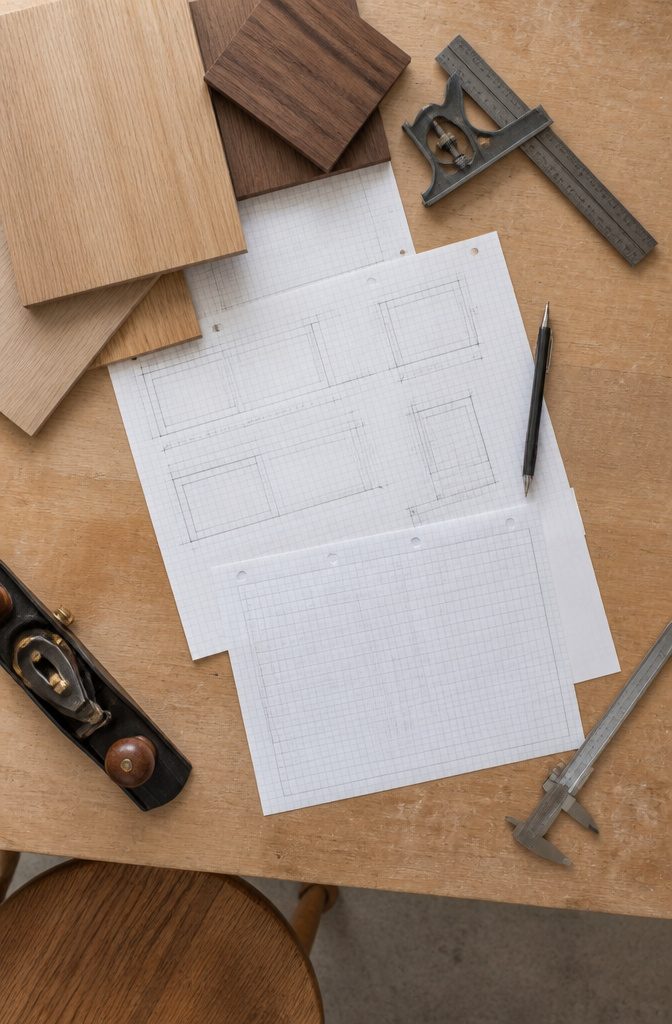
I take time to make plan, elevation, and detail drawings of every cabinet project before I cut anything.
The plan view shows where the cabinets sit in the room; the elevation view shows what they look like from the front, with door widths and heights marked; detail drawings show how parts overlap and fit together.
Those detail sketches don’t need to be to scale, but they inform the construction process and help me see problems before they happen.
From the drawings I create a cut list with dimensions and quantities for every component. The list becomes the map for material ordering and tells me which parts can come from a single sheet without waste.
Large built-ins get divided into modules that fit through doorways and into a minivan, typically allowing ⅛ inch to 3⁄16 inch clearance between the face frame and existing walls for installation and manageable caulk joints.
I label each cut piece before assembly so parts don’t get mixed up when multiple modules are being built at once.
4. Cut and Prepare the Cabinet Parts
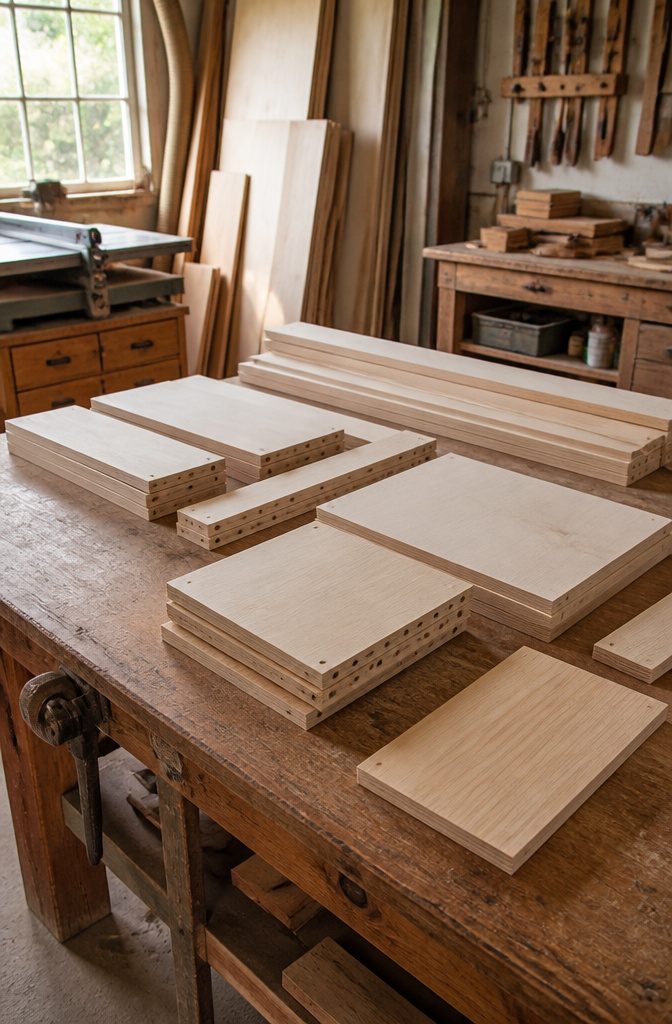
I start by breaking full sheets into pieces I can control. A circular saw handles the first pass, ripping plywood down to something closer to the cabinet depth before anything hits the table saw.
For pantry cabinets I cut strips 23¾ inches wide, and base cabinets get 22¾-inch strips. The pantry runs an inch deeper so that when the countertop goes on later, it lands flush with the pantry face but still overhangs the base.
Once the strips are manageable, I crosscut shelves and panels to length at the table saw. Each front lower corner of a side panel needs a toe-kick notch.
I mark a cutout about 3½ inches tall and 4 inches deep on each side, then cut it with a jigsaw. A sharp blade makes the difference between a clean cut and one that needs cleanup.
Before assembly, I apply iron-on edge banding to any front edge that will show. It goes faster if the parts are cut and stacked in order first, so I’m not hunting for pieces mid-task.
5. Build the Face Frame or Prepare Frameless Edges
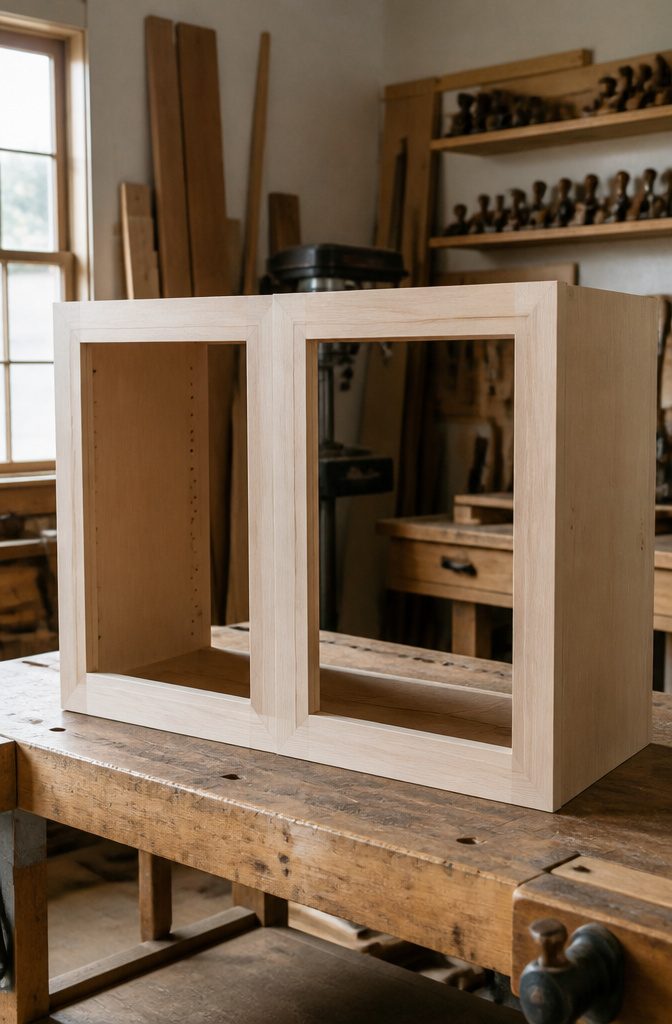
If the cabinet fits a three-sided space like a vanity nook, making the face frame before you build the box gives you a chance to test the fit while the cabinet is still easy to adjust.
I measure the opening, make a template, cut the face frame to match, then build the box to fit the frame rather than the other way around.
Most face frames use stiles and rails between 1.5 and 2 inches wide, joined with pocket holes drilled on the back so they stay hidden when the frame goes on.
A pocket hole jig speeds this up, and the joints pull tight without clamps or pins showing on the front.
Frameless cabinets skip the frame entirely, which simplifies the build but leaves raw plywood edges exposed at the front of each panel.
Edge banding covers those edges with a thin strip of veneer that matches the plywood face, applied with heat from an iron and trimmed flush with a razor.
The result reads cleaner and more minimal, though you lose the coverage a face frame provides if your cuts wander slightly.
6. Assemble the Cabinet Boxes and Supports
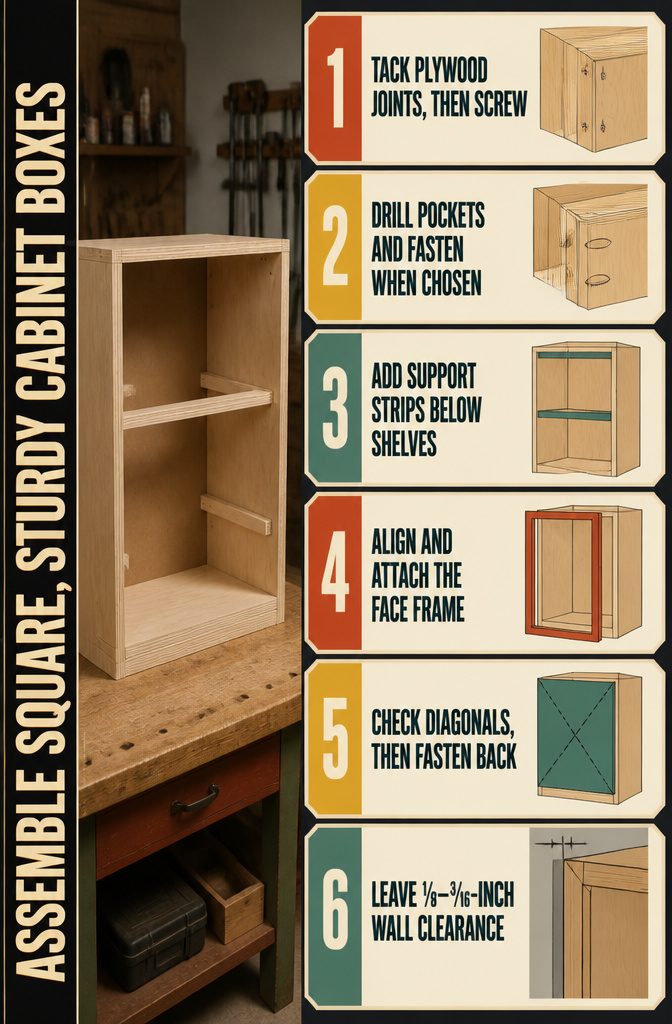
- Tack plywood parts together with a brad nailer, then drive 2-in. trim-head screws through the same joints to strengthen the connections. Both leave small holes you can fill quickly later.
- If you’re using pocket holes instead, drill 3/4-in. pockets and fasten with 1 1/4-in. screws. Either method holds the box square while you work.
- Cut and attach plywood support strips inside the cabinet wherever a shelf will sit. I fasten one directly below the top and one below any fixed middle shelves.
- Line up the face frame with the front edges of the box, then secure it with brad nails and glue. Check that all edges sit flush before the glue sets.
- Cut a piece of 1/4-in. plywood for the back panel. Before you fasten it, measure corner to corner on the back opening — equal diagonals mean the box is square. Adjust if needed, then nail or screw the back panel in place.
- For cabinets going into a niche, leave 1/8 in. to 3/16 in. clearance between the face frame and the wall so the frame doesn’t bind during installation.
7. Install and Secure the Cabinets to the Wall
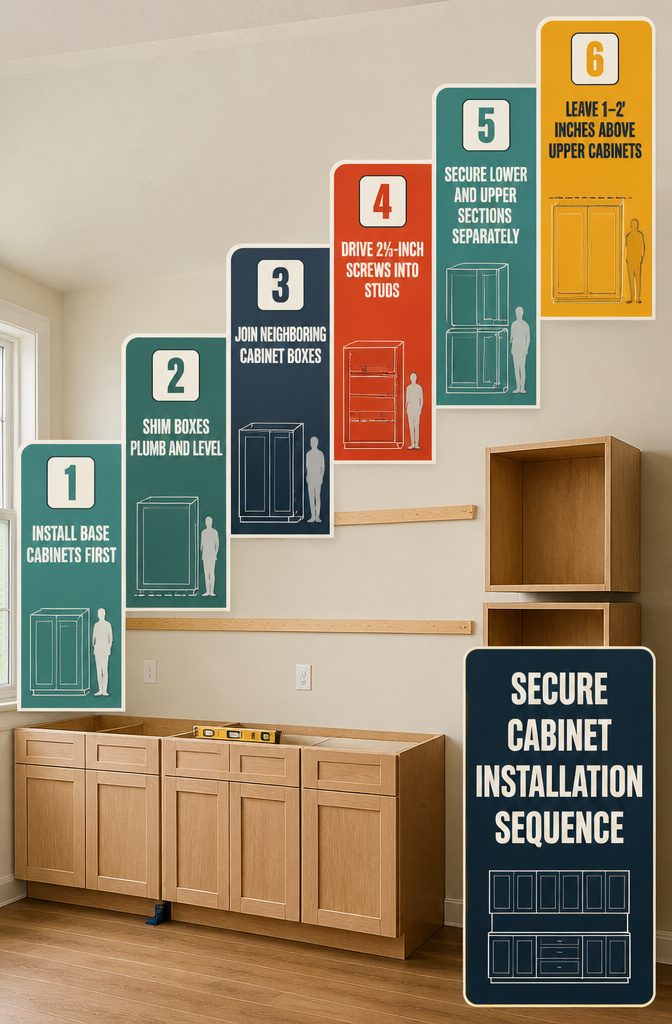
- Start at the bottom. Install base cabinets or the lowest components first, before any upper units go up. This gives you a stable reference for leveling and keeps the whole run anchored.
- Shim the boxes plumb and level. Concrete and wood subfloors are rarely flat. Slide shims under the cabinet base until a level reads true front-to-back and side-to-side, then mark stud locations with a finder.
- Join adjacent boxes. Screw cabinets together through their side panels before fastening anything to the wall. This locks alignment and keeps the run straight.
- Fasten through supports into studs. Drive 2 ½-inch screws through the top and middle support strips at the back of each box, straight into wall studs. Cabinets can hold hundreds of pounds of dishes or get climbed by kids, so hitting solid framing matters.
- Build floor-to-ceiling units in two pieces. A single tall box is too heavy to move and too awkward to install alone. Stack the upper section on the lower after both are secured.
- Leave 1 inch to 2 inches above upper cabinets. Ceilings are almost never flat. The gap disappears under crown molding or trim.
8. Fit Shelves, Drawers, Doors, and Hardware
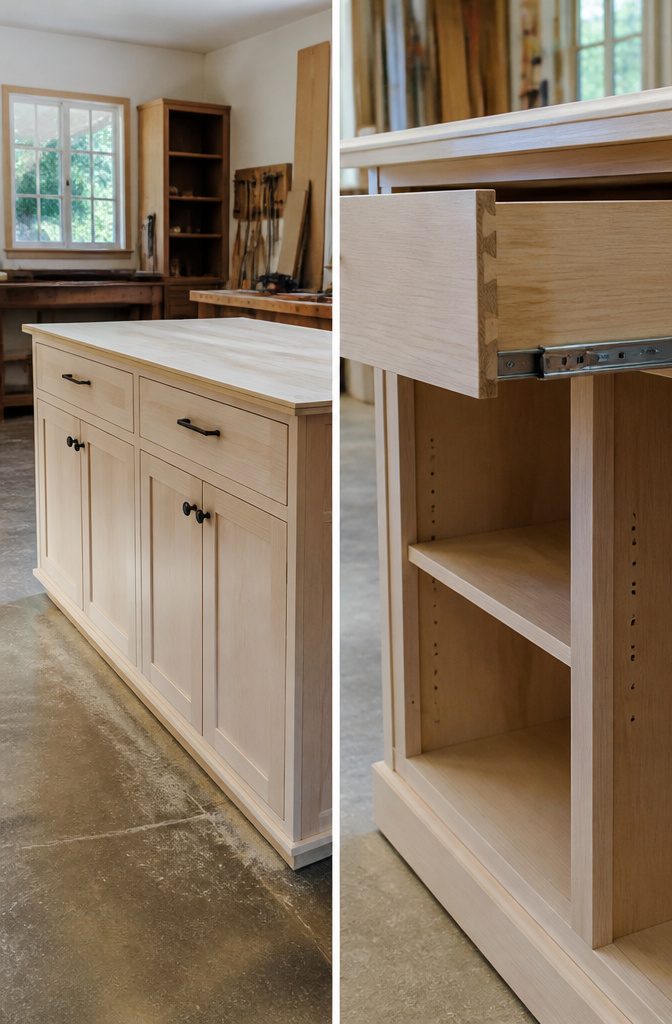
Shelf-pin holes are easiest to drill with a jig, which keeps the spacing consistent and the rows straight.
I use a drilling guide that positions each hole at the same depth, so shelves sit level even when the cabinet is loaded.
For inset doors, I start by trimming 1/16 in. off the top, then work the sides in increments as small as 1/32 in. until the margins are even.
When I cut the closing edge, I set the saw to a 3° bevel so the door can swing shut without binding.
Non-mortise hinges save time on face-frame cabinets because they don’t require routing, and I pair them with magnet catches to hold doors closed.
Full-overlay doors on frameless cabinets use concealed hinges, and for large pantry doors I install three hinges instead of two, placing the middle one slightly off center to avoid shelf placement.
Drawer slides come in 22 in. and 16 in. lengths in most projects. I build drawer boxes with 3/8-in. plywood bottoms and make tongue-and-groove doors with 1/4-in. floating plywood panels, which allow seasonal movement without cracking the joint.
9. Sand, Prime, Paint or Finish, and Add Final Pieces
Sand everything with 120-grit paper first, then 180-grit to leave a smooth surface.
Flat cabinet sides and shelves go faster with a random-orbit sander; corners and tight spots need hand-sanding or a block. A coat of water-based primer goes on before installation.
I prefer Kilz 2, though KILZ 3 works just as well if that’s what the paint counter has in stock. The primer evens out raw plywood and gives the topcoat something to grip.
Paint the cabinet interiors before you hang the boxes. I’ve used SW Dorian Grey with Captivate in Satin on several jobs, and two coats over primer covers well on PureBond plywood.
For a natural finish, Minwax Helmsman or a water-based lacquer like Target Coatings EM6000 lets the grain show without the amber cast older polyurethanes leave behind. Early American Minwax stain adds warmth to maple or oak without going too dark.
Toe-kick boards hide the gap under base cabinets. Cut 3½-inch plywood strips to length and nail them along the front, or screw them if you’re working without a nailer.
Trim pieces cover gaps where cabinets meet the floor or ceiling, and countertops go on last once everything is level and caulked tight.
Face-Frame or Frameless: Which to Build
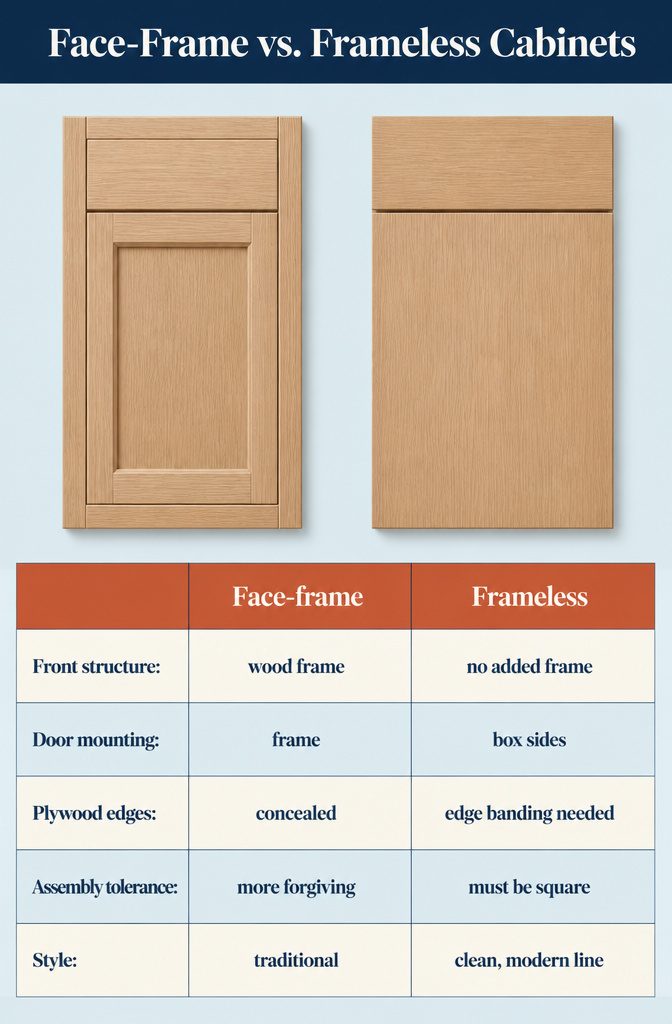
The choice between face-frame and frameless construction decides how your cabinet looks, how it opens, and how much work goes into squaring it up. A face frame is a rectangle of solid wood attached to the front of the box.
It adds stiffness, hides the plywood edges, and gives you a forgiving surface to mount doors and hinges against. Frameless cabinets skip that step entirely.
The doors mount straight to the box sides, which means fewer parts and a cleaner, more modern line. The catch: without a frame to absorb minor errors, every joint has to land square or the doors won’t sit right.
Frameless boxes also leave raw plywood edges exposed at the front, so you’ll need to apply edge banding or accept the unfinished look.
I lean toward frameless when the design calls for full-overlay doors and a simpler build sequence, but face frames win when you need traditional styling or want extra forgiveness during assembly.
Dealing With Uneven Walls and Floors
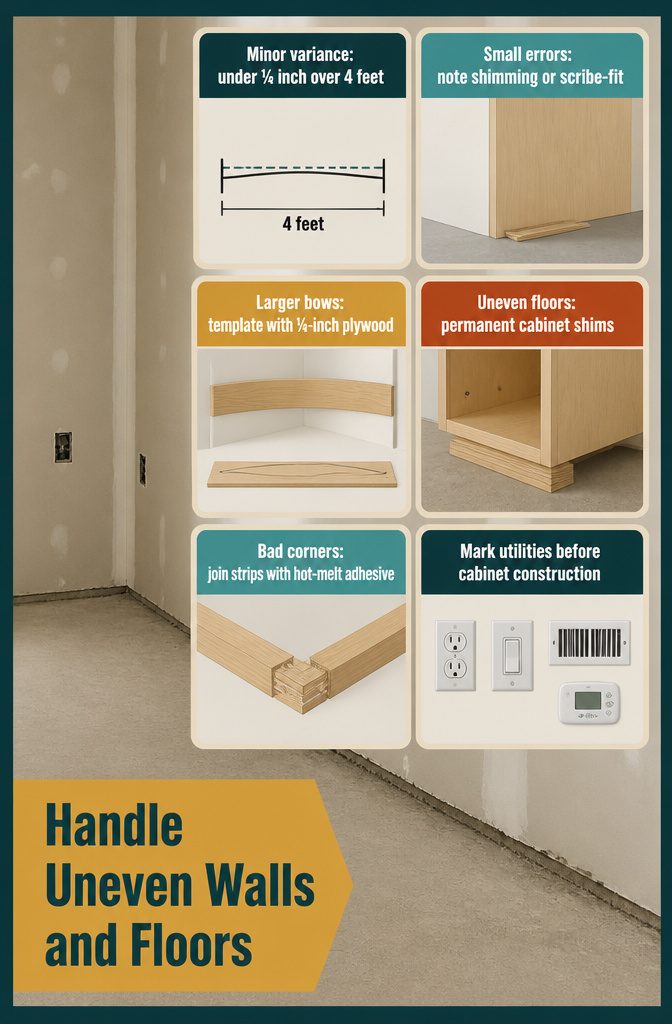
Before I start installing, I check the wall and floor for variances. Small irregularities under ¼ inch over a 4-foot span get noted on my drawings so I know where shimming or scribe-fitting will be needed.
Larger bows or out-of-square corners call for templating: I cut strips of ¼-inch plywood, hold them against the problem area, mark the scribe line, shape the strip with a block plane, and transfer that profile back at the shop.
Hot-melt adhesive lets me glue strips together when a corner is badly out of square.
Floors are rarely level, especially concrete. I shim base cabinets up until they sit level and square, then fasten through the back into wall studs.
The shims stay in place permanently. I also mark the location of outlets, switches, HVAC registers, and thermostats before I build anything.
In some cases I’ve extended a register into the cabinet baseboard or relocated a receptacle; other times an electrician or HVAC tech has to move things out of the way.
Keeping Cost and Build Time Down
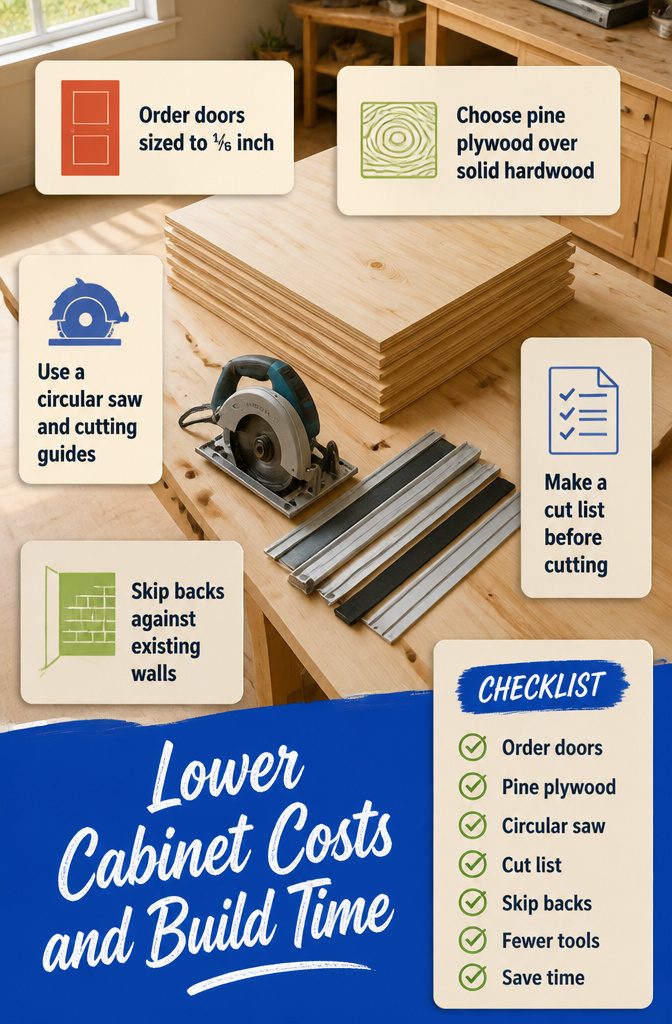
I simplify where I can, because every unnecessary part adds hours and asks for more tooling. A few decisions make most of the difference:
- Order cabinet doors sized to 1/16 in. rather than building them yourself — it cuts labor and you skip milling, routing, and sanding that would otherwise take days.
- Choose pine plywood over solid hardwood for both boxes and doors. Pine ply costs less, arrives smooth, and needs no planing. You cut, assemble, and finish without milling anything down. That also means fewer tools: a circular saw and cutting guides handle the job, no planer or big table saw required.
- Build a cut list before you start cutting material. Calculating sizes once keeps the project moving and prevents repetitive measuring mistakes.
- Skip back panels on cabinets that sit against existing walls — the wall itself does the job and you save material.
Frequently Asked Questions
What is the difference between face-frame and frameless cabinets?
Face-frame cabinets have a solid wood rectangle attached to the front of the box that adds stiffness and hides plywood edges.
Frameless cabinets skip that step entirely, with doors mounting directly to the box sides for a cleaner, more modern look. Frameless builds are simpler but require more precision since there’s no frame to hide minor errors.
How do I build cabinets?
Measure and plan the space first, noting any irregularities larger than 1/4 inch over 4 feet. Cut plywood parts to size, assemble the boxes with screws or pocket holes, then attach face frames or edge banding.
Install by shimming level, fastening to wall studs with 2 1/2-inch screws, then fit shelves, doors, and hardware before sanding and finishing.
Is building cabinets cheaper than buying?
Building cabinets yourself saves on labor costs but requires tools and time.
Pine plywood runs less than hardwood and arrives flat with no milling needed, so you skip the planer and jointer. Ordering pre-sized doors instead of building them cuts days of work and eliminates routing and sanding steps.