A cabinet-based kitchen island costs $1,200–$3,000 in materials and takes one to two weekends to build, but that assumes you measured clearance before you bought anything.
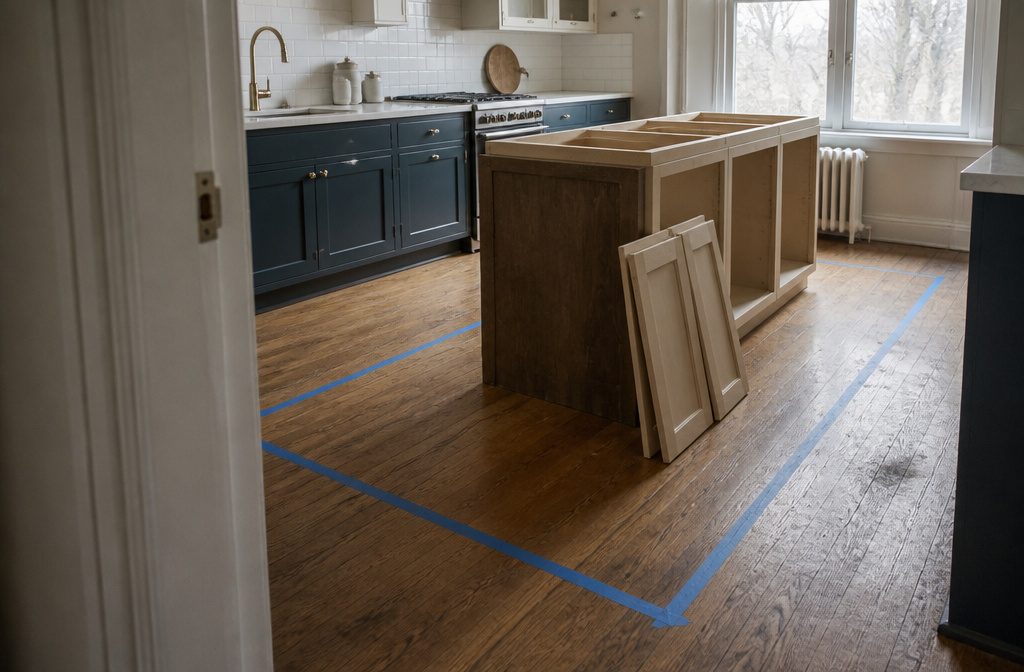
Most builders skip the floor tape step and find out the island blocks traffic only after the cabinets are fastened together.
The fix means either living with 36 inches of clearance instead of the 42–48 you need, or tearing down what you built and starting over with a smaller footprint.
1. Plan the Island and Choose a Build Method
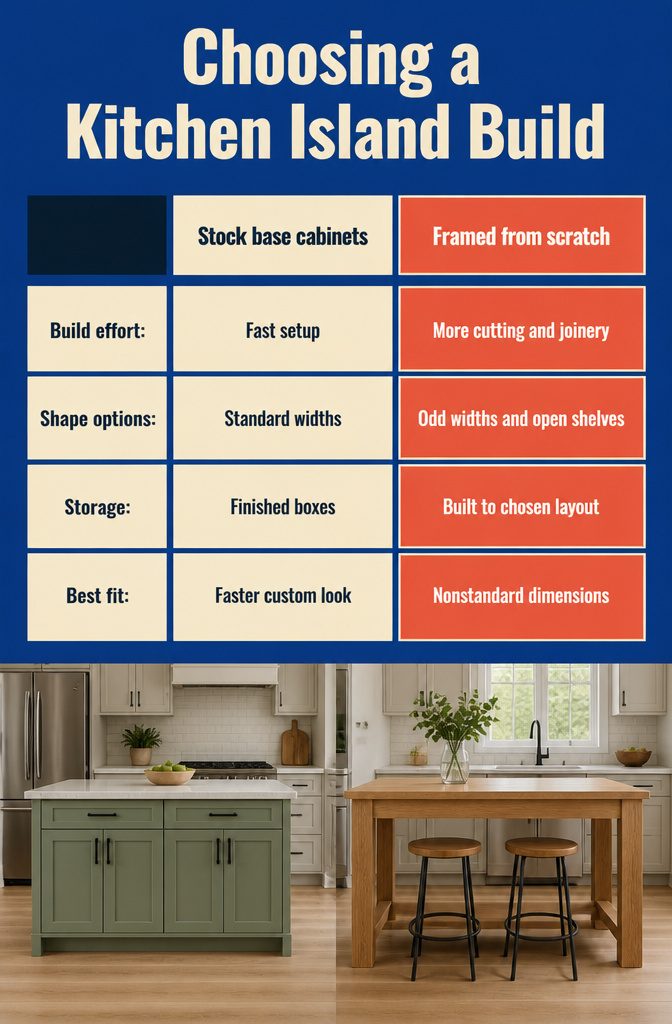
The base-cabinet route is the fastest path to working storage. You buy square boxes with hardware already mounted, set them in place, and skip the part where you measure, cut, and assemble every drawer slide yourself.
Stock cabinets with finished end panels balance speed and a custom look without hiring a millworker, and that’s the method I’d point most capable homeowners toward when they want something better than flat-pack but aren’t ready to frame from scratch.
A fully framed island gives you freedom for odd widths, open shelving, furniture legs, and shapes that standard cabinets can’t solve cleanly. It also asks more of you, because every seam and finished dimension is yours to get right.
A freestanding table-style island built from dimensional lumber needs minimal tools and works well in kitchens where you want barstool seating or a piece that reads more like furniture than cabinetry.
Red oak is common for this approach, with 4×4 legs, 1×6 aprons, and a solid top.
The upcycled dresser island is an option when you already own a sturdy piece and your kitchen layout can take something asymmetrical.
It skips the cabinet-buying step, but you’re trading speed for the work of reinforcing the frame, adding a countertop that overhangs enough to be useful, and making sure the height matches your other surfaces.
2. Measure and Tape the Footprint on the Floor
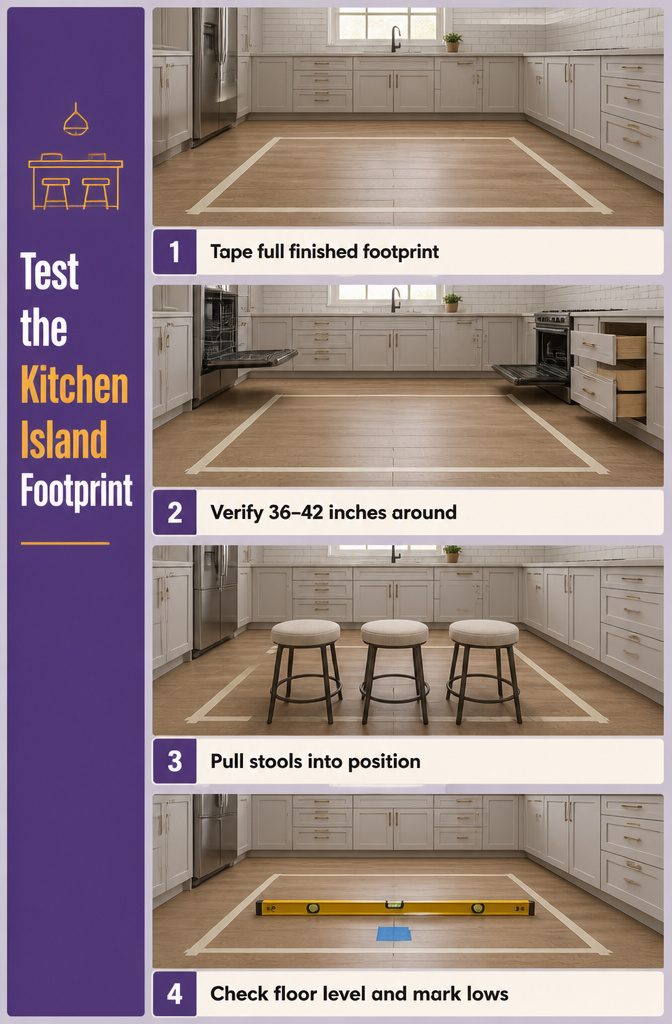
- Tape the finished island footprint on the floor using the full dimensions: cabinet widths, panel thickness, any filler strips, and countertop overhang. Do not just mark cabinet box sizes. The taped outline shows you immediately whether the island is too large before you spend money or start building.
- Measure and verify 36–42 inches of clearance around all sides of the taped footprint. Some kitchens work better with 42–48 inches, especially if multiple people cook at once. Walk the space. Open the dishwasher, swing the oven door, and pull out drawers on adjacent cabinets to confirm nothing blocks traffic or collides mid-operation.
- Test stool placement if you plan seating. Set chairs or stools where they would sit and check whether they block walkways when pulled out.
- Check the floor for level across the taped area. Even a small drop shows up later as twisted cabinet faces and a countertop that will not sit flat. Mark any low spots now so you can shim the base during assembly.
3. Build or Prepare the Base Structure
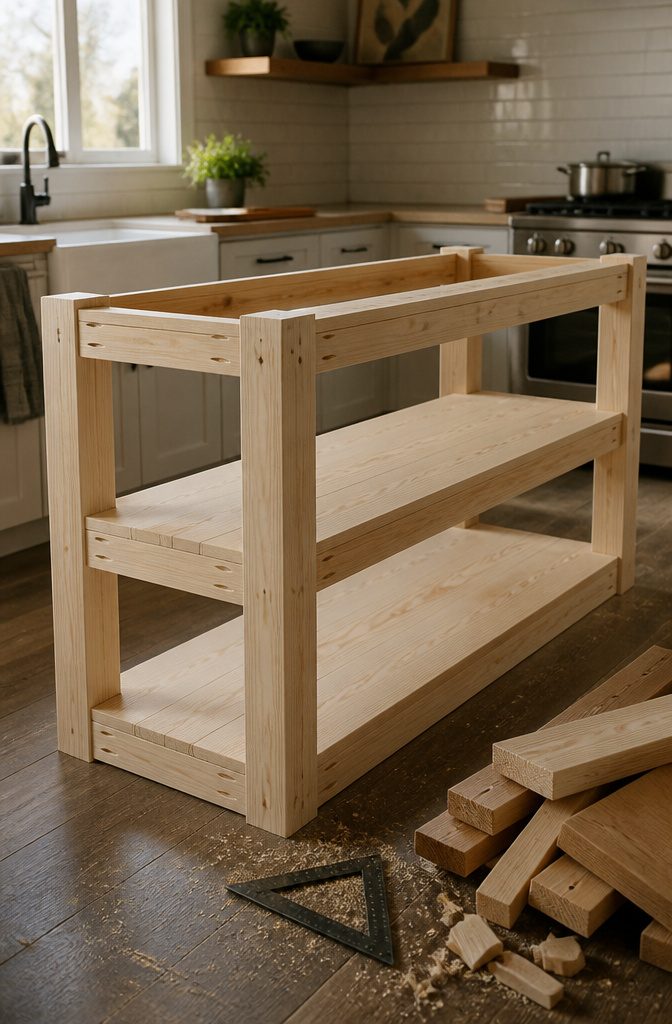
The base you build depends on the build type you chose in the previous step.
A frame from scratch starts with four 2-by-4s cut to 35 inches for the legs, then six 1-by-8s at 46 inches that trim down on the table saw to form two shelves—four boards at 6¾ inches wide, two at 6¼ inches wide, so three pieces glued together make a 19¾-inch shelf.
Pocket holes join them, and 1-by-3 side rails attach to the legs at 3½ inches from the ground for the lower shelf and 16½ inches up for the upper one.
The cabinet route is faster.
Line up your base cabinets with shims under any that sit uneven, clamp them near the top and bottom, drill 1/8-inch pilot holes beside each hinge location, then fasten through the face frames with #8 x 2½-inch screws.
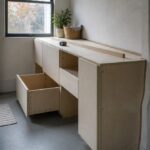
Never screw through the side panels—they split under weight. A plywood build breaks the sheets down first with a panel saw or track saw, then cuts everything to final size on the table saw before assembly.
A furniture-leg island cuts 42-inch red oak legs and notches them 1½ inches deep, 6 inches from the bottom to accept stretchers.
Set the miter saw stop at 1½ inches, add a spacer to the fence, and make repeated passes until the notch is clear, then clean up high spots with a chisel. Glue the stretchers into place once the notches fit square.
4. Assemble the Frame, Face, and Storage Features
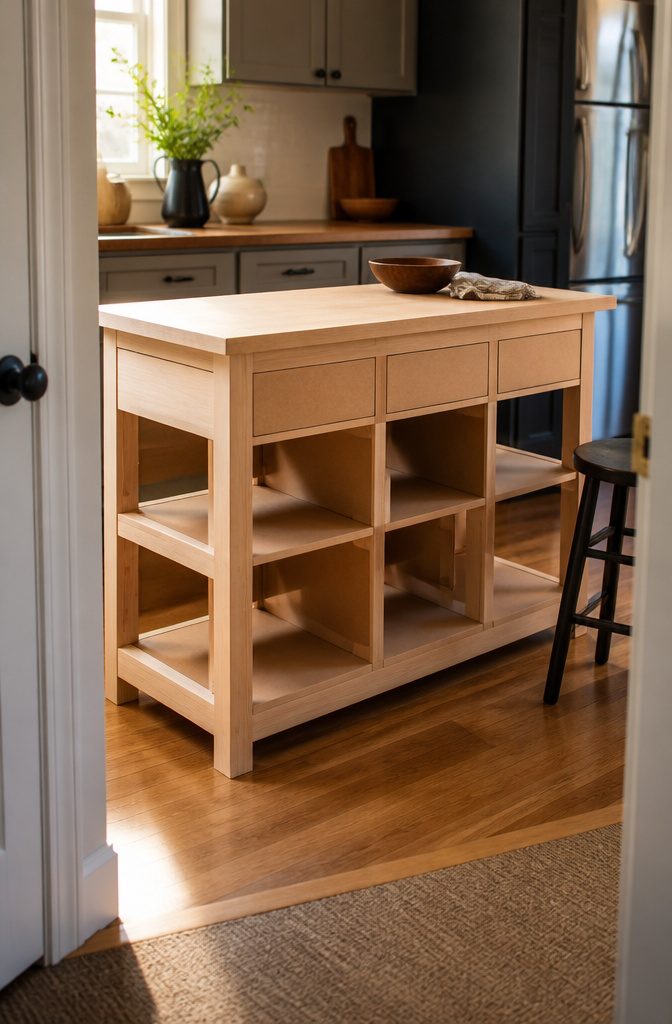
I start by attaching the short and long rails to the legs.
The first rail sits 3½ inches off the ground, the second at 16½ inches. Both measurements lock in the height of any shelves or stretchers that follow.
Side rails connect the structure, and shelves drop into place once the frame holds square. If the design calls for a face frame, I use poplar for the stiles and rails, then attach trim before moving to the drawer assembly.
Drawer boxes need 22-inch full-extension glides if the island will hold pots or mixing bowls, anything heavier than utensils.
I build false fronts from ¾-inch poplar and ½-inch MDF, cutting ¼-inch tongue-and-groove joints to keep the edges flush. The drawer fronts install after the boxes are fitted and tested.
Apron boards at 4¾ inches attach with 1¼-inch pocket screws, legs with 2-inch screws. Stretchers follow last.
If the island uses cabinet boxes instead of open framing, I set and fasten those before fitting any storage hardware. That order keeps the drawers aligned and prevents having to shim or rework the glides later.
5. Anchor the Island or Add Casters for Mobility
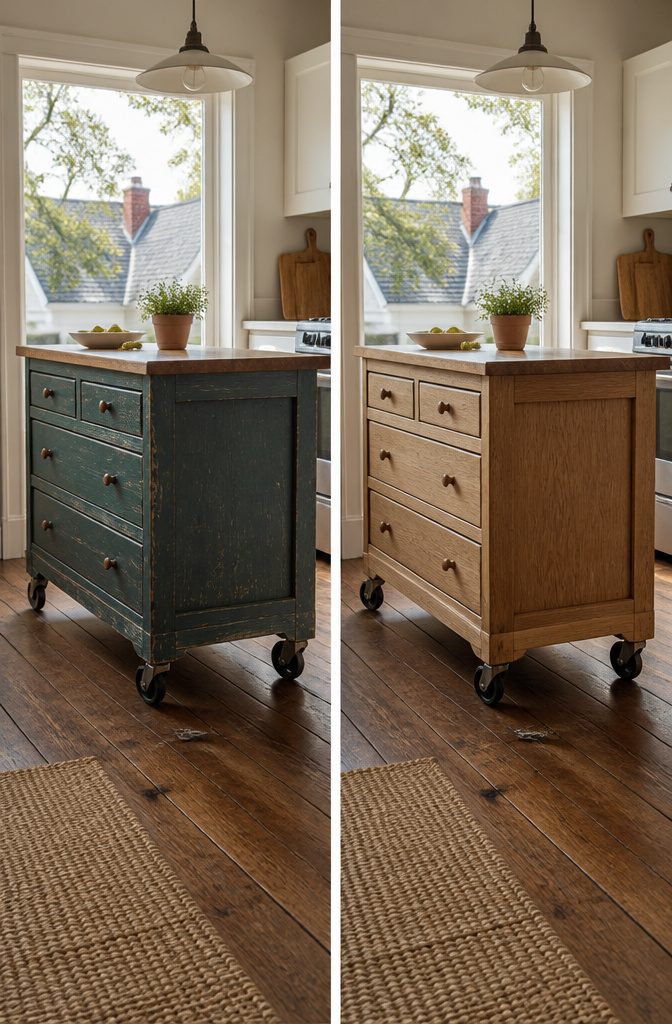
Once the cabinets are connected, you face a choice between anchoring the island permanently or fitting it with wheels so it can roll out of the way.
Fixed islands get fastened to the floor with two 8-inch two-by-fours serving as mounting blocks.
You mark lines along the front and back toe-kicks, place the mounting blocks just behind those lines, and screw them down through hardwood subfloor or into concrete using a hammer drill and anchors.
The island then sits over the blocks, and screws through the toe-kick hold it in place.
For a dresser build or any island you want to move, locking rubber casters give you mobility without sliding or scratching.
If the dresser has legs, stem-mount casters thread into them. If the bottom is flat or the legs are weak, you saw them off and bolt on plate-mount casters instead.
The wheels let you reconfigure the kitchen when you need the floor clear, which matters more in a small space than in a wide-open layout.
6. Fit and Attach the Countertop
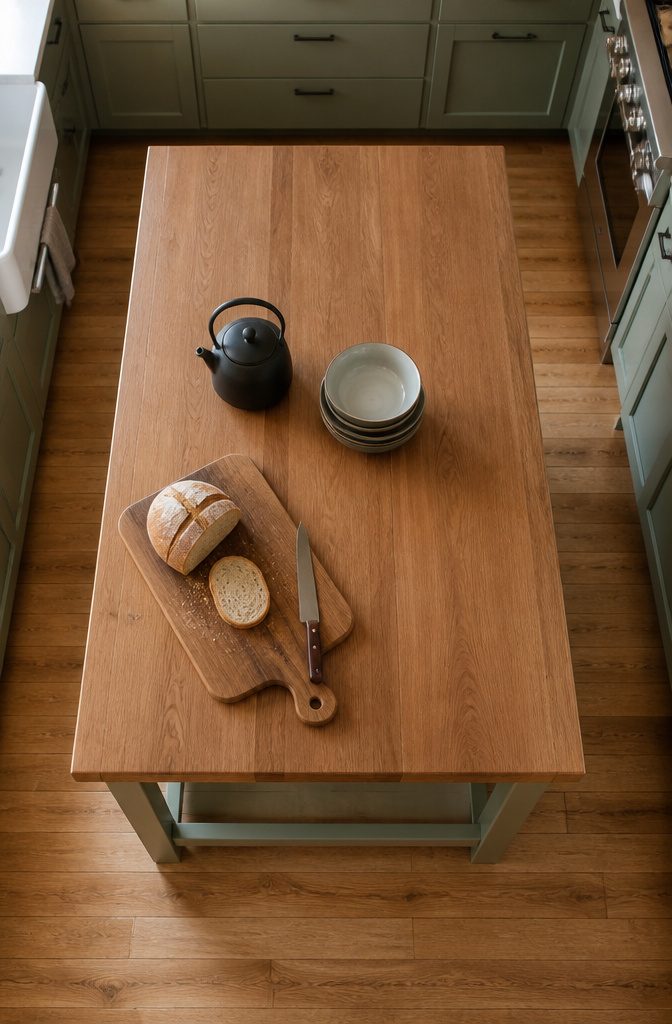
Position the top so the overhang measures no more than 10 inches without adding brackets or corbels beneath it.
A 20 mm thick countertop supports up to 10 inches unsupported; a 30 mm top supports up to 12 inches. Past that, the cantilever sags over time or cracks under weight, and the fix is visible metal support or a redesign.
I set mine 1 inch back from the cabinet faces on all sides, which leaves room for the doors to clear and keeps the proportions tight.
Pre-drill three clearance holes along each stretcher with a 3/16-inch bit. The oversized hole lets the screw shift as the wood moves with humidity, so the top stays flat through the seasons.
Center the countertop on the base, check the overhang on all four sides, then drive 2-inch pocket screws up through the stretchers into the underside of the top.
If you glued up your own panels, wait the full 72 hours after the final topcoat before you attach anything—early fastening can leave witness marks where the finish had not cured hard.
7. Finish and Add Final Details
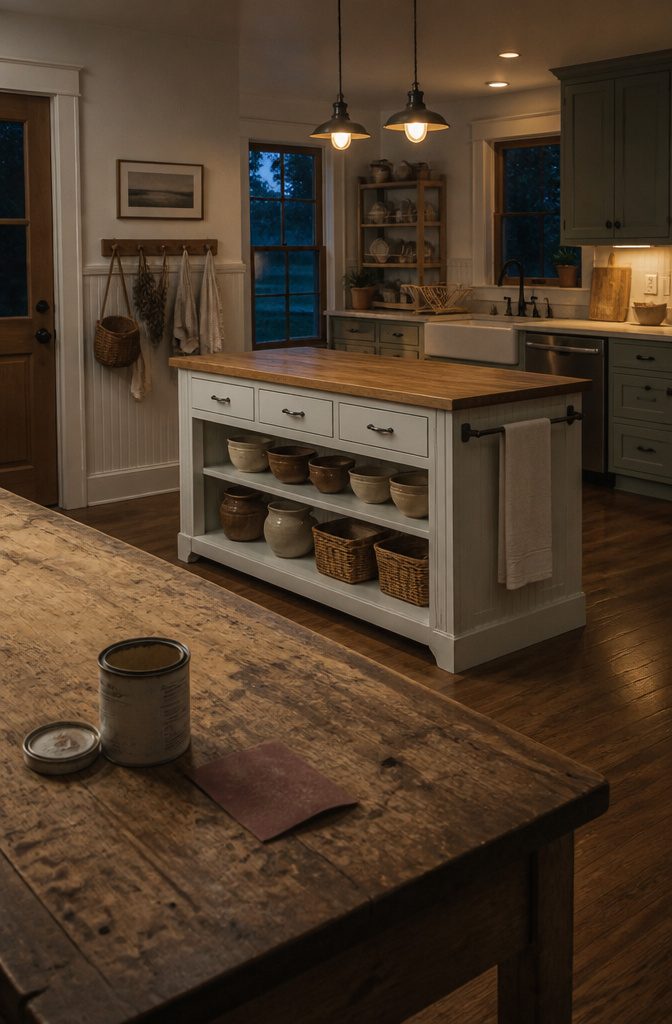
Once the frame and countertop are on, seal any MDF surfaces with two light coats of shellac, then sand the edges smooth with 220-grit paper.
I find it easier to prime before paint rather than trying to fix a patchy finish later.
Apply one to two coats of primer across all painted surfaces, let each coat dry fully, then follow with two to three coats of your chosen paint.
Satin latex paint resists cooking stains better than flat finishes and holds up to scrubbing. After the paint cures, add two coats of a satin topcoat for durable protection.
For wooden countertops, a single coat of stain followed by polyurethane works well, though Danish oil stains and protects in one step if you want to skip a layer.
Fill any nail holes before you sand, and if your design includes kickboards, beadboard panels, or corbels for overhang support, attach those before the final finish goes on. Hardware pulls go on last.
Materials and Construction Choices by Build Type
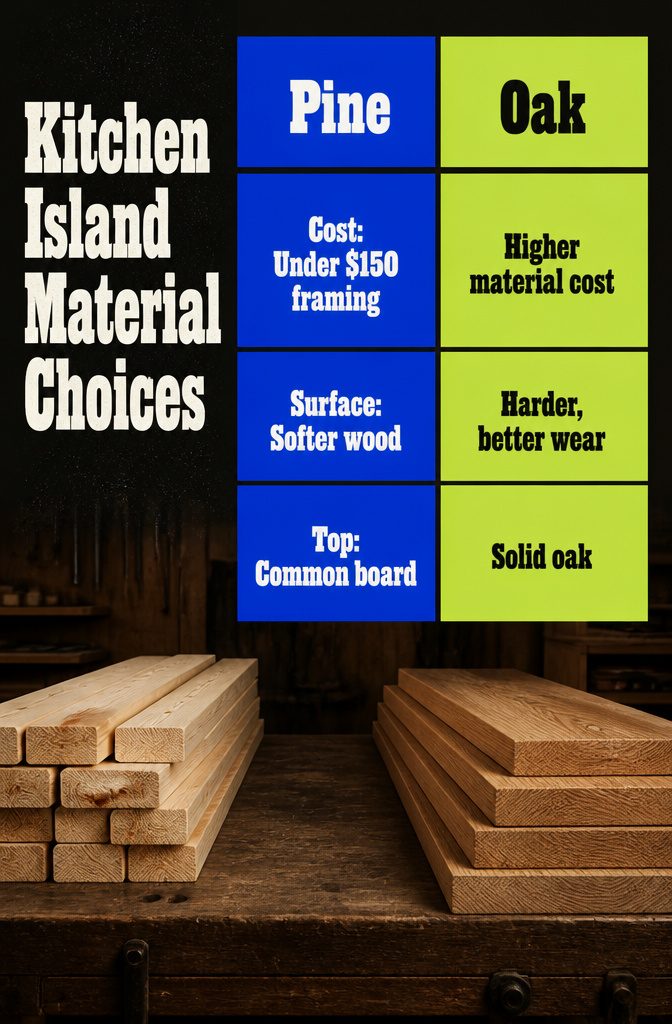
Pine carries the build if you are working fast on a tight budget—under $150 for framing lumber in a basic design.
Passage 3 lists four 2×4×8-foot, three 1×4×8-foot, two 1×3×8-foot, two 1×6×8-foot pine boards, plus one 1×24×48-inch common board. Oak raises the cost but gives you a harder surface and better wear.
Passage 1 specifies red oak and solid oak across aprons, legs, and top. Passage 4 names ¾-inch and ¼-inch plywood, ¾-inch and ½-inch MDF, and poplar for face frames.
| Build type | Frame material | Typical top | Cost range | Movable |
|---|---|---|---|---|
| Cabinet-based | Stock base cabinets, 2× platform lumber | Lumber, butcher block, or stone | Mid to high | Optional casters |
| Dresser conversion | Existing dresser, added support | Plywood, MDF, or thin hardwood | Low | n/a |
| Framed from scratch | Pine or oak dimensional lumber | Glued-up hardwood or common board | Low to mid | Yes with casters |
| Freestanding table-style | 4×4 legs, 1× or 2× aprons and stretchers | Solid hardwood or laminated panels | Mid | Rarely |
Cabinet builds give you finished storage out of the gate but lock you into cabinet widths. Framed builds let you hit any dimension but require more cutting and joinery.
Storage and Functional Features to Plan For
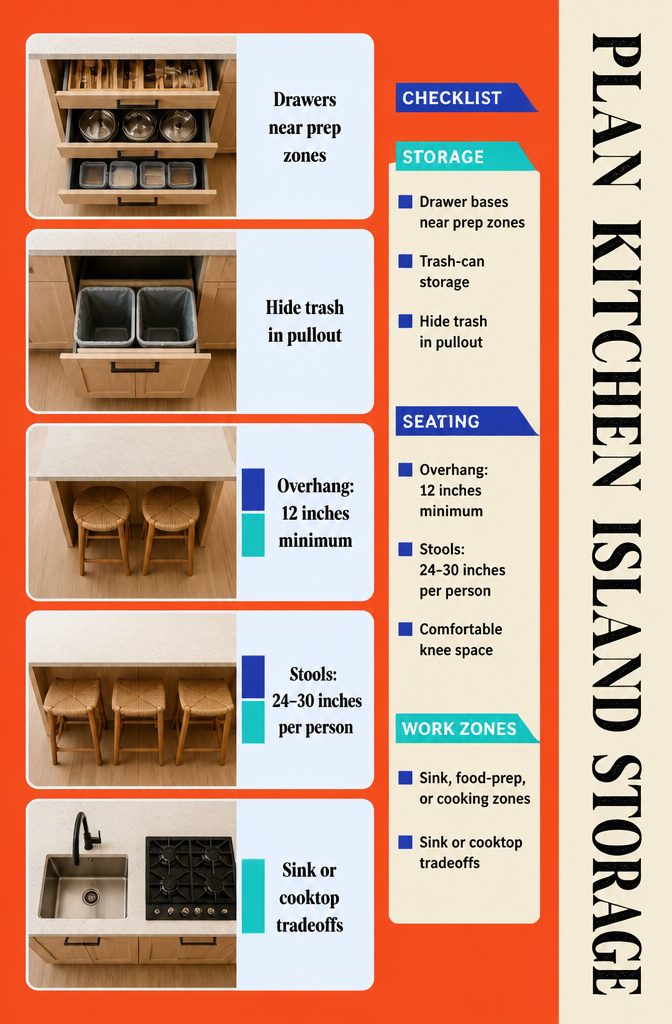
Storage and Functional Features to Plan For
The best storage is laid out by zone before you start building. A short lead-in, then what to plan for:
- Drawer bases near prep zones hold pots, utensils, and food storage more efficiently than fixed shelves. A small island might only fit deep drawers on one side. A medium island can add a trash pullout and open back shelving.
- Trash-can storage works best near cleanup or prep areas. Build it in with a pullout cabinet so the floor stays clear and the can stays hidden.
- Seating overhangs need 12 inches minimum, with 15 inches more comfortable for knees. Plan 24–30 inches of width per person for stools. Tight spacing works for short sits; wider spacing is better if the family eats there daily.
- Sink, food-prep, or cooking zones turn the island into a working surface, but each brings tradeoffs. A sink puts unwashed dishes on display. A cooktop creates a social cooking setup but means hot pans near guests, so a deeper island is safer.
Island Dimensions and Clearances That Work
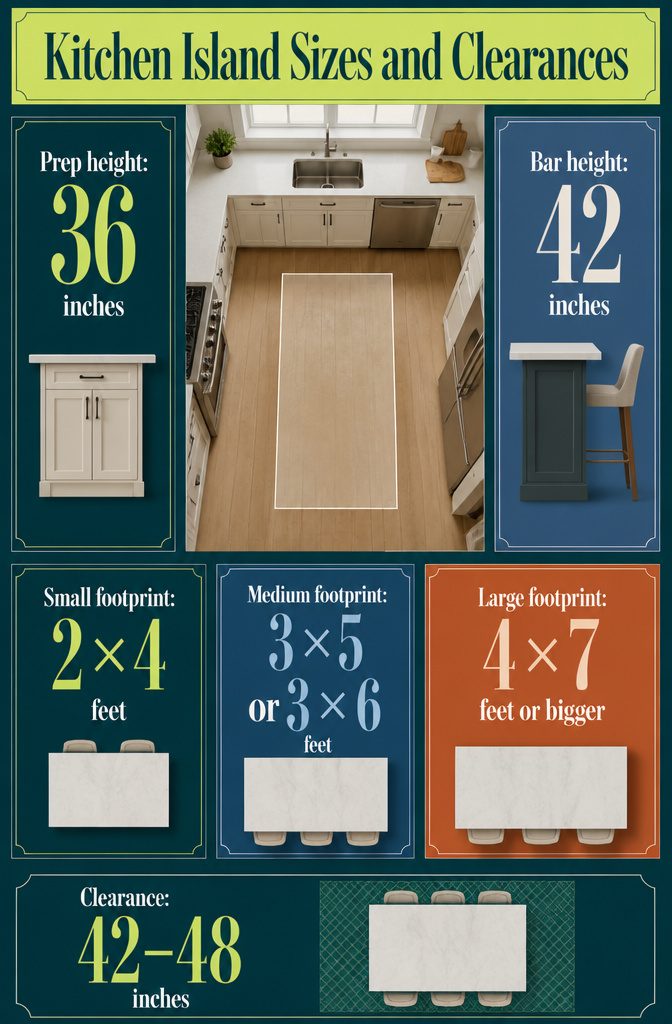
Most built-in islands use 36 inches for height because that matches standard base cabinets and works best for prep.
Bar-height islands at 42 inches suit seating, and table-height islands at 30 inches feel more casual but rarely make sense for a working kitchen. I stick with counter height unless the island is purely for eating.
Base cabinets run about 24 inches deep before you add panels or overhang.
A small island footprint often starts around 2 by 4 feet, a medium island around 3 by 5 or 3 by 6 feet, and a large island 4 by 7 feet or bigger. The maximum size depends on clearance, not ambition.
You need at least 42 to 48 inches of space around the island for traffic and appliance swings. Less than that stops feeling comfortable fast, especially in a busy kitchen.
If the island gets so deep that the middle becomes dead space, it is oversized for the room. Walk around it without turning sideways, and the size is probably right.
Countertop Materials for DIY Installation
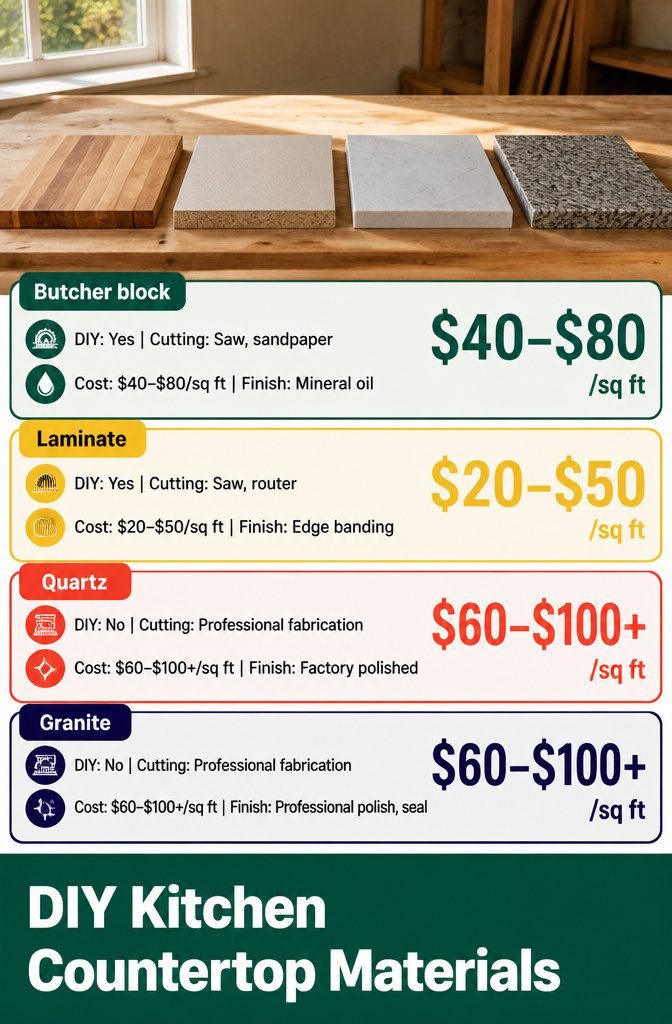
Butcher block is the easiest countertop material to cut and install yourself, which matters when you are building rather than paying someone else to do it.
You can score it with a circular saw, finish the edges with sandpaper, and seal it with mineral oil in an afternoon.
Laminate is nearly as forgiving: you cut it to size, glue it down, and trim the overhang with a router. Both materials let you skip the fabricator.
Quartz and granite need professional cutting and polishing.
Granite runs $60–$100 per square foot before installation, and you will pay extra to have someone template, cut, and set it. Quartz costs about the same and carries the same demand for equipment you probably do not own.
I would use either one if the island is permanent and the budget allows it, but not on a first build where mistakes are likely.
| Material | DIY-Friendly | Cutting Method | Finishing Required | Cost Range (per sq ft) |
|---|---|---|---|---|
| Butcher block | Yes | Circular saw, sandpaper | Seal with mineral oil | $40–$80 |
| Laminate | Yes | Circular saw, router | Edge banding, adhesive | $20–$50 |
| Quartz | No | Professional fabrication | Factory polished | $60–$100+ |
| Granite | No | Professional fabrication | Professional polish, seal | $60–$100+ |
When to Call an Electrician or Plumber
When to Call an Electrician or Plumber
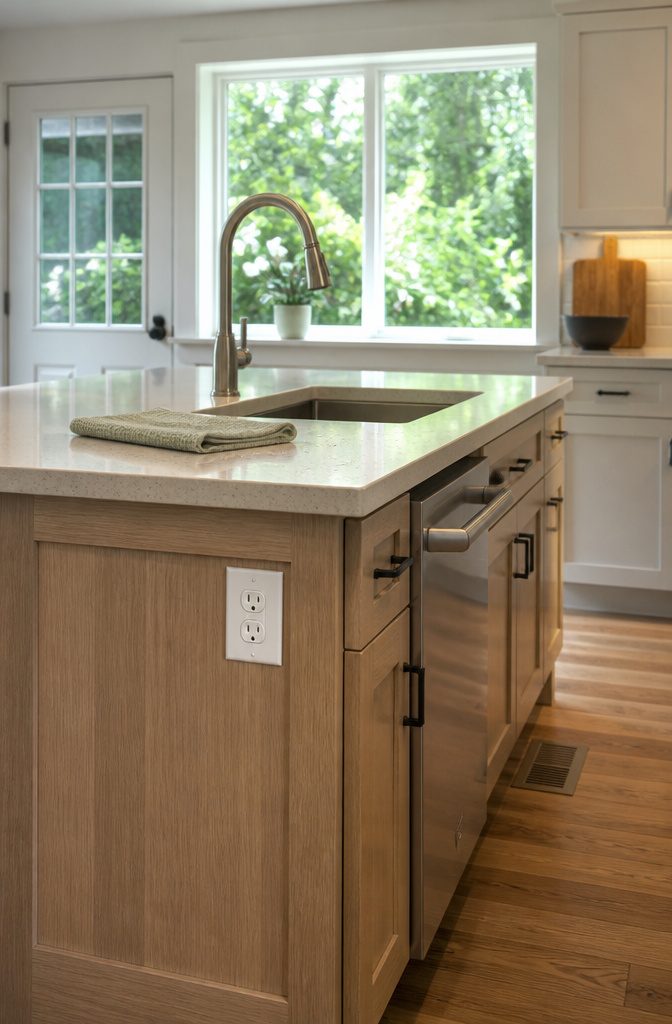
A permanent island bolted to the floor may require outlets under the National Electrical Code, and you’ll need an electrician if you don’t have experience running wire yourself.
Requirements vary by location and code cycle, so confirm what your municipality actually needs before you start roughing in power or plumbing. The claim that outlets are no longer allowed in kitchen islands is not a safe universal rule.
A sink island costs $3,500 to $9,000 or more once you account for plumbing, countertop cutouts, drain routing, and vent strategy.
A cooktop island runs $5,000 to $12,000 and up, because it needs a dedicated circuit or gas line, appliance clearances, ventilation design, and real thought about splatter and seating conflicts.
I would not treat either one as a casual weekend build. Licensed trades and permits are where DIY risk goes up fast, and current requirements depend on appliance specs, floor framing, and what’s already running under the kitchen.
Project Time and Cost by Island Type
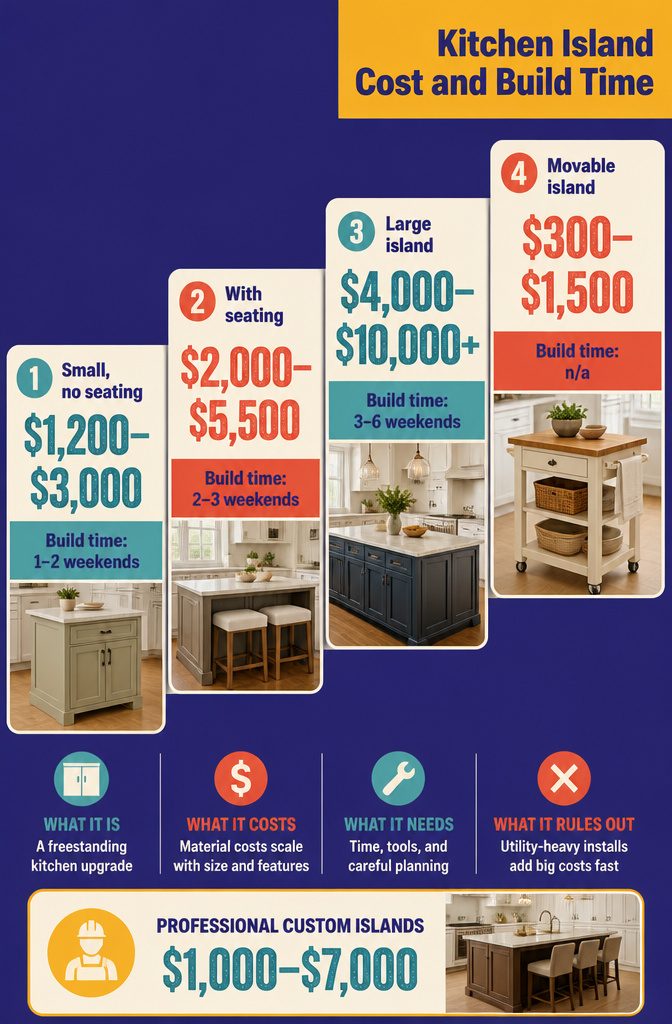
A basic cabinet island runs $1,200–$3,000 in materials and takes 1–2 weekends to build.
Add seating and the cost moves to $2,000–$5,500. A large island with more cabinets and a wider countertop sits at $4,000–$10,000 or above, and the build stretches to 3–6 weekends depending on size and whether utilities are involved.
| Island type | Material cost | Build time | What drives the price |
|---|---|---|---|
| Small, no seating | $1,200–$3,000 | 1–2 weekends | 1–2 base cabinets, basic top |
| With seating | $2,000–$5,500 | 2–3 weekends | Larger top, overhang support |
| Large island | $4,000–$10,000+ | 3–6 weekends | More cabinets, wider slab, finish work |
| Movable island | $300–$1,500 | n/a | Pre-assembled or simple assembly |
Professional custom islands run $1,000–$7,000, which makes DIY attractive until you add a sink, cooktop, or stone fabrication. Then utility rough-in, permits, and coordination costs stack fast.
Frequently Asked Questions
How do I build an inexpensive kitchen island?
Pine framing lumber keeps costs under $150 for a basic island built from scratch.
A dresser conversion costs even less if you already own a sturdy piece, though you’ll need to reinforce the frame and add a countertop. Both approaches skip the cabinet-buying step and work well when budget matters more than finished storage.
What size does a kitchen need to be for an island?
You need at least 42 to 48 inches of clearance around all sides of the island for traffic and appliance doors.
A small island starts around 2 by 4 feet, a medium island around 3 by 5 feet, and a large island 4 by 7 feet or bigger. If you can’t walk around it without turning sideways, the kitchen is too small for that footprint.
What type of wood is best for a kitchen island?
Pine works well for framing on a tight budget and cuts easily with basic tools.
Red oak costs more but holds up better to wear and works well for furniture-style islands with visible legs and aprons. Poplar is a good choice for face frames and drawer fronts that will be painted rather than stained.