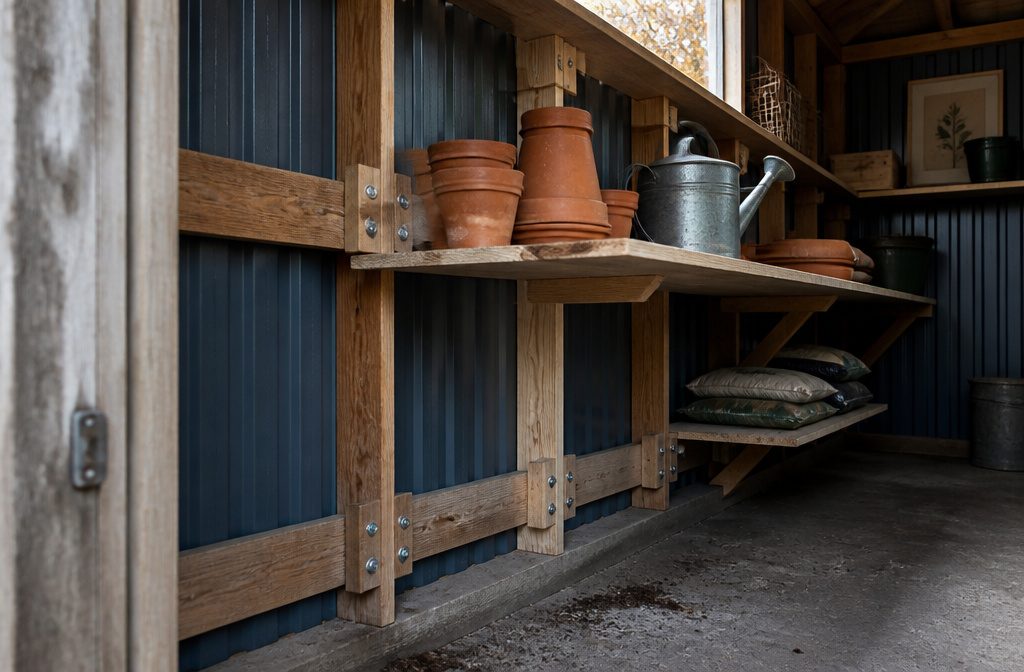
A full wall of shed shelves built with wall cleats costs $30–$80 in materials and holds together when you screw the back cleat into every stud along the span.
Most builds fail because people skip studs to save time, and the shelf sags or pulls loose under the first serious load.
The twofeetfirst method and the backyardoas cleat approach both call for hitting every stud with lag screws where the cleat meets the wall, and Young House Love warns that spans beyond 18 inches need thicker plywood or cross braces under the surface to keep deflection from doubling over months.
1. Plan the Layout and Choose a Shelf Type
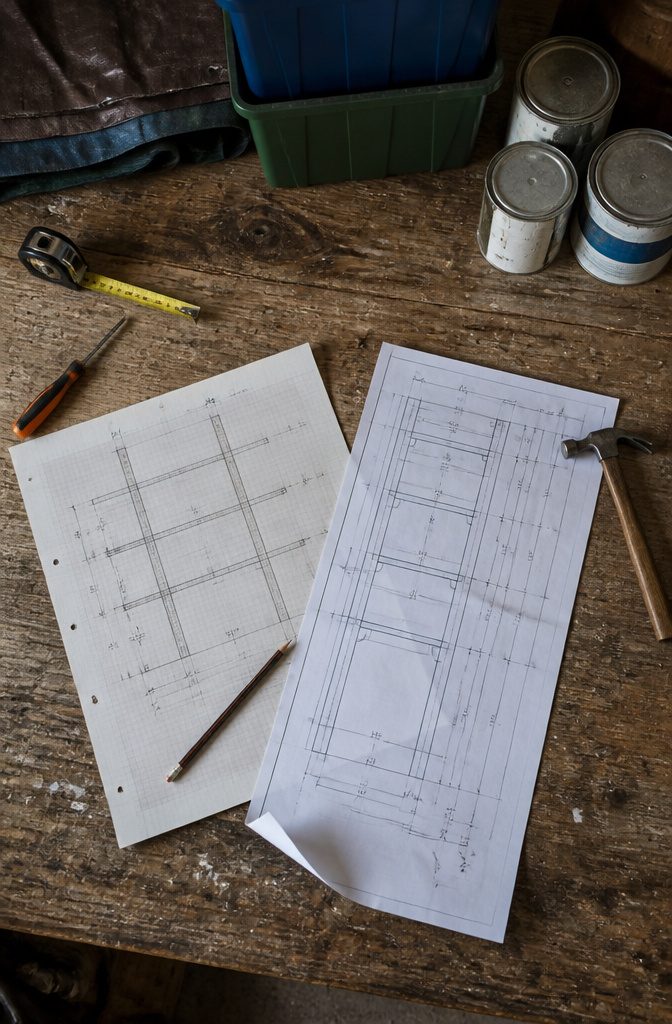
I start with what will go on the shelves, because that decides everything else. Totes stack differently than hand tools, and paint cans need more vertical room than folded tarps.
Once I know the items, I sketch a rough layout showing shelf height, width, number of levels, and the spacing between them. That rough sketch becomes a detailed blueprint with actual cut measurements before I buy anything.
The blueprint stage is where I decide on the build type.
Wall-mounted shelves using cleats give the best strength-to-cost ratio when the shed has accessible studs, usually running $30–$80 for a full wall. Freestanding 2×4 frames work when studs aren’t available or the shed is a rental.
If the storage is all uniform totes, I can build rails cut to the tote dimensions instead of flat shelves, which saves plywood and keeps bins from sliding.
Each approach changes the materials list and the measurements on the blueprint, so I settle the type before I measure twice.
2. Measure and Mark the Location
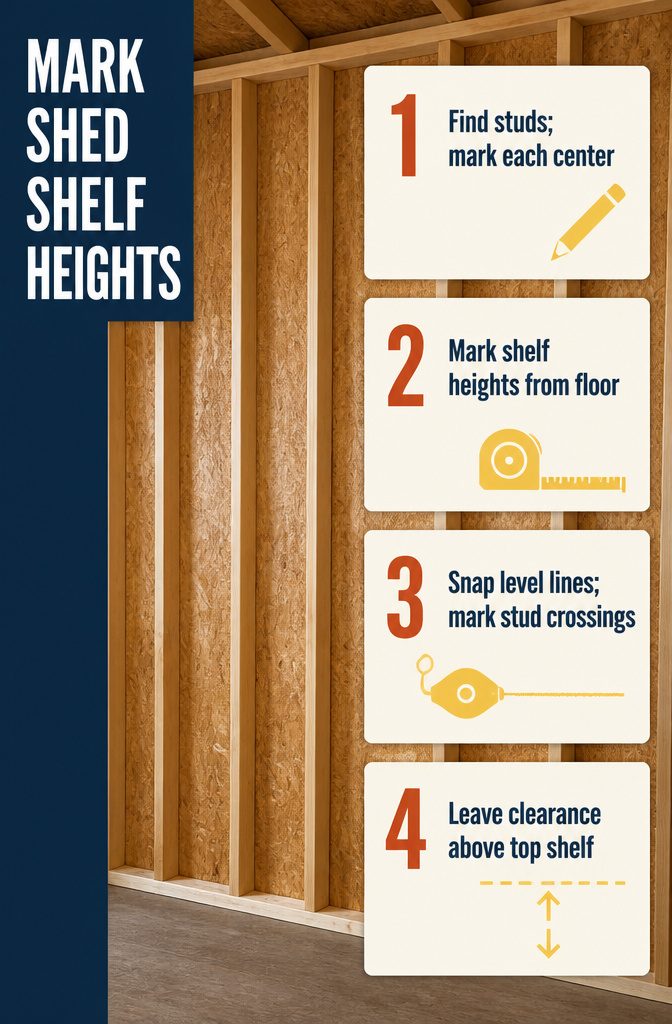
- Find and mark every stud using a stud finder. Mark the center of each one with a pencil — studs typically sit 16 or 24 inches on center.
- Measure up from the floor and mark your first shelf height on the wall. I use 24.5 inches for a mid-height shelf and 49.75 inches for a second shelf, but you can customize these to fit storage totes, paint cans, or whatever you’re storing. Make the bottom shelf taller than the rest — 30 inches or more — so you have room for large or heavy items you won’t want to lift.
- Snap a level chalk line at each shelf height, then mark where every stud crosses the line. This gives you a level reference and shows exactly where to drive screws.
- Leave clearance above your top shelf so you can slide items in from the front without the ceiling blocking them.
3. Cut and Install Wall Cleats or Back Boards
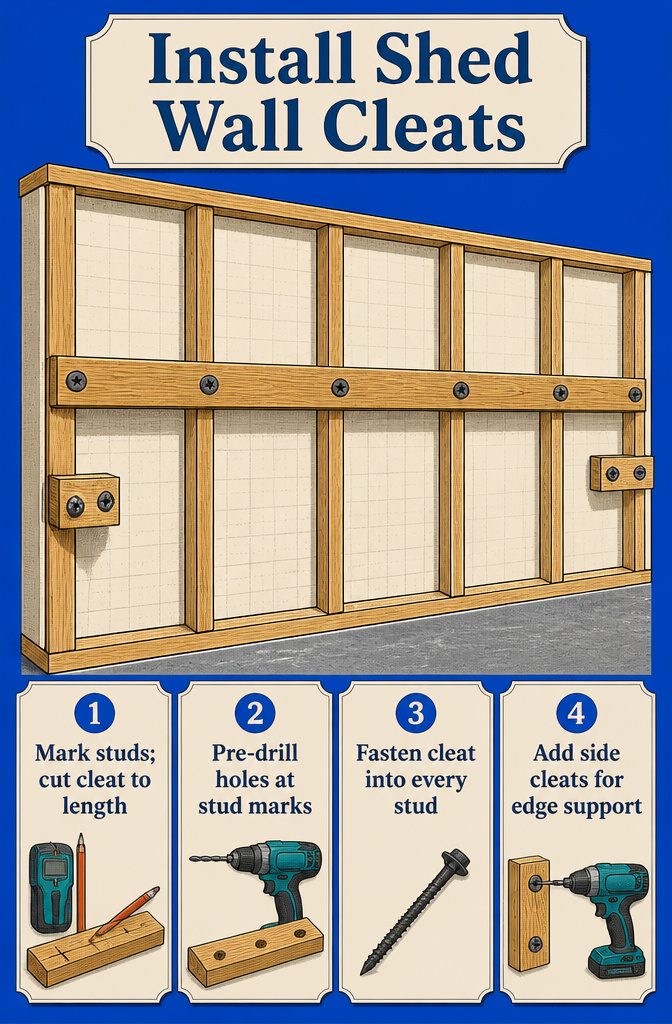
- Mark stud locations and cut the wall cleat to length. Use a stud finder to mark every stud along the wall where the shelf will sit. Standard spacing runs 16 or 24 inches on center. Measure the full shelf run, cut a 2×4 to that length with a miter saw, and mark where each stud intersects the board.
- Pre-drill screw holes in the cleat. Drilling pilot holes before driving screws keeps the 2×4 from splitting and makes fastening go faster. Space the holes to align with each stud mark.
- Fasten the back cleat into every stud. Drive 3.5-inch lag screws or structural screws through the cleat and into each stud along the shelf line. Hitting every stud matters: the back cleat carries the load, and skipping connections invites sag.
- Add side cleats if the shelf needs edge support. Cut short 2×4 pieces and screw them to the side walls or end studs. Side cleats prevent the plywood edges from flexing and finish the support frame cleanly.
4. Build and Attach Shelf Supports or Frames
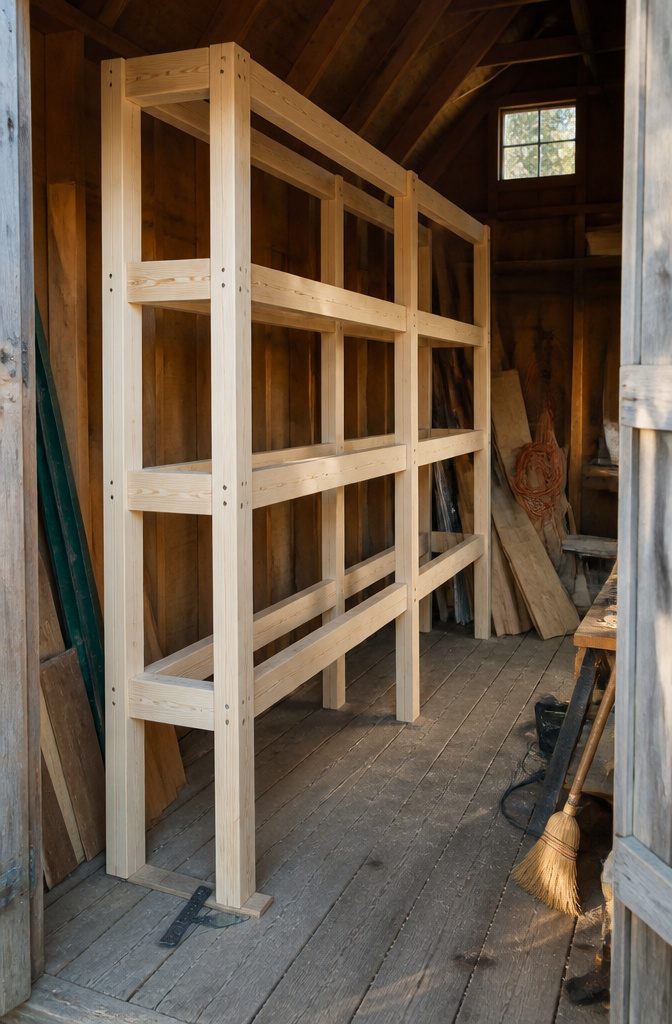
The simplest frame starts with paired 2×4 supports.
Cut a front and a back piece for each shelf height, hold the back board against the wall at the marked line, and screw the front board to it temporarily so both stay level while you work.
Once the horizontals are locked in place, add vertical 2×4 posts that run from floor to the top shelf, screwing them tightly into the outer horizontal pieces.
Pull out the temporary screws connecting front and back, then tie the paired supports together with side pieces that span from wall to front edge. Use 3-inch construction screws for all frame joints.
The pocket-hole method flips that sequence: mount the wall board first, cut braces to the shelf depth minus three inches, drill pocket holes on both ends with a jig, and screw the braces between the wall board and a front 2×4 that you clamp level before fastening.
Freestanding units skip the wall entirely.
Build two side frames by screwing horizontal rails between vertical posts at each shelf height, stand both frames upright, connect them with back rails, check corners with a square, and shim the base until the whole unit sits plumb.
5. Add the Shelf Surface or Tote Rails
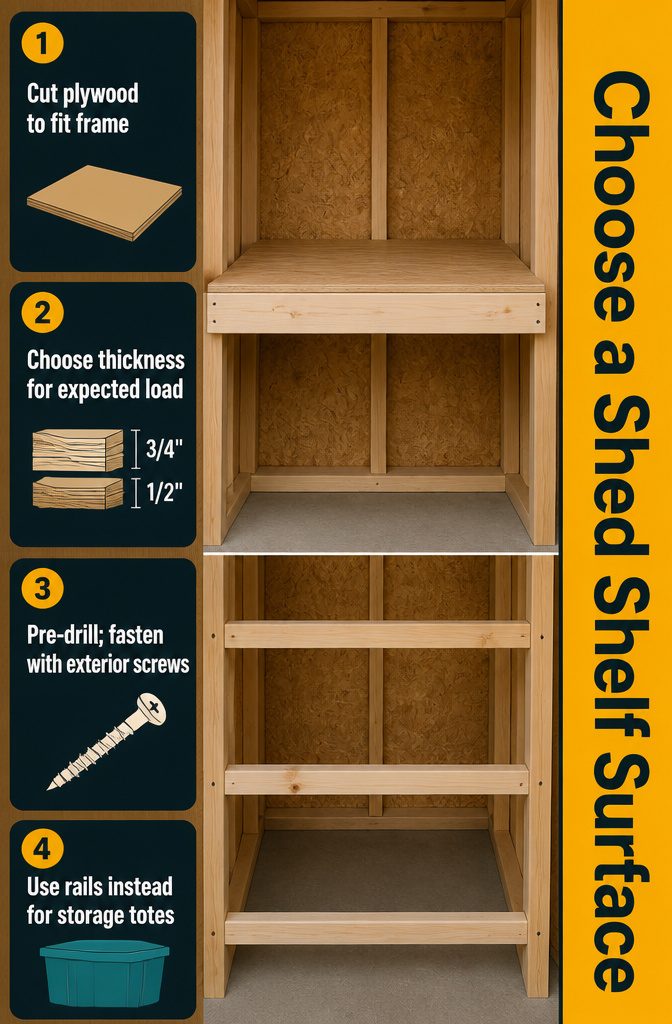
- Cut plywood to fit the frame. Measure the width of the frame, then use a circular saw to cut that width from the sheet. Measure the length next, remembering that each piece needs to sit on a 2×4. Test the fit before fastening anything—if you need multiple pieces, check all of them first.
- Choose your plywood thickness based on the load. I use 3/4-inch plywood for heavier storage because it holds fasteners more reliably at the edges and resists sag better than thinner stock. Half-inch plywood works for lighter loads and costs less, but you give up stiffness. OSB saves a few dollars per sheet if moisture stays low, though plywood is the safer choice in a damp shed.
- Fasten the plywood to the frame. Pre-drill 1/8-inch holes to prevent splitting, then drive 1.25-inch exterior screws through the plywood into the frame. Use at least six screws per piece—one at each corner and two along the middle of the frame. For plywood fastened directly to cleats or rails, 1.5-inch screws work better.
- Skip the plywood for a tote system. If you are storing bins rather than loose items, rails are enough. Run 2×4 rails at each shelf height instead of covering the entire frame with plywood, and the totes drop in between them. Simpler to build, lighter to support, and you lose no function.
6. Add Legs, Braces, and Anchoring as Needed
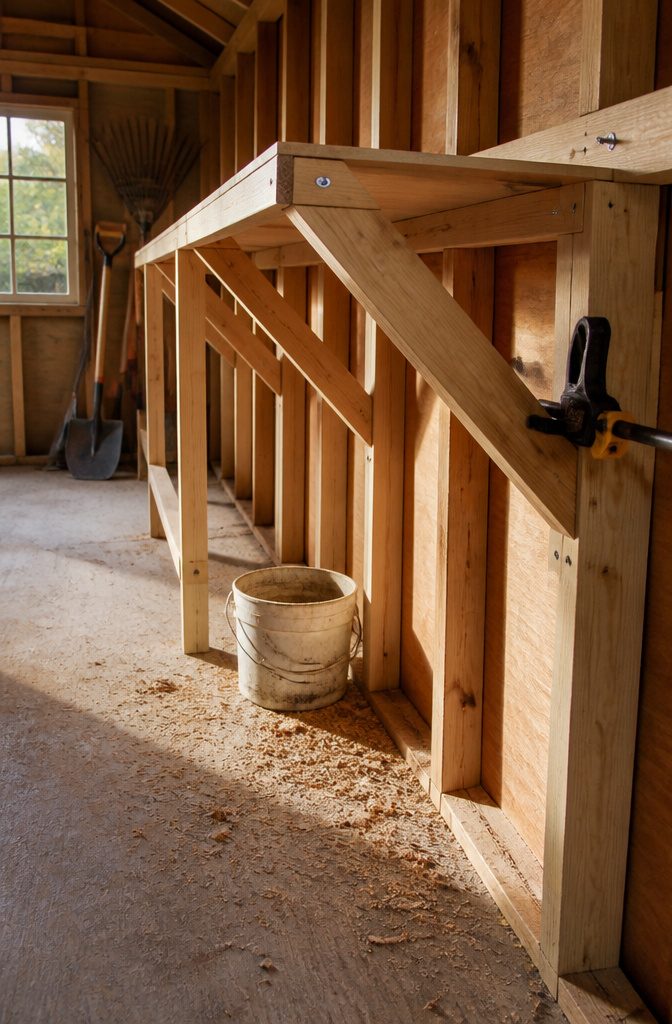
Once the shelf frames are together and the plywood is down, the next question is whether the shelf needs legs or can float on wall braces alone.
A leg brace at least every 8 feet keeps long spans from sagging, and three braces across an 8-foot shelf is workable, though four is safer if the load is heavy.
Legs run floor to top board and screw into the horizontal frame, so check plumb before you drive the screws home.
A shelf with no legs underneath needs angled wall braces instead.
I cut these from 2×4, set the angle by holding the board where I want it and tracing where it crosses the stud, then trim the second cut where it meets the shelf frame.
Each brace screws into both the frame and a wall stud, and the shelf has to land on that stud or the whole setup tips.
Pre-drill an eighth-inch hole to keep the 2.5-inch screws from splitting the wood, and use a clamp to hold the brace steady while you fasten it.
Freestanding units get one last step: anchor the top back rail to a wall stud with a lag screw or L-bracket. An unanchored unit tips under load or when bumped, so that screw is not optional.
Fit Shelves to Storage Needs
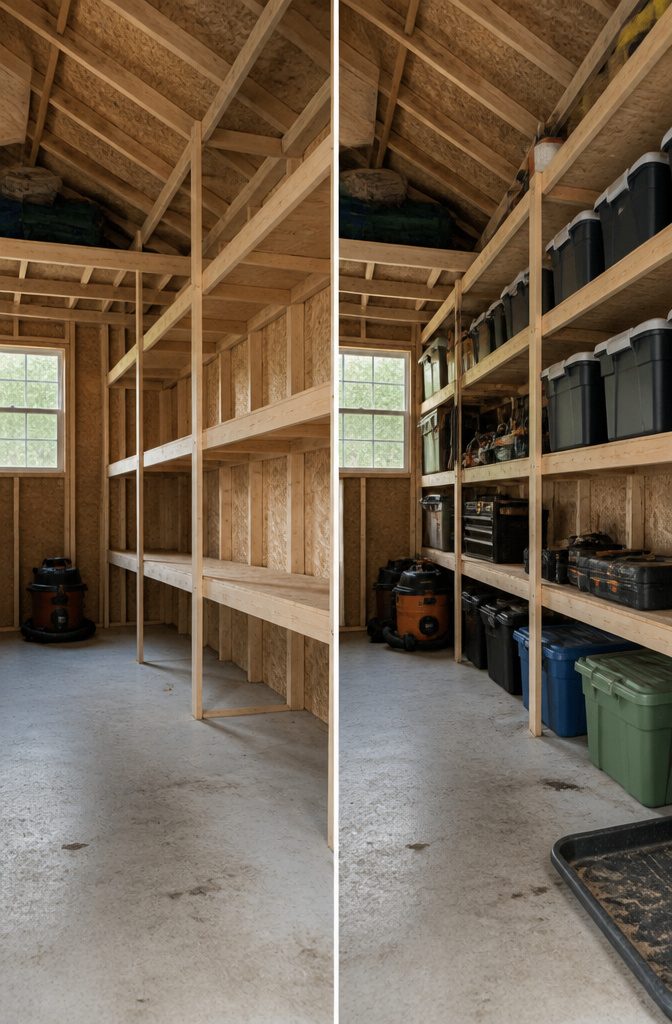
The shelving that fits a shed packed with camping gear won’t work for one holding paint cans and power tools.
I start by listing what actually goes in there, then customize shelf spacing to match the tallest items in each category. A shed storing plastic totes needs different vertical clearance than one holding garden chemicals or a wet saw.
Bulky or heavy items belong on the bottom level. I keep that first shelf around 30 inches off the floor so lawn equipment, shop vacs, and tall storage bins slide underneath without lifting.
The shelves above can sit closer together, maybe 12 to 16 inches apart, because smaller supplies and hand tools don’t need the same headroom.
One approach spaces every shelf to fit standard storage totes exactly, which works when everything lives in matching bins. Another leaves the spacing loose and adjustable for oddly shaped gear that won’t stack neatly.
Ceiling-mounted shelves solve the problem when wall space runs out. I’ve seen them hold camping chairs, tarps, and seasonal items that don’t get pulled down often.
Access is harder: anything stored overhead takes a ladder and a strong grip, so it’s not the spot for your most-used tools or anything fragile.
Support and Stability Methods
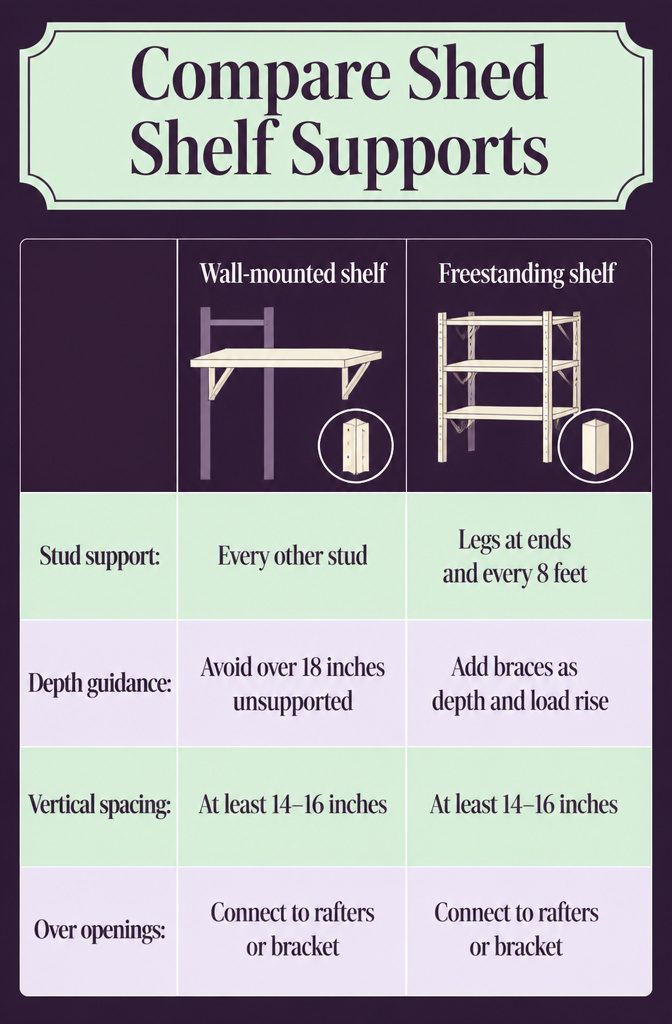
Support varies by shed wall type, but the goal stays the same: keep the shelf from sagging or tearing loose. Most methods succeed when you commit to the structure fully rather than skip fastening points.
Attach to at least every other stud if you’re running a roughly 10-foot shelf along a wall.
The twofeetfirst build used 2.5-inch screws into wall studs, and the backyardoas cleat method called for lag screws into every stud where the back cleat meets the wall. That cleat bears the entire load, so each stud connection counts.
I wouldn’t go much larger than 18″ without using thicker plywood or adding extra cross support under your plywood. Otherwise they may sag over time.
Depth and weight together determine how much bracing the shelf needs. For freestanding builds, add a leg at each end plus one every 8 feet along the span to keep the middle from dropping.
Additional support moves:
- Space shelves at least 14–16 inches apart vertically so you can fit totes and larger items between levels.
- Use side cleats or short cross-braces to support the plywood edges and stop flex at unsupported runs.
- Attach legs to each shelf level with pre-drilled holes to avoid splitting the 2×4s.
- For shelves above windows or doors, connect them to rafters overhead or use an angled bracket below.
How Deep and How Long Should Shelves Be
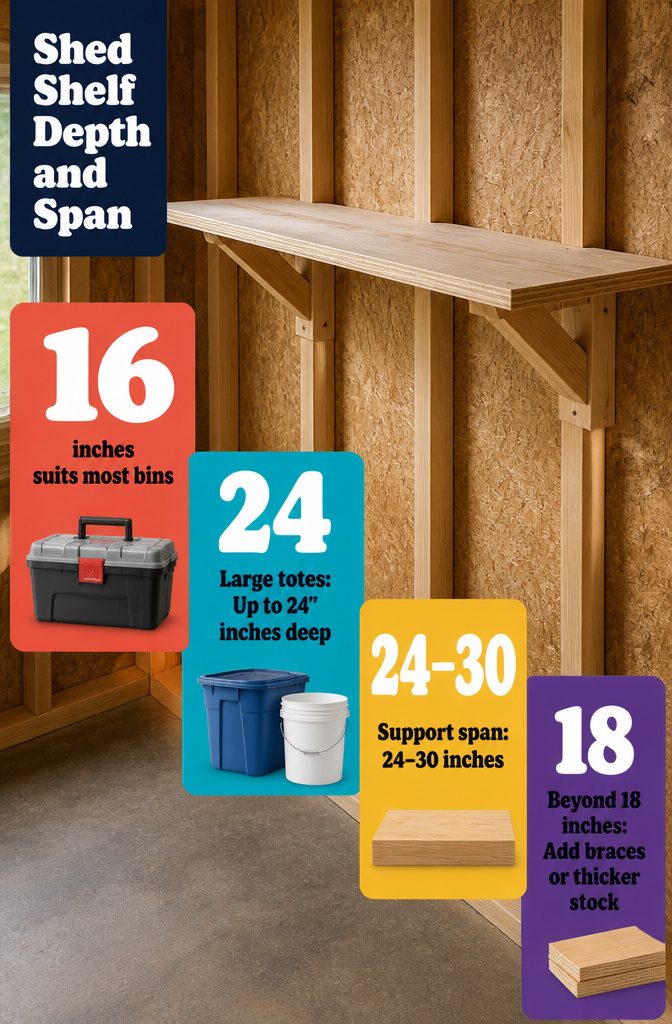
Sixteen inches suits most tool boxes and bins without wasting wall space.
I go deeper—up to 24 inches—when someone stores large totes or five-gallon buckets, but beyond that you create a dead zone at the back that rarely gets used.
Length matters just as much. For 3/4-inch plywood at moderate load, the practical safe span between supports runs 24 to 30 inches.
Heavy items like full paint cans push that number down. Wood creeps under steady weight, and deflection can nearly double over months, so a shelf that looks fine in spring may bow noticeably by winter.
Depth and span trade off.
If you cut 12-inch side pieces between front and back cleats, the finished shelf sits around 15 inches deep. Push much past 18 inches without adding cross braces or switching to thicker material, and you invite sag over time.
Frequently Asked Questions
How deep should shelves be in a shed?
16 inches works for most tool boxes and bins without wasting wall space. Go up to 24 inches if you store large totes or 5-gallon buckets, but deeper than that creates a dead zone at the back that rarely gets used.
How long should shed shelves be between supports?
24 to 30 inches is the practical safe span for 3/4-inch plywood at moderate load.
Heavy items like full paint cans push that number down, and wood creeps under steady weight so a shelf that looks fine in spring may bow by winter.
Is it cheaper to buy or build shed shelves?
Building is almost always cheaper.
A 6-foot wall-mounted cleat shelf typically costs $30–$80 in lumber and hardware, while comparable steel shelving units start at $80–$150. Building takes time: roughly 2 to 4 hours for a first build.
What wood should I use for shed shelves?
Use 3/4-inch plywood for the shelf surface and 2×4s for cleats and frames.
Half-inch plywood works for lighter loads and costs less, but you give up stiffness. Use pressure-treated 2×4s where moisture is present.
How do I keep shed shelves from sagging?
Keep spans under 30 inches for 3/4-inch plywood, add a center cleat or leg on wider runs, and anchor every cleat into wall studs. Heavy items push that safe span down, so add extra support if the load is constant.
Can you put shelves up in a shed?
Yes.
Wall-mounted shelves using cleats give the best strength-to-cost ratio when the shed has accessible studs. Freestanding 2×4 frames work when studs aren’t available or the shed is a rental.