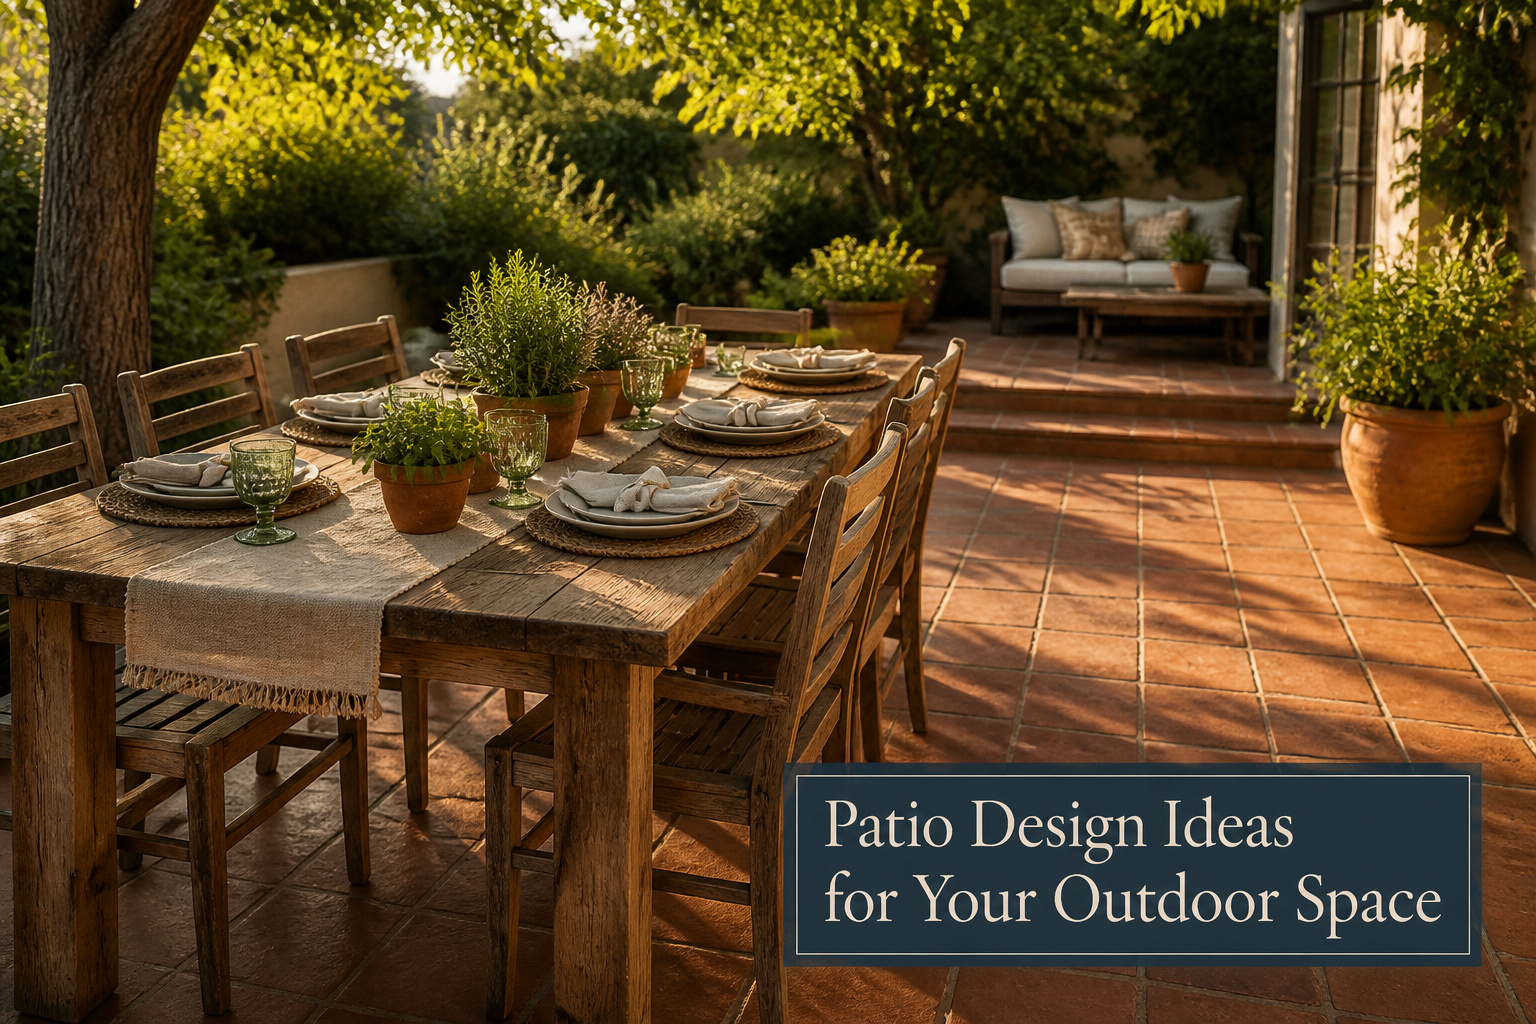
Patio design ideas range from a $150 propane fire pit to full outdoor kitchens with plumbed sinks and built-in refrigeration. The deciding factor is not budget but how you actually use the space: one primary function, sized first, keeps a 150-square-foot slab from becoming an obstacle course. I learned that the hard way sketching three zones onto concrete that barely held two, ending with a grill blocking the door swing and a loveseat trapped under a market umbrella.
1. Define Your Patio Space
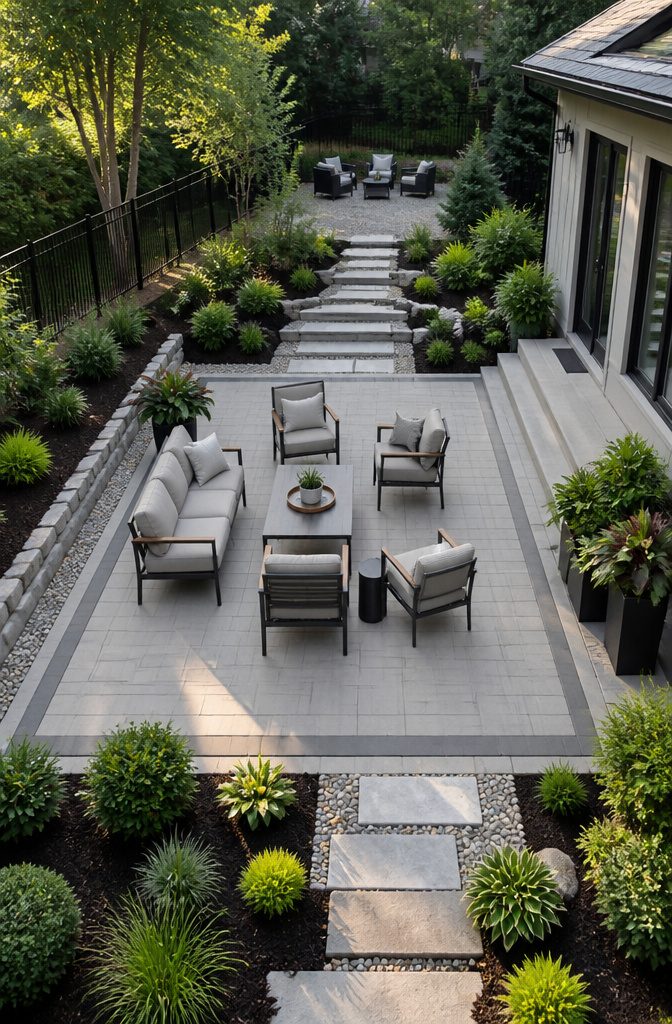
Before picking a single chair or paver, figure out how many people the patio actually needs to hold. Each person needs 25–30 square feet to sit and move without bumping elbows. A space meant for six people clocks in at 150–180 square feet, roughly a 10-by-15 or 12-by-15 footprint. That math keeps a gathering from turning into a shuffle.
Square footage shrinks fast when you try to do everything at once. A dining table, a conversation circle, and a grill station all competing for the same concrete turns the patio into an obstacle course. The better move for most of us is picking one primary job and building around it. Want dinner outside? Size and place the table first, then see what perimeter space is left for a slim console or a potted edge. Dreaming of a fire-pit crowd? Start the layout from the fire feature outward, and choose low seating that does not demand the same clearance a dining chair would.
I learned this the hard way on a rental years ago, sketching three "zones" onto a slab that barely held two. The drawing looked balanced; the reality was a grill blocking a door swing and a loveseat no one could reach without ducking under a market umbrella. One function, one anchor piece, and the rest fills in without a fight.
2. Choose a Cohesive Theme
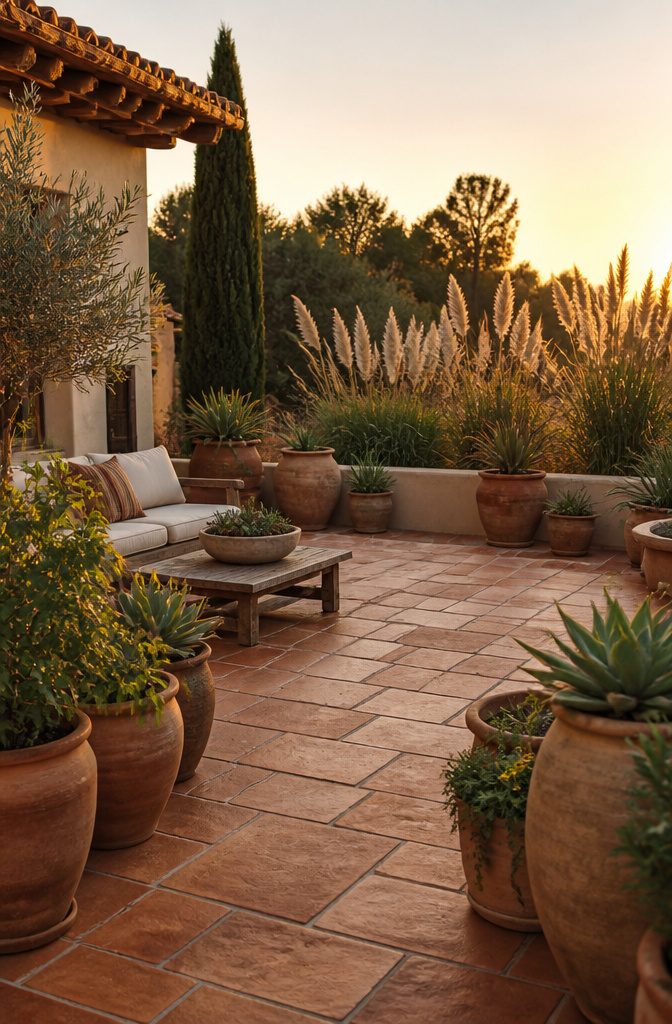
A unified theme makes every later decision easier, from paver color to whether that fire feature belongs at all. Without one, the patio becomes a collection of separate purchases that never quite belong together, the mismatched look that comes from buying piece by piece over two weekends because something was on sale.
Last season I watched a neighbor’s space go from "Mediterranean courtyard" to "whatever was in stock" in about three purchases. Terra cotta planters, then gray wicker, then black steel cable railing. Each choice made sense alone. Together they looked like three people had designed one patio.
Pick your direction before you spend, even if that direction is as simple as "neutral browns and gray." One source suggests angling seating 10–15 degrees off the sunset line for golden-hour conversation without the glare. That single functional choice, made early, then informs whether your hardscape needs warmth or coolness, whether ornamental grasses fit or feel off.
A smaller budget actually helps here. Less money means fewer big-ticket items, so each one matters more. Splurge on the two or three pieces that establish the mood, then let everything else support them.
3. Create Defined Zones
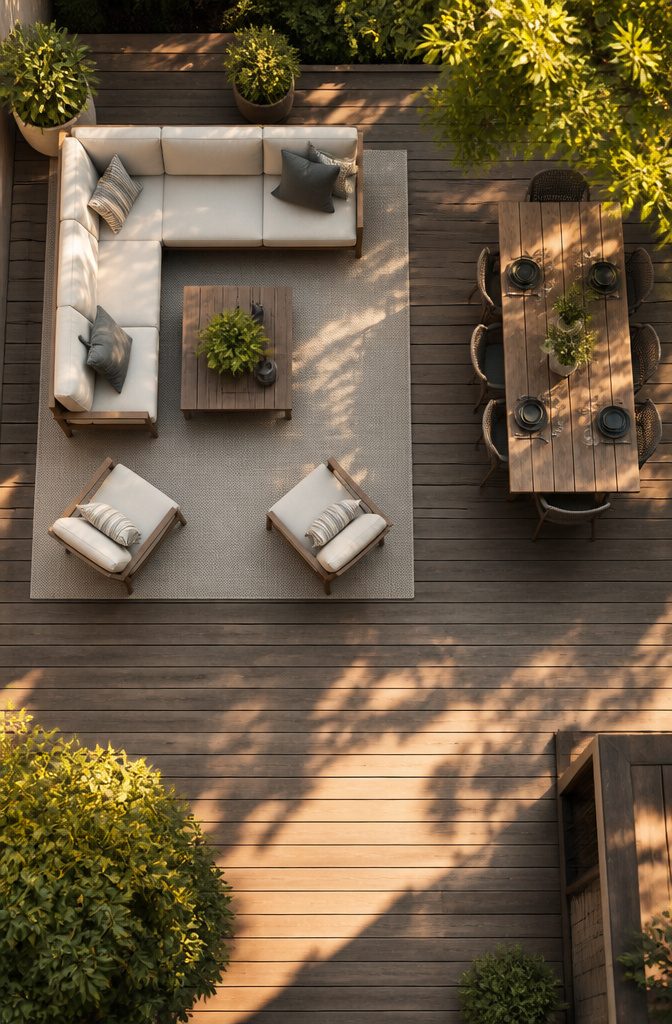
A rug underfoot reads as a room even when the walls are open air. On my last patio refresh, I laid a flatweave to anchor the seating cluster and left an 18–24 inch strip of exposed deck between it and the dining zone’s rug. That gap is what sells the separation; without it, two rugs look like one that fell short.
Furniture does the same work. A sectional sofa backs up against nothing and still draws a line between lounge and traffic path. Turn the back toward the grill station and you have a kitchen boundary without a single planter box.
Pavers can mark territory too. Running the same stone in a herringbone band through the center of an otherwise running-bond field creates what reads as a built-in rug. The shift in pattern costs nothing extra in material, just in layout time.
Columns and built-in planters sit heavier on the budget, but they earn their place where you need shade or greenery to double as architecture. A planter wall two feet high won’t block conversation across it, yet it stops the eye and keeps the dining chairs from drifting into the fire-pit circle.
4. Build In Seating
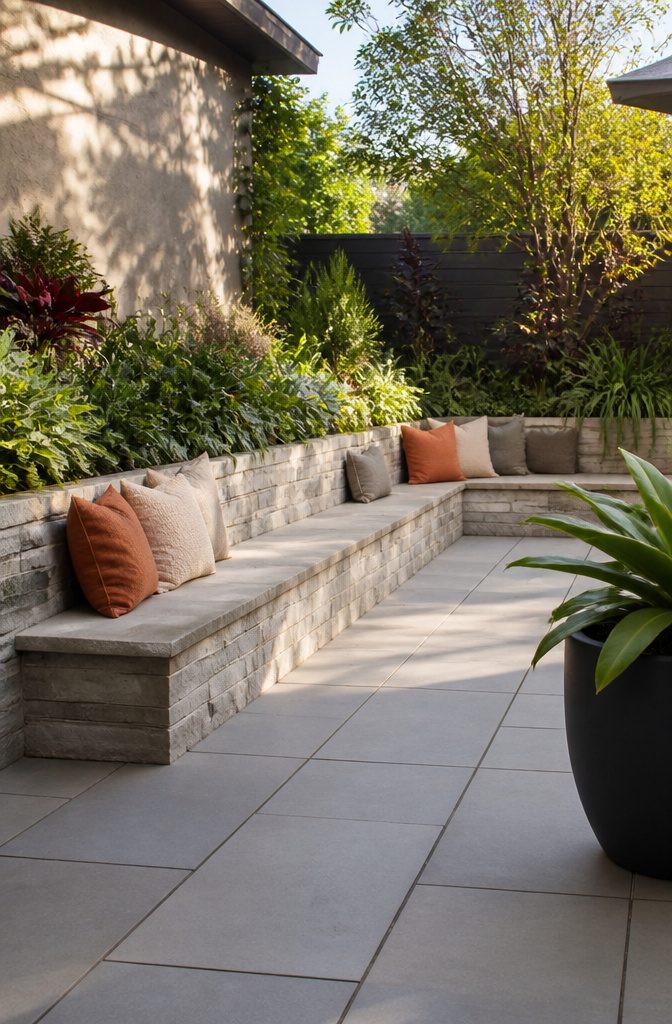
Built-in seating walls or bench caps make the most sense when square footage is tight and every piece of movable furniture costs you walking room. A low wall system wrapped around the patio edge gives you permanent seating without the annual shuffle of chairs in and out of storage, and on a sloped yard that retaining wall can double as a bench with the right capstone.
On my first attempt, the seat height came in wrong. Patio seat walls typically run 18 inches tall, but I poured mine at 16 and the result felt like a kindergarten chair for anyone over five-foot-eight. Knees shot up, backs slumped, and guests quietly stood instead. The fix meant tearing out capstones and adding a poured layer, which ate a weekend and the difference in concrete cost. Measure the tallest regular sitter in your household, then add an inch for cushion compression. A 20-inch finished height with a two-inch cushion lands most adults where their thighs stay level and their spine stays straight.
Permanent benches work best when you already know how people gather in the space. If your patio shifts between grill nights, kid play, and morning coffee, movable pieces keep you flexible. Lock the seating in place only after one primary function wins out.
5. Pick Comfortable Furniture
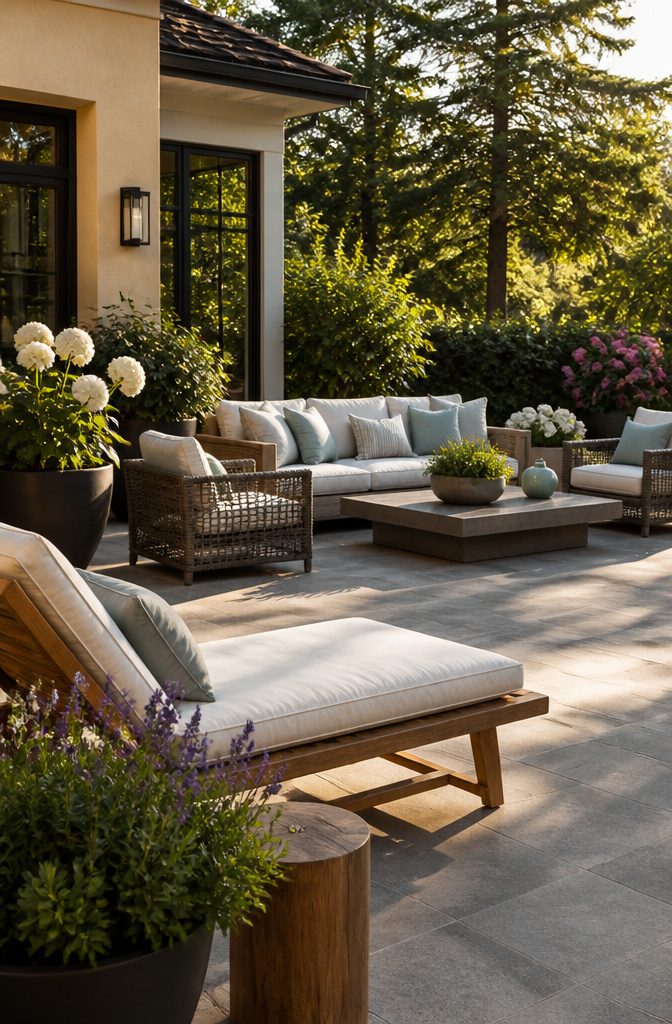
The metal bistro set looked sharp in the store display, but after one winter the powder coating bubbled and the seats pitted where water pooled. Powder-coated steel only holds up if it lives under cover year-round. Aluminum frames with woven resin wicker cost more upfront yet barely weathered after two full seasons of daily use and rain. My teak lounger grayed to a soft silver, which some people love, but the grain stayed smooth and the joints tight; the eucalyptus chair beside it checked and wobbled by year three. Cushions are where cheap shows fastest. The box-store set with polyester covers faded from navy to dishwater in a single summer, while Sunbrella fabric on a hand-me-down sectional still closes its zippers without catching. For seating you actually stay in, sling chairs beat rigid backs for long afternoons, and a 24-inch seat depth lets you tuck your legs up without perching on the edge.
6. Add a Dining Area
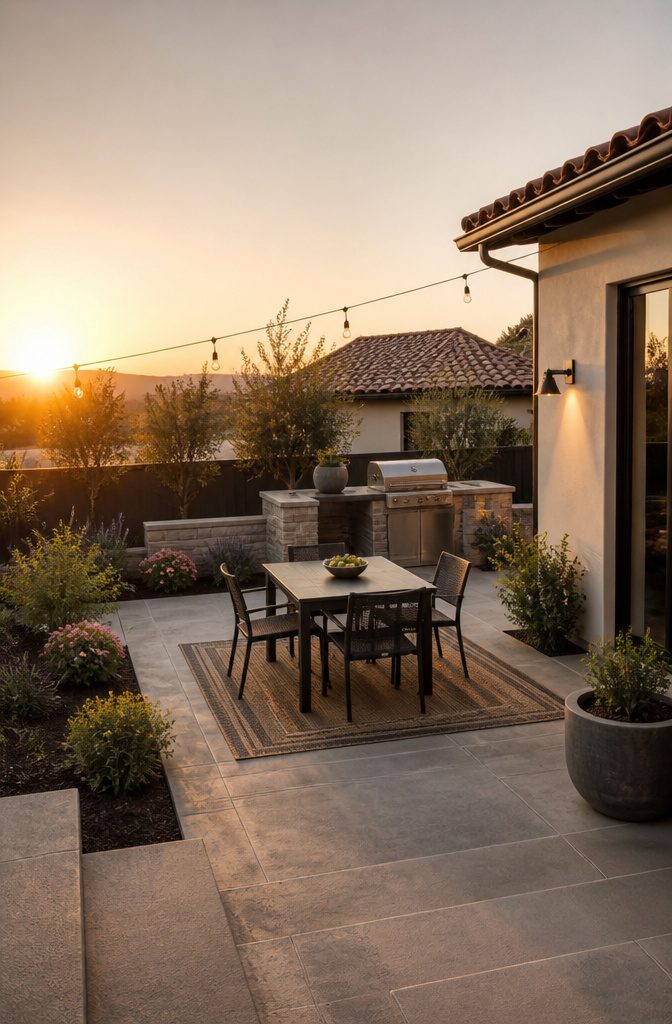
A table and chairs turn the patio into a place for meals, but the sizing trip me up every time. I bought a six-person set for the backyard convinced we’d host summer dinners that never happened. The thing dominated the space, and two years later I traded it for a four-top that actually fits how we live.
Each person needs roughly 25 to 30 square feet to sit and move comfortably. A six-person setup calls for 150 to 180 square feet total, which lands around a 10-by-15 or 12-by-15 footprint. That sounds manageable on paper, but on my patio it left almost no room for walking around chairs or squeezing past with a platter.
Measure for the number of people you actually host, not the crowd you imagine. For most of us, that is four seats, maybe with a folding chair stashed for the one extra guest who shows up twice a year. The smaller table freed up space for a grill cart and a path to the garden, which gets used every weekend. The big set gathered pollen and regret.
7. Use Modular Furniture
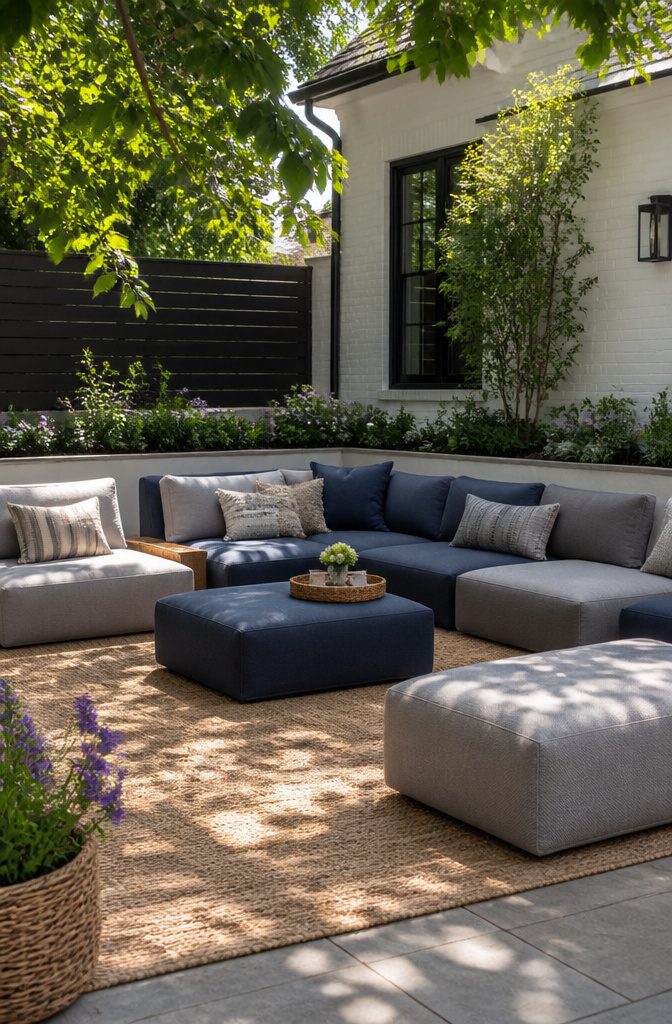
A fixed sectional looks settled until you need to squeeze in six extra chairs for a birthday cookout. Modular seating, the kind sold in individual cubes or armless sections that clip together, lets you pull apart a sofa into three love seats or line pieces against the railing for standing room in the center. The payoff comes when your patio serves more than one purpose: a quiet morning coffee spot, a dinner for four, then a crowd with drinks. The mistake is buying more modules than you have dry storage for. Pieces left in the rain through winter wear faster than any fixed set, and a cover that fits an odd arrangement costs more than you expect. I keep my count at what fits on a single 6 x 3 foot shelf in the garage, which for me meant stopping at four base units plus two ottomans. Anything past that and the flexibility starts to feel like a puzzle I never want to solve.
8. Design for Entertaining
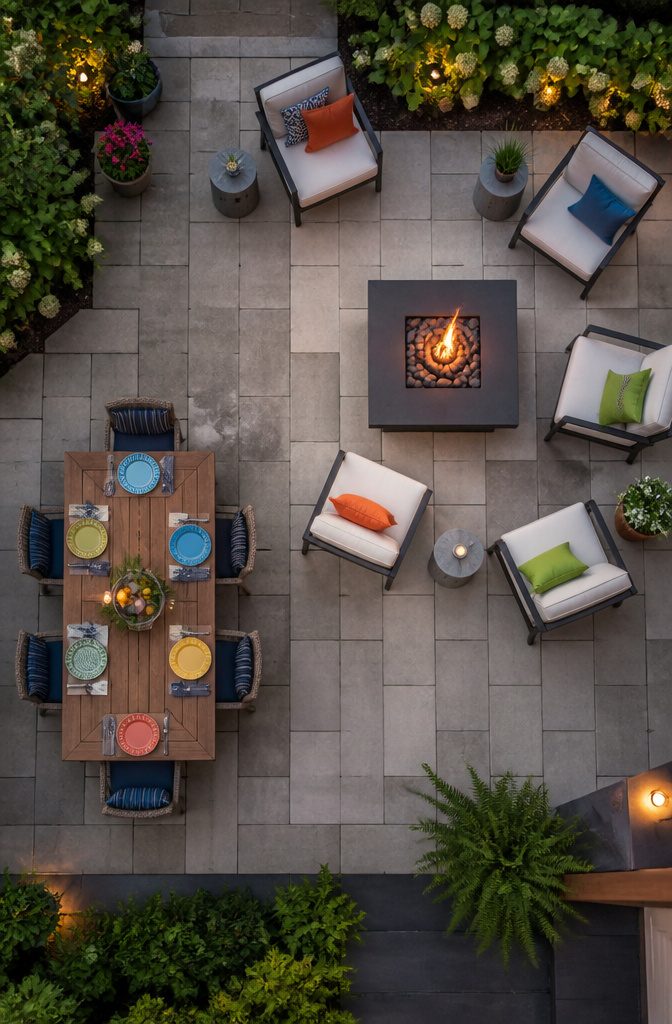
The best patio layouts for entertaining work like a good kitchen triangle: people drift, pause, and settle without a traffic jam. I learned this the hard way after setting six chairs in a straight line along my back wall, all facing inward like a waiting room. Nobody talked. The person at one end had to shout past three laps to reach the other, and the middle seats trapped anyone who needed a refill.
Angle seating 10 to 15 degrees off the sunset line instead. Faces catch golden hour light without the glare that makes everyone squint, and the slight break from rigid geometry keeps groups loose enough that new people can join without rearranging the whole setup. Built-in seat walls or low perimeter walls help here; they reduce the chair-count arms race and leave open ground for people to move through with a drink in hand.
Traffic flow matters more than total seats. Leave a clear path from the door to the food or drink surface, because guests will use it whether you planned for it or not. Where people set drinks down shapes where they actually stay: a ledge, bench cap, or side surface within arm’s reach beats a beautiful chair with nowhere to rest a plate.
9. Add a Fire Pit
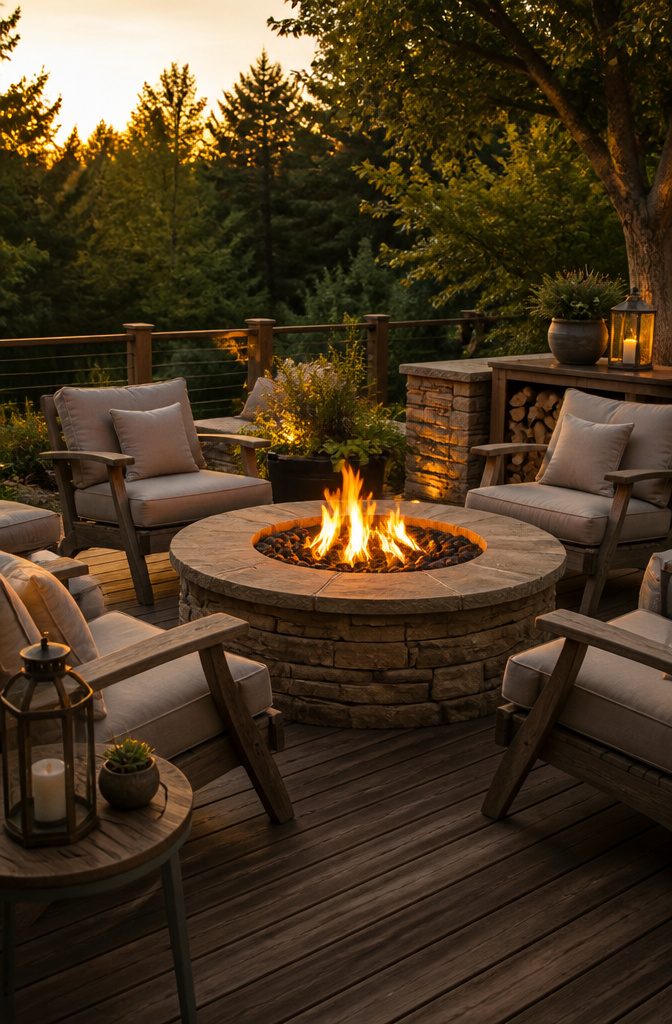
A fire pit pulls people in like no other piece of patio furniture manages to. The warmth pushes the usable season past sunset and into weeks of the year you’d otherwise stay inside, and the circle of seats around it creates a gathering point that happens naturally rather than by plan. Five of the design roundups I read while working through this piece treated a fire pit as the centerpiece of the whole layout, not an afterthought.
A simple propane unit runs about $150–400, depending on how much stone surround you want included. Building one from block and veneer stone yourself lands closer to $500–800 once you count the burner kit, gravel base, and fire brick. I spent a long evening weighing those numbers myself. The propane route wins for anyone who might move in a year or two, or who does not want to wrestle a gas line permit. Stone builds make sense when you own the place and have a level spot that will not shift. What tipped me toward the simpler option was the realization that half the built-in pits I saw in photos were sitting unused because the owners never got around to the gas hookup.
10. Try a Fire Table
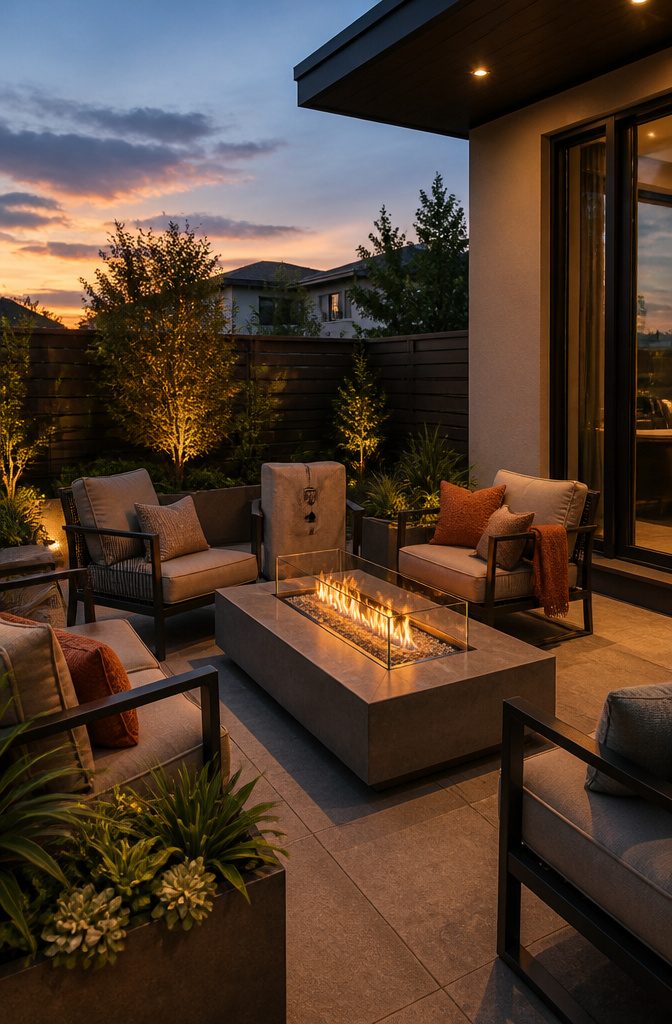
A fire table gives you the warmth of a flame and a spot to set a drink without eating up the footprint of two separate pieces. The surface stays usable even when the burner is running, so a 10-by-10-foot patio can still host four people around it without the elbow wars that come from squeezing in a fire pit plus a side table. I looked at one for my own space last spring and realized the math only works if you actually need that surface; a fire pit with a low wall you can perch a plate on covers some of the same ground for less money. The deciding factor is whether your patio is small enough that every square foot has to pull double duty. On a compact San Francisco patio, designers sized the seating, table, and fire element together so nothing crowded the cherry laurel hedge that gives the space its privacy. That kind of one-piece solution keeps the layout legible when there is not room to spread out. If you have the width for a full seating group with breathing room, a separate fire pit and table gives you more flexibility in how you arrange things.
11. Install an Outdoor Kitchen
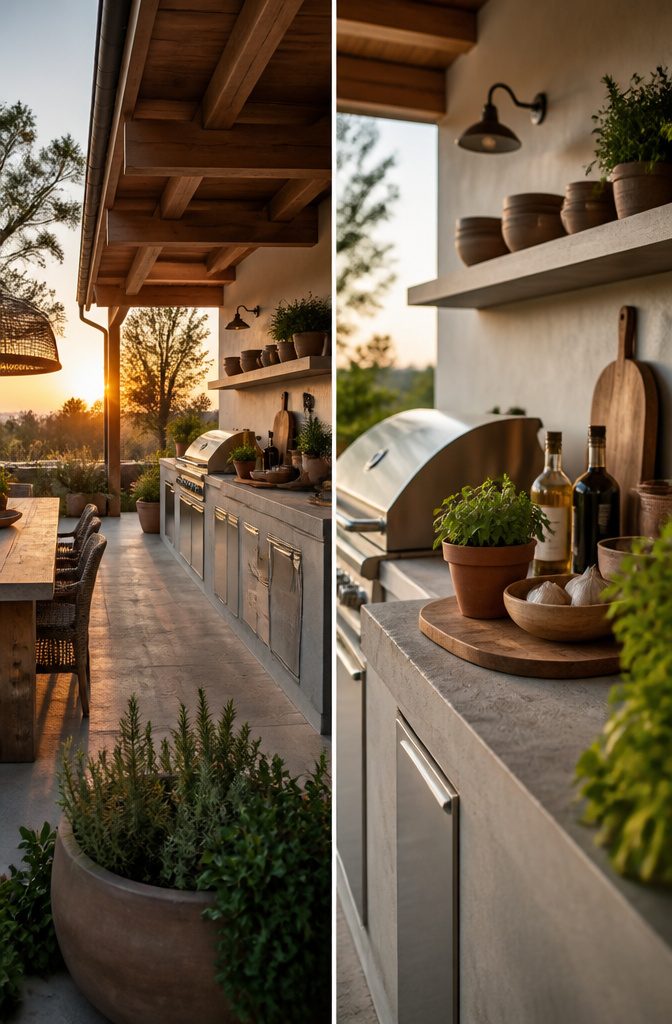
Concrete pavers handle the heat and spills better than poured concrete for an outdoor kitchen base, which matters once you set a hot griddle down or drop a sauce pan. Built-in island storage buys back floor space on a smaller patio, and overhead lighting recessed into a ceiling keeps the counters usable after dark without losing square footage to lamps. A ceiling fan over the cooking zone pushes insects around more reliably than citronella and stretches the season by weeks in spring and fall.
A mini fridge and running water are where the budget splits hard. Plumbing and electrical coordination can require subcontractors, and wall systems with modular aluminum-framed cabinets run steeper than a simple grill station on a paver foundation. For renters or anyone keeping costs under a few hundred, a rolling prep cart and a cooler keep the same workflow without the permanent install.
12. Add a Bar Area
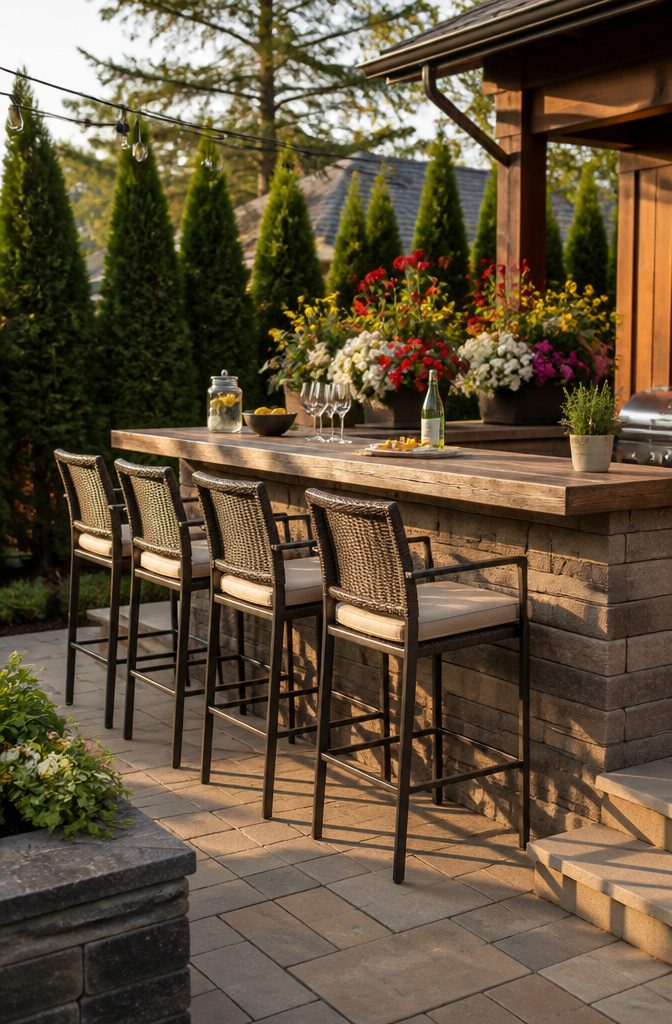
A bar counter changes how people move on a patio. Instead of someone ducking inside for every refill, drinks stay where the conversation is. I built mine from leftover pavers stacked two-high on a bed of compacted gravel, topped with a cedar plank I ran through a table saw for a clean edge. Total came to about $160 and six hours, most of it leveling the base.
Reclaimed lumber works just as well if you have a fence company nearby that tears out old boards. Scrub them with a wire brush, seal with an exterior oil, and lag-bolt three 2×4s across the front for a towel rail that doubles as a bottle opener mount. The 36-inch height fits a standard barstool without thinking, though I set mine an inch lower because the paver base already raises you off the grade.
Skip the sink unless you love winterizing plumbing. A galvanized bucket tucked underneath catches ice and empties in seconds. My first version had a small fridge cavity; the motor died in eighteen months from pollen clogging the coil, and I patched the hole with a cutting board that slides out for prep space.
13. Use a Pergola for Shade
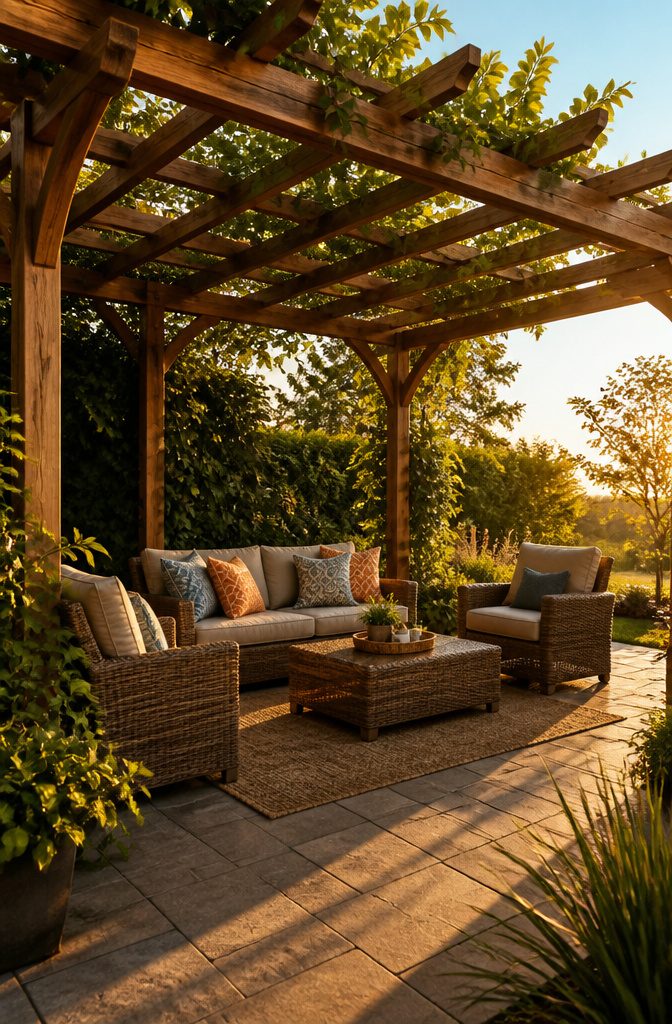
Midday sun can turn a patio into a no-go zone by one o’clock. A pergola fixes that without sealing you inside. The open slats throw broken shade, so you still get sky and breeze, but the direct beams stop hitting your neck.
I put up a 10 x 10 cedar kit from a big-box store two summers back. The price was $380, not counting the four bags of concrete for the posts. Assembly took a Saturday with a friend and a rented auger. The biggest mistake was setting the posts too shallow on the first try; we had to pull one and dig six inches deeper after a wind gust shifted the whole frame an inch overnight. Depth matters more than width with these things.
The afternoon difference is real. My infrared thermometer read 94°F on the concrete in open sun, 78°F under the pergola at the same hour. That 16-degree drop comes from blocking direct radiation, not from cooling air. The slats still let heat rise, so it never turns into the trapped warmth a fully roofed structure collects.
Climbing vines on top would drop it further. Wisteria or grapevine takes three years to fill in, though, so plan the bare slats for year one and plant at the posts that same weekend.
14. Design Lighting
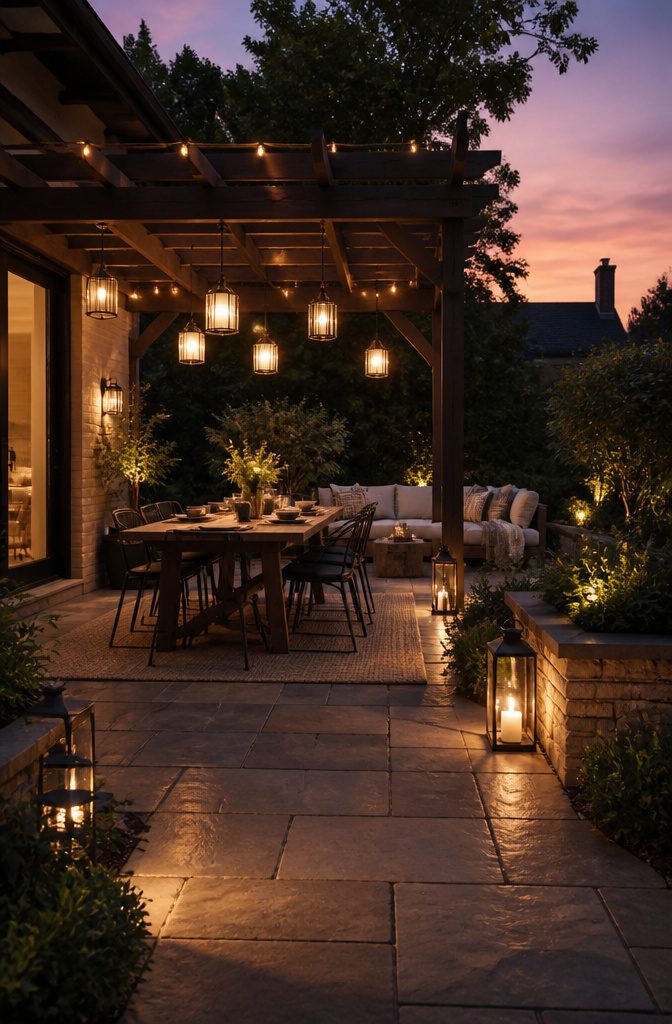
String lights were where most of my patio budgets went for the first two years, and they carried more atmosphere than function. A single strand of warm bulbs across the railing looked festive enough for a dinner, but try to read a paperback under them and the light pools too far apart, leaving your hands in shadow and the pages grey. I kept adding more strands, daisy-chaining until the outlet was crowded and the glow was still only pretty, not practical.
The shift came when I started treating the patio like an indoor room with a real lighting plan. Sources consistently point to three layers working together: overhead washes from pergola-mounted fixtures, mid-level lanterns that define zones, and task-level spots where you actually need to see. Metal archways with hanging lanterns, like Jeremiah Brent’s setup, give you that middle layer without eating floor space on a small patio. For renters, battery or solar options skip the wiring entirely, and a covered patio opens up to pendant lamps or even a small chandelier as a focal point.
The 18–24 inch gap rule for zoning applies to light pools too. Overlap them slightly and the space reads as one continuous room; keep them separate and you carve out distinct corners for eating versus lounging. My current setup runs solar string lights overhead for mood, a rechargeable lantern on the side table for reading, and a small clip light on the chair itself for the pages. Three sources, three heights, and for the first time the patio stays usable past sunset without anyone squinting.
15. Add Smart Lighting
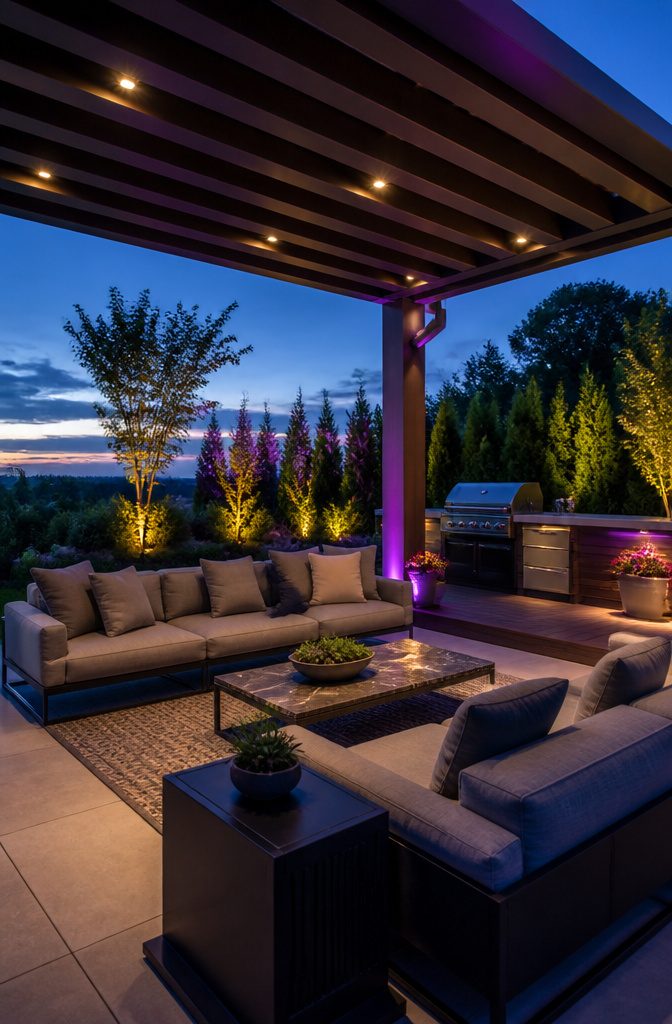
Smart lighting was one of those upgrades I almost skipped after seeing how rarely it showed up in patio roundups. Only two of the dozen or so collections I looked at even mentioned app-controlled fixtures, and neither spent more than a sentence on them. The bulbs and a basic hub ran me about $180, which felt steep for something I could switch on by hand.
A week of actually using them changed my mind. Setting the lights to fade up at sunset meant the patio was already inviting when I walked out with dinner, and being able to dim them from my phone without leaving the couch kept me outside longer on cool nights. The motion path I set for the steps has already prevented one stumble in the dark. For a weekend project budget, the convenience only pays off if you spend real time out there after dark. If your patio is strictly a daytime coffee spot, hardwired fixtures on a simple timer do ninety percent of the work for a fraction of the cost.
16. Build Multi-Level Patios
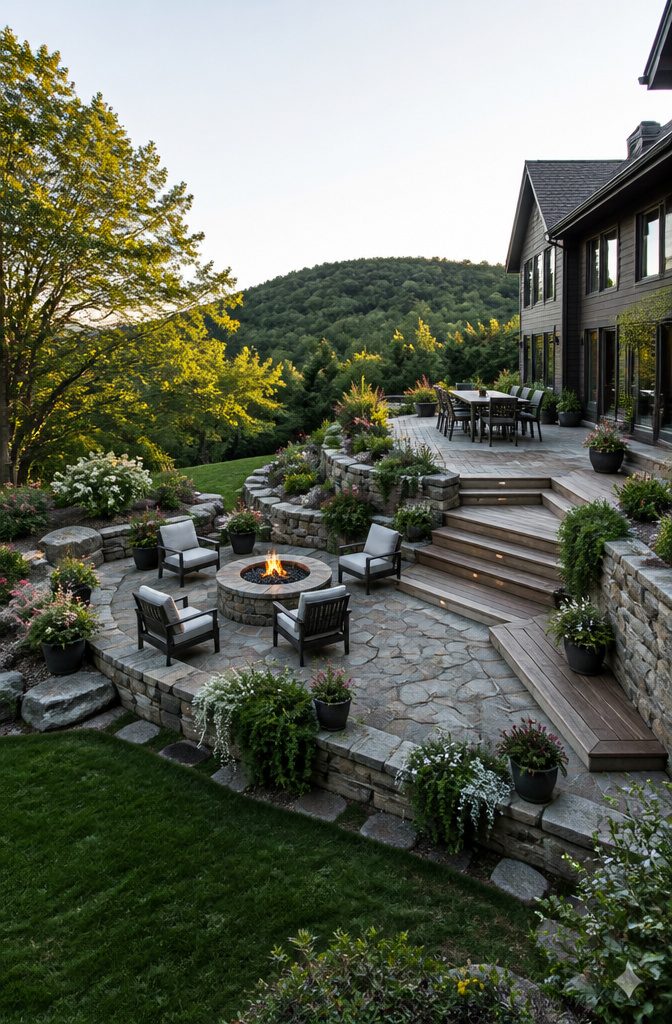
A sloped yard gives you an excuse to build up instead of fighting the grade. Step treads and retaining walls turn elevation changes into outdoor rooms: an upper level for the grill and prep space, a lower one for the fire pit and chairs. The separation by height does what furniture alone cannot; it makes two functions feel like two places.
Flat ground removes the problem entirely, which is why I never bothered with tiers. My yard sits level enough that a single poured slab handles everything. The neighbor two doors down had the opposite situation. His back lot drops about four feet from the house to the fence line, and he built a two-tier setup with a brick patio up top for eating and a stone landing below around a fire pit. The levels give the small space two clear jobs without a screen or planter to divide them. Watching it work made me notice what I had missed: on flat land, you have to build the separation yourself, or accept that everything happens in one plane.
17. Add a Water Feature
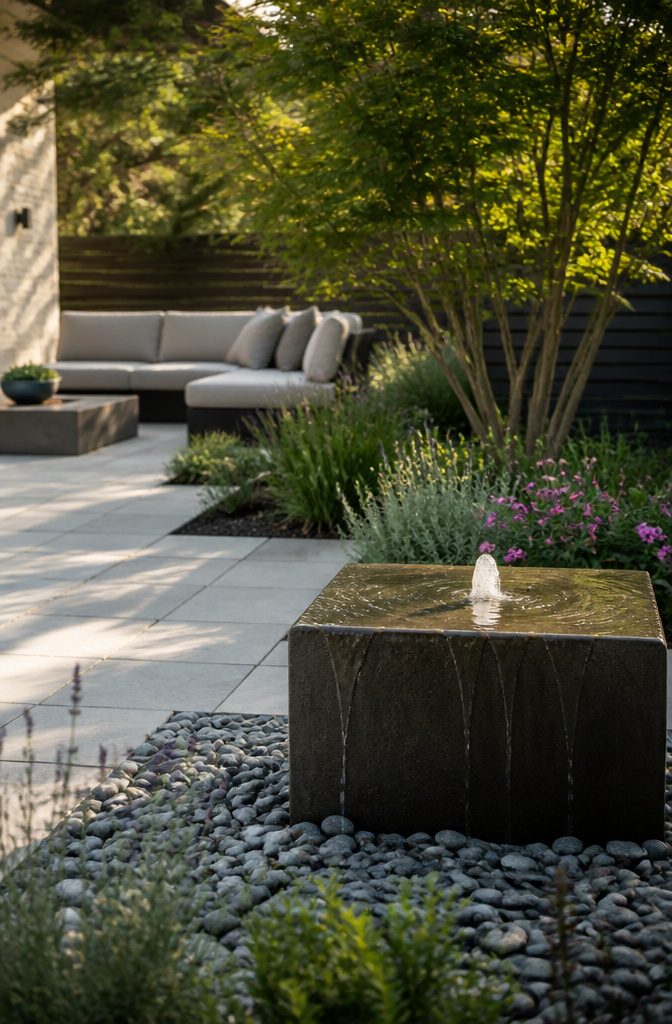
The sound of moving water does more than mask traffic; it changes how long you want to sit outside. A small fountain or bubbling stone near the seating area gives you that effect without the commitment of a pond. Weekly refilling in summer is the maintenance reality most product photos leave out. I learned that the hard way with a bubbling stone that looked self-contained but lost water to evaporation and splash faster than I expected. If you have the space and the slope, a low-maintenance pond built alongside the patio creates a sitting area sized for two chairs and the kind of backdrop that makes morning coffee feel like an event. Water walls or spillways integrated into an existing wall need less surface area and no refilling, though they cost more upfront and usually need professional installation. For a weekend project on a few hundred dollars, a standalone fountain with a hidden reservoir and an auto-fill line, or at least a reminder on your phone, keeps the calm from becoming a chore.
18. Create a Zen Space
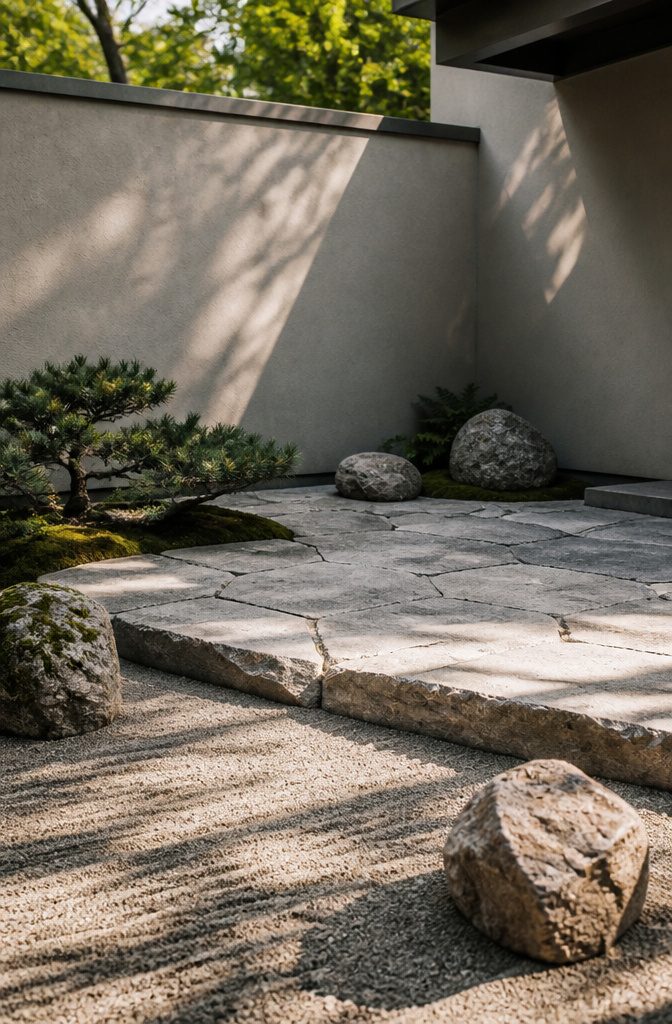
A patio corner built for stillness works best when you strip it down rather than add. I learned this the hard way after installing a small recirculating fountain one spring and finding the motor hum fought every quiet sitting. The pump came out, the basin filled with sand, and the space finally did what I’d wanted all along.
Rocks and sand, raked or left natural, give you that settled feeling without the maintenance or noise of moving water. A single flat stone for sitting, a few larger stones grouped at angles, and a bed of fine gravel or coarse sand between them: that’s the structure. The raking is optional; the emptiness is not. A tiny broom or a wooden rake lets you trace lines if the mood hits, but leaving it untouched is equally valid.
Planting stays minimal and low. A small juniper prostrate against one stone, a clump of sedum, maybe moss allowed to colonate the north faces. Anything taller than knee height breaks the horizon line and starts making the space about the plant, not the pause.
The real cost is placement. This corner needs to sit where you already pass and stop, not where you force a new habit. Mine landed where I used to dump potting soil bags; the ritual of raking sand replaced the guilt of the mess.
19. Use Natural Materials
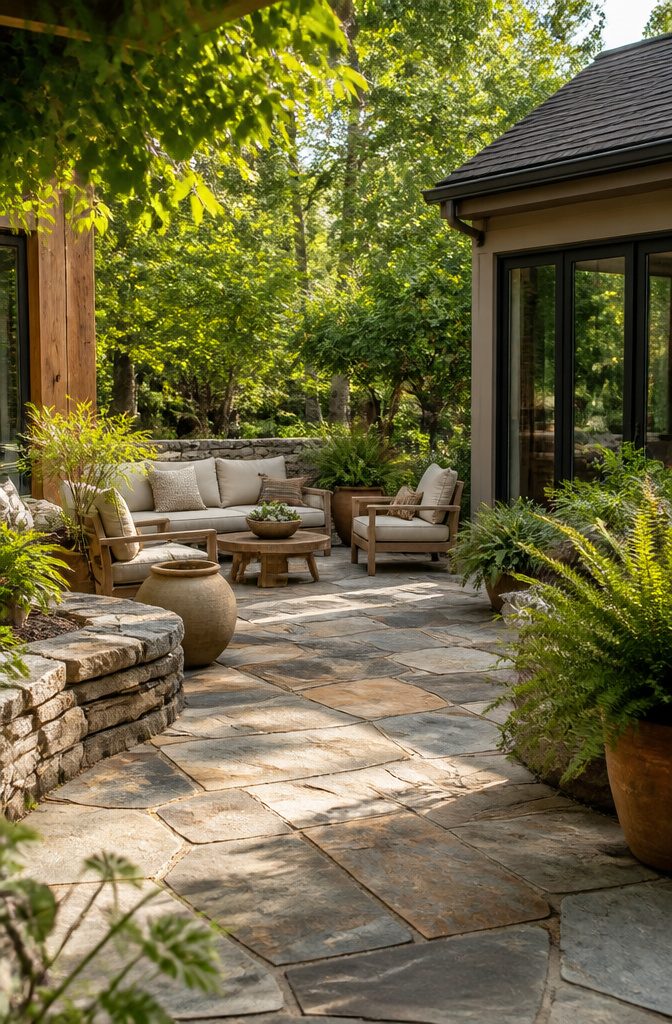
Stone, wood, and plants do the work of making a patio feel like it belongs to the yard rather than sitting on top of it. The sources that rank for this topic all lean on that same principle: natural materials create cohesion with what lies past the patio edge.
What stopped me in the reading was how often "natural stone" gets used as a catch-all for very different materials. Real flagstone runs about $15 to $25 per square foot installed, based on what I found comparing across these projects. The concrete pavers stamped and dyed to mimic it land closer to $6 to $12. The gap is real, and it matters on a weekend budget.
The paver-and-grass spacing technique caught my attention too: leaving intentional gaps between stones for low-growing plants or gravel. It softens the hardscape edge, adds texture through the seasons, and handles water better than solid concrete. For a small patio, that permeability can mean the difference between puddles and usable space after rain.
Wood enters the mix as border walls or deck-adjacent framing, repeating tones from the surrounding trees. The stone border wall in one of the featured designs did exactly this, pulling from the woods beyond the lot line so the patio seemed to extend farther than its actual footprint. That trick of borrowed landscape costs only the wall itself.
If I were spending my own money on this, I’d put the premium into real stone only on the surfaces my bare feet touch daily. The border wall, the fire pit surround, the paths less traveled: concrete pavers with good color variation handle those jobs without the guilt of wasted budget.
20. Choose Durable Materials
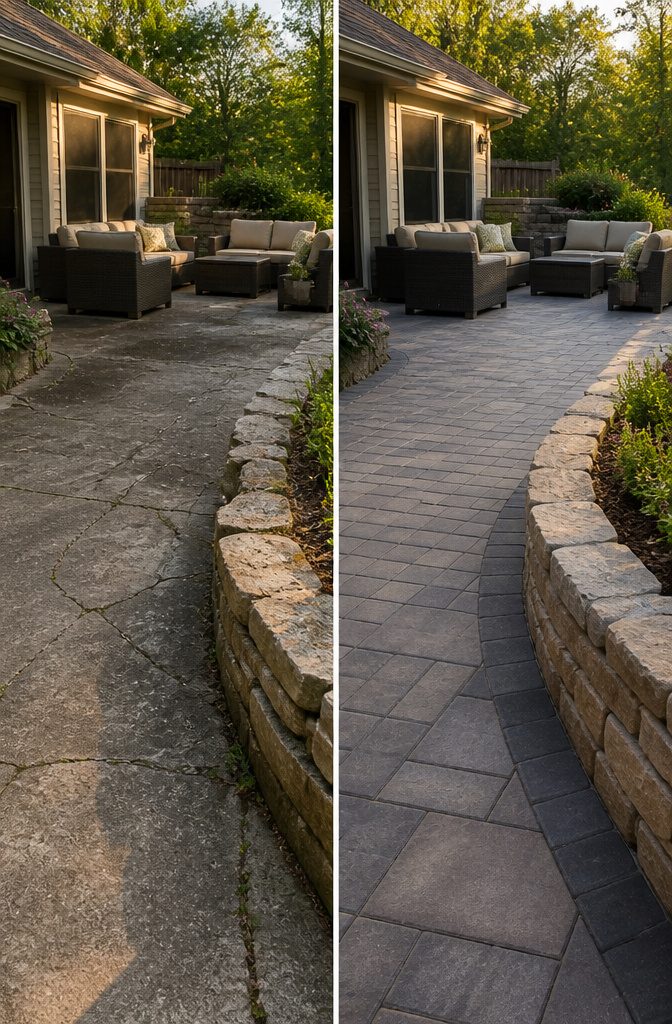
Weather resistance is what separates a patio that still looks intentional in year five from one that looks neglected by spring. Brick and natural stone hold up as classic choices, and concrete pavers give you color and texture options, though they ask for sealing every two to three years plus regular cleaning. Ceramic and porcelain tile skip most of that upkeep but stay away from pool edges where they get slick.
Concrete itself keeps getting better. A plain slab runs about 15% less than pavers, and stamped concrete, while pricier, can pass for limestone, slate, or flagstone with less maintenance than the real thing. Darker grayscale tones read more contemporary if that fits your house.
"A stamped concrete patio is not only more durable, but it typically requires less maintenance than natural stone options."
For a weekend project on a real budget, that maintenance gap matters more than the upfront cost gap. Three winters of freeze-thaw without sealing or special care is the test that weeds out materials that look good in the showroom. Natural wood seating and wicker hold up well against the elements, but for the surface you walk on, concrete and brick are the ones still looking deliberate when you pull the grill out in April.
Frequently Asked Questions
How do you plan a backyard patio?
Start by figuring out how many people the space needs to hold. Each person needs 25–30 square feet, so a six-person patio clocks in at 150–180 square feet. Pick one primary function, such as dining or lounging around a fire pit, and build the layout around that anchor piece rather than trying to squeeze in everything at once.
What type of patio is easiest to maintain?
Concrete patios rank among the lowest-maintenance options, with stamped concrete running about 15% less than pavers and typically needing less upkeep than natural stone. For furniture frames, aluminum with woven resin wicker barely weathered after two full seasons of daily use and rain in my own testing.
How can I make a small patio feel bigger?
Use light-colored materials for flooring, which create the perception of a larger living area while keeping the surface cooler. Attach the roof structure to your home for a seamless indoor-outdoor aesthetic, and add a privacy wall or pony wall to define the space without closing it in.