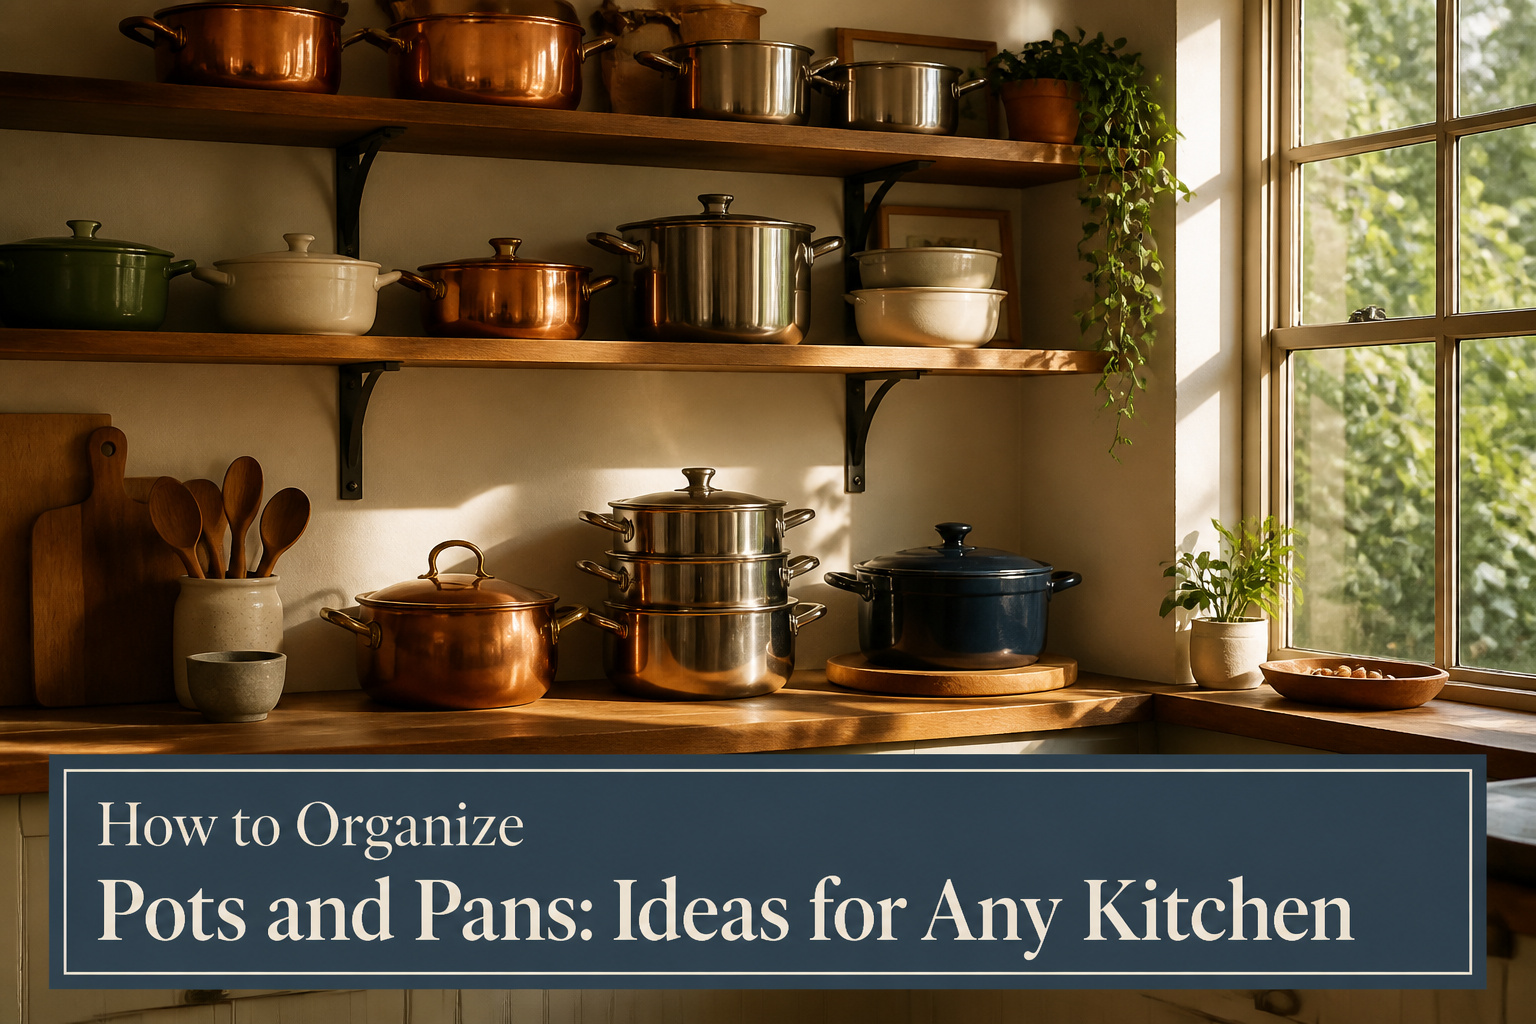
A well-organized pot and pan setup takes one weekend of measuring and installing, plus the cost of hardware or ready-made racks. Most people get the mounting wrong, not the storage idea itself. Ceiling racks need joist anchoring, not drywall, because a loaded Dutch oven already pushes ten pounds and four of them will tear anything less out of the ceiling.
1. Hang a Ceiling Rack
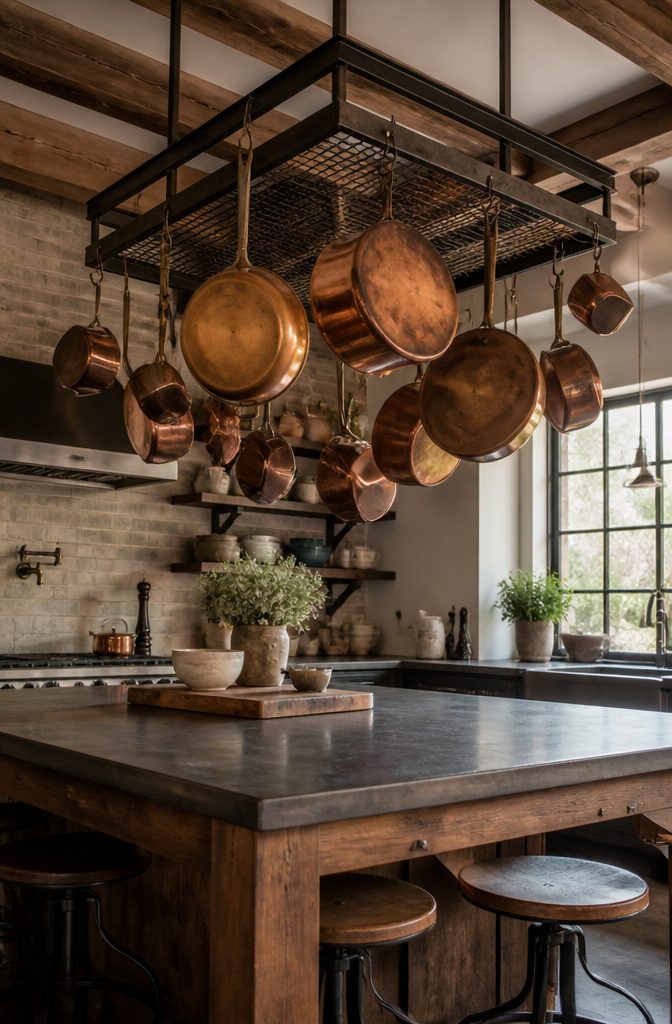
Ceiling racks turn the empty zone above an island or counter into working storage for pots and pans. The weight adds up fast, so mounting into a ceiling joist or load-bearing post is non-negotiable unless you want cookware on your floor. Most ready-made racks list a capacity, and you should treat that number as the hard stop, not a suggestion. A heavy Dutch oven alone can push ten pounds, so four of those plus a couple skillets and you are already past what drywall anchors will forgive.
What actually fits depends on your ceiling height and your reach. Twelve inches of head clearance is the minimum that feels safe; anything tighter and you are ducking around your own cookware. The tradeoff is worth it if cabinets are scarce. Wall space stays open for other tools, and the pans you use most stay visible and grab-ready. The look reads industrial or rustic depending on the rack finish, which is either a bonus or a dealbreaker depending on your kitchen.
2. Mount a Wall Rack
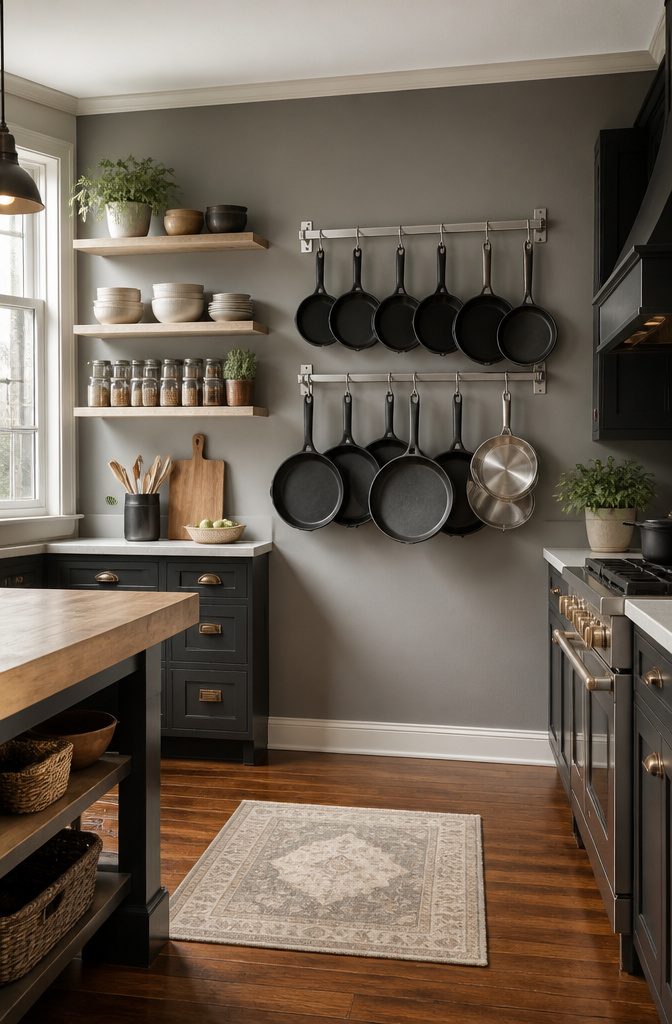
Wall-mounted racks turn cookware into something you actually want to look at while freeing up the cabinets underneath for the bulky things that never stack well. The hardware matters more than the rack itself: find the stud or joist first, because drywall anchors rated for fifty pounds look reassuring right up until they are not. A contractor or structural engineer can confirm what the wall will bear if your stud finder leaves you guessing.
Spacing the hooks is the part that separates a useful rack from a decorative mistake. Too close and the pans clatter against each other every time the dishwasher runs; too far and you are storing air. I have seen racks that look planned and racks that look abandoned mid-project, and the difference is usually two inches of hook spacing someone eyeballed instead of measured.
The look skews industrial or farmhouse depending on the finish you choose, which makes it one of the few storage moves that doubles as wall art. Renters can make this work with a tension-mounted rail system or by accepting that a few screw holes are easier to patch than a year of cabinet Jenga.
3. Install a Pegboard
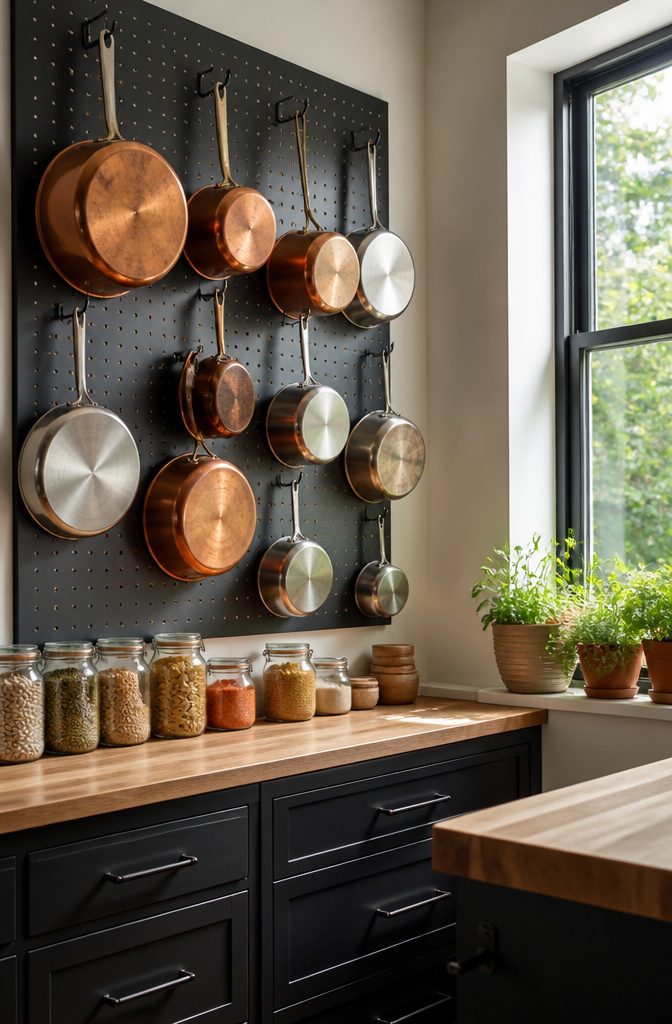
Standard pegboard warps under the weight of a loaded cast iron skillet, and that sag is the first thing you’ll notice Monday morning after a Sunday install. The hardware-store sheets, usually 1/4 inch thick with 1/4 inch holes on 1 inch centers, flex because the masonite or tempered hardboard core was never meant to hold concentrated loads. For pots and pans, that material is a mistake worth skipping.
Metal pegboard, the kind with 20-gauge steel faces and integrated flanges, solves the warp problem but costs more and needs real wall anchors. Hook selection matters as much as the board itself: straight hooks let pans swing and clatter, while angled J-hooks or double-pronged hooks cradle the handle and keep the weight centered under the hole. Carbon steel and cast iron pans need the sturdiest hardware, since they run heavier than anything else in most kitchens.
A pegboard installation has to hit structure, not just drywall. Load-bearing studs or joists carry the weight; anything less risks the whole arrangement pulling free under a full set of cookware. Wall mounting keeps pans at arm’s reach and visible, though ceiling support is the alternative if cabinet space is already gone. Either way, the reinforcement is non-negotiable when you’re hanging that much metal.
4. Use a Pan Organizer Rack
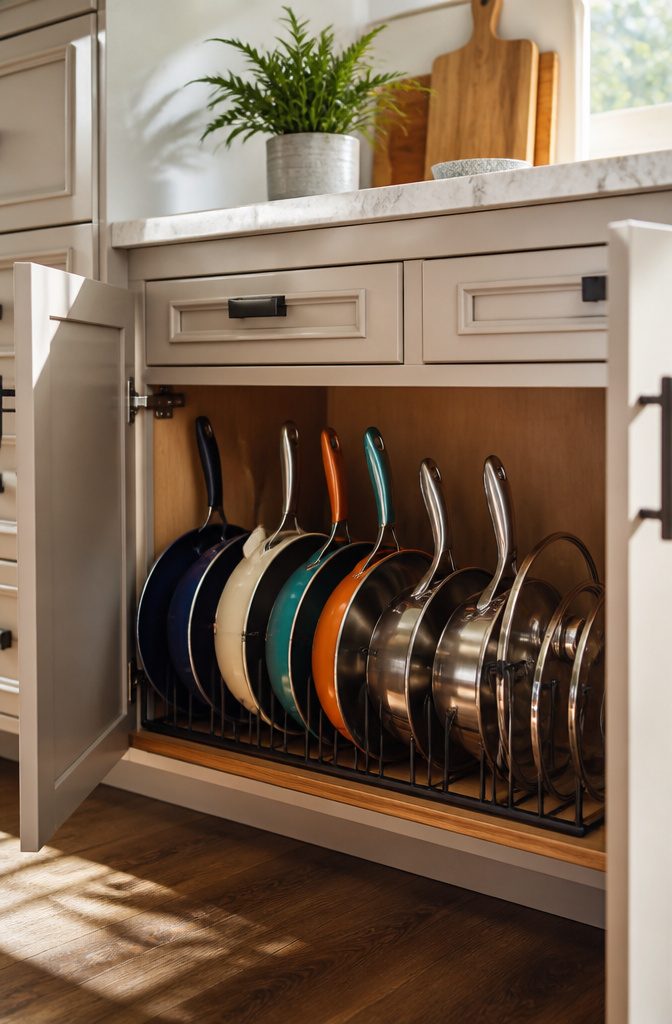
A pan organizer rack keeps each piece separated so coated surfaces never touch, which is the main reason I started looking at them. Most racks stand pans vertically in a low cabinet or slide horizontally into a deeper one, and the choice between those two setups depends entirely on the cabinet you have.
Vertical organizers work best in narrow cabinets where height is available; horizontal racks need more depth front to back but less clearance above. Before buying anything, measure the interior height, depth, and width of the cabinet, then check the rack dimensions against those numbers. A rack that fits on paper can still block the door hinge or leave no room for a lid to sit beside it. Some units expand to fill the width, which helps if you are working with a standard cabinet size but do not want to commit to a custom piece.
5. Stack With Protective Dividers
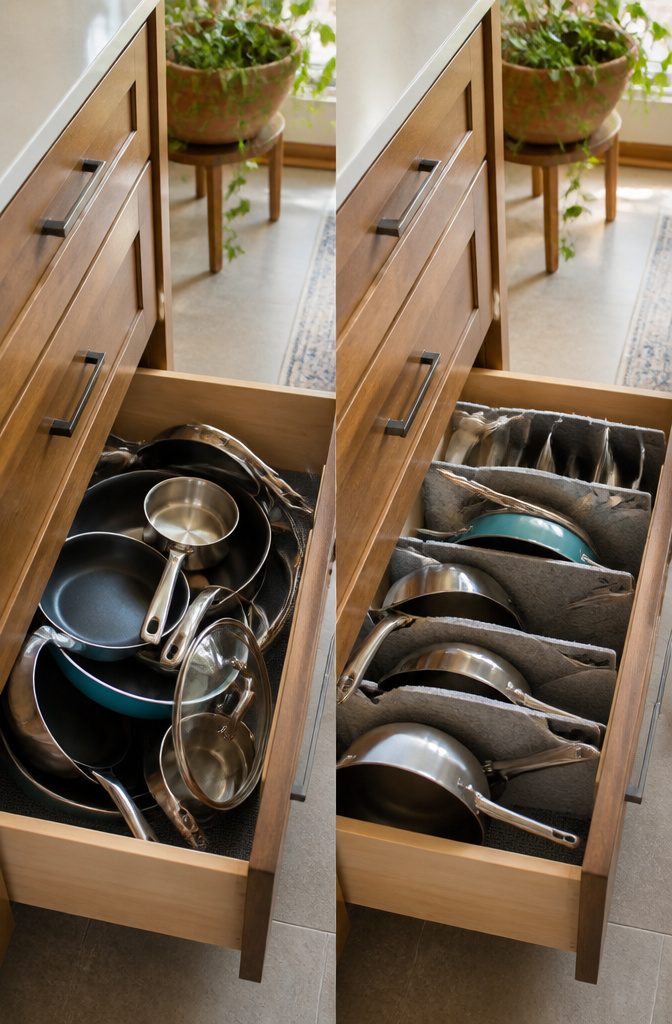
Paper plates saved my first nonstick set from the scrap pile three moves ago. I had stacked the pans shiny-side to shiny-side in a deep cabinet, and within a month the ceramic coating looked like it had been keyed. Nonstick surfaces scratch at the lightest contact, so any stack needs a buffer.
The free route works fine in a pinch. A folded dish towel or a paper plate between each pan breaks the friction. Felt rounds do the same job more neatly; the polyester ones come 16 inches across and trim down for smaller skillets. Their non-slip texture keeps the stack from shifting when you pull the bottom pan.
Cast iron and stainless steel are more forgiving. Steel can take direct stacking without visible damage, and cast iron only needs a divider if you want to protect its seasoned oil layer. But nonstick demands the barrier every time. Without it, you are buying the same pan twice.
6. Store Lids Separately
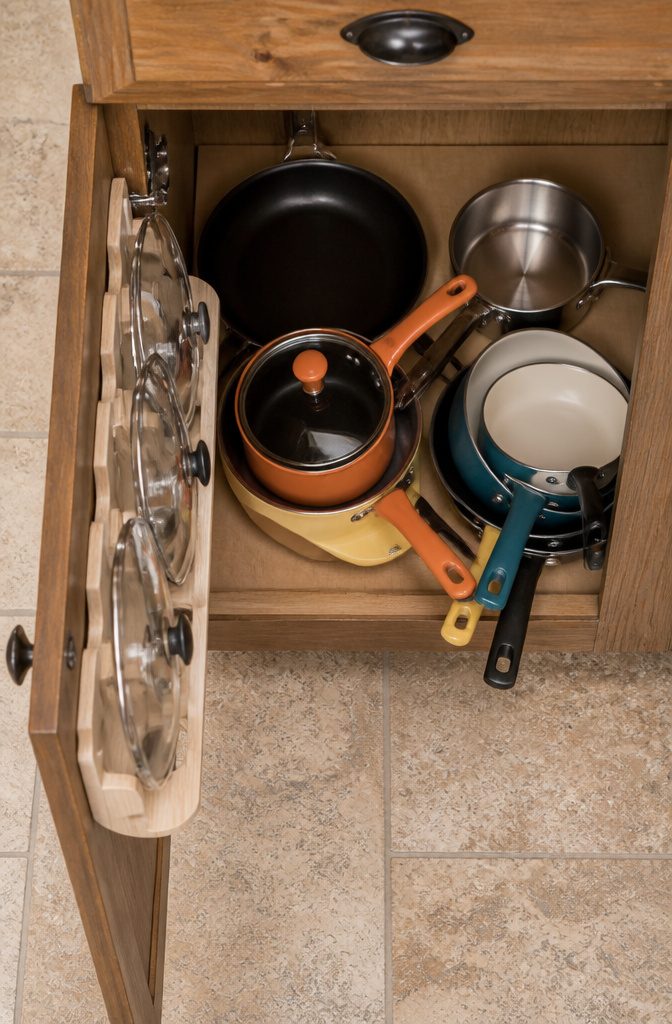
The first lid organizer I ever bought was a pull-out wire rack from Bed Bath and Beyond, the kind that slides inside a cabinet like a shallow drawer. It worked, but only because I stopped trying to nest lids inside pans first.
Nesting lids inside pans is the mistake that undoes most small kitchens. The lids shift, the plastic or glass edges chip against metal, and pulling one pan out becomes a five-piece avalanche. Storing them apart solves this immediately.
Lid racks mount on cabinet doors or stand upright on shelves, holding lids vertically so you grab the handle and go. File-style holders work the same way, slotting lids in like folders. Both keep the cooking surface of your pans untouched and give you full visibility. I have seen renter-friendly versions that sit on existing shelves without a single screw, and heavier slide-out units that install with basic brackets.
The minimum you need is vertical separation. A slim wire rack costs little more than a set of pan protectors and saves the space those padded layers waste. If you hang pans overhead or stack them in a deep drawer, the lids still need their own home nearby, or you will end up balancing them on top again out of sheer convenience.
7. Use Deep Drawers With Dividers
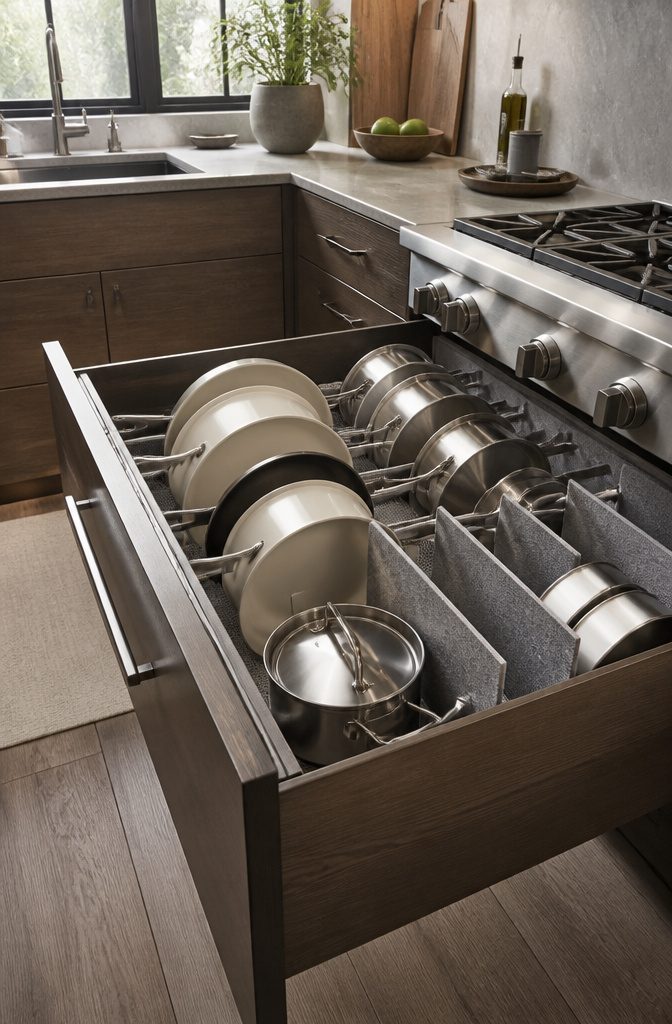
Deep drawers with dividers change the game for smaller pans that otherwise disappear into stacks. A sheet pan, a couple of saucepans, and a small skillet can all lie flat in their own slots, visible the second you pull the handle.
The drawer needs to be deep enough that the tallest pan sits below the frame, or the drawer won’t close. Most standard kitchen drawers run 22–24 inches front to back, which is plenty for a 16-inch felt divider or a plywood cubby. One approach uses 1/4-inch plywood strips to build custom compartments; another drops in ready-made felt dividers, 16 inches across, trimmable down for narrower cookware. Either way, a non-slip liner underneath keeps pans from sliding when the drawer opens and closes.
The real limit is what fits flat. A 12-inch skillet probably belongs on a wall rack or ceiling hook. But lids, sheet pans, and anything under ten inches across? They line up like books on a shelf, no lifting, no scratching, no restacking after every dinner.
8. Add a Roll-Out Drawer
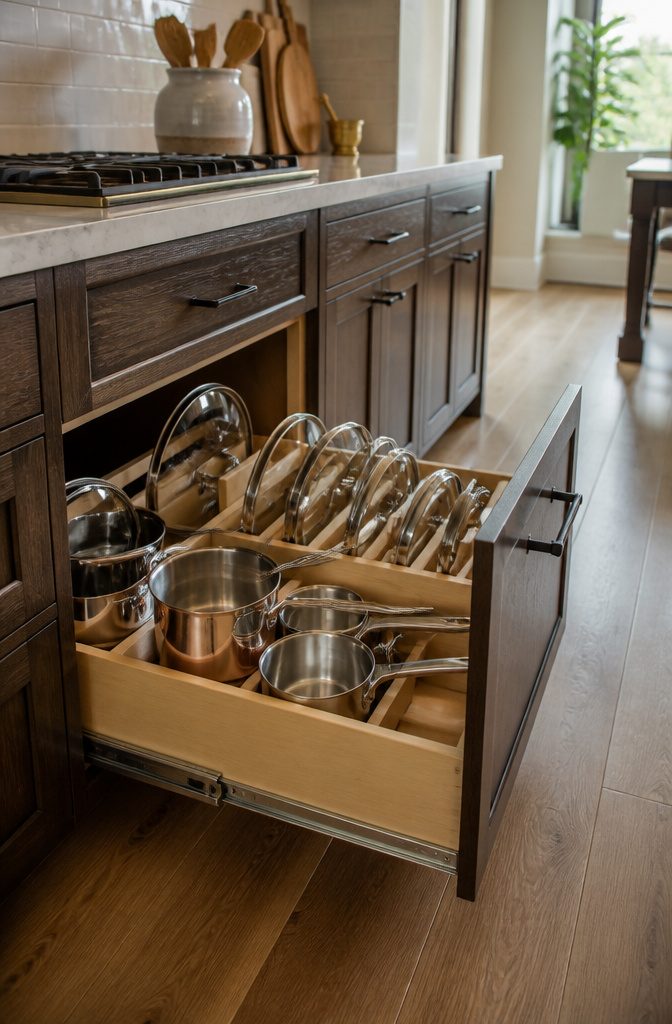
A roll-out drawer changes the game for base cabinets because it brings the pot to you instead of sending you climbing inside after it. Systems built for a 12-inch cabinet opening or wider slide out on tracks and hold the weight of cast iron or a stack of stainless without complaint, which makes them one of the more forgiving retrofits if your kitchen was built in the era of fixed shelves.
Retrofit kits bolt onto existing cabinet floors and ride on side-mounted glides; built-in drawer boxes replace the whole shelf-and-hinge setup and cost more but move smoother and carry more. Either way, the handle is the detail that trips people up. A pot stored handle-out needs clearance for that protrusion, so the drawer front sits proud or the cabinet box is deeper than standard. Measure the diagonal of your largest pan with its handle, not just the pan itself, or the drawer will close on the metal and chew the finish. Stack pans inside each other if the drawer depth allows it; dividers keep lids vertical and stop the stack from toppling when the glide extends.
9. Put a Lazy Susan in a Corner Cabinet
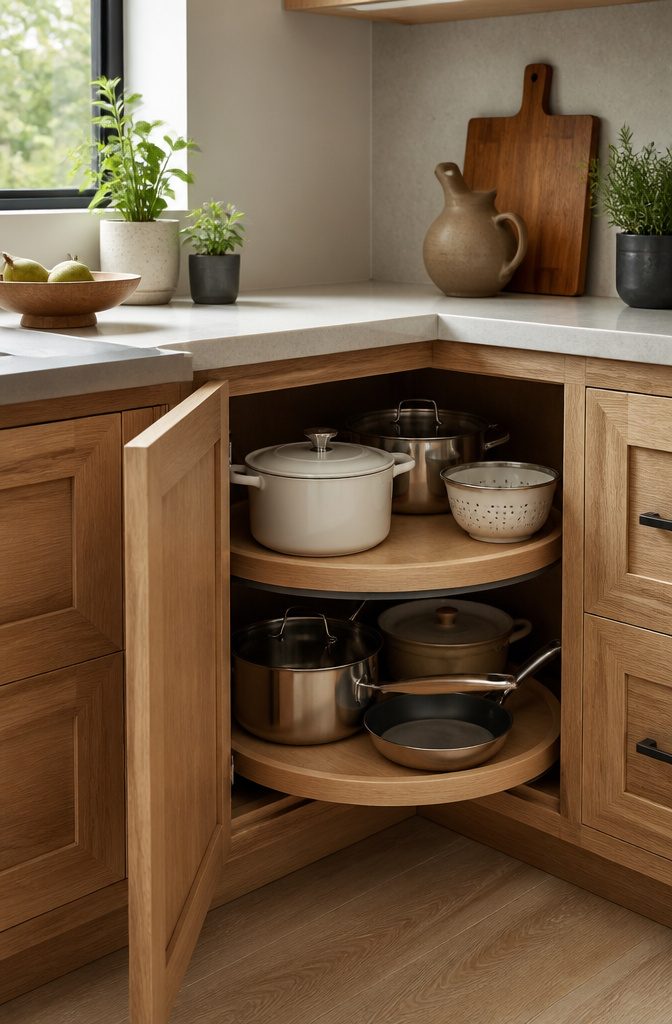
Corner cabinets swallow storage whole if you let them. A rotating platform turns that dead zone into reachable real estate, which is why a Lazy Susan belongs in the conversation for pots and pans organization ideas even though it comes with hard limits.
Most cabinet corners force you to kneel and reach past the front row to find the back. A turntable fixes the access problem, but the diameter matters more than people expect. The shelf has to clear the door swing and the adjacent wall, so the usable surface shrinks fast. Weight capacity shrinks too. A loaded 12-inch cast-iron skillet can push past what the hardware tolerates, and the raised lip that keeps items from sliding off becomes a liability when you are trying to lower something heavy onto a moving target.
Light aluminum or tri-ply pans work here. Cast iron does not, not unless you are storing one small piece dead center and never moving the platform with weight on it. The better move for heavy iron is still a low drawer or a wall mount where gravity works with you instead of against a spindle.
10. Add Under-Shelf Baskets
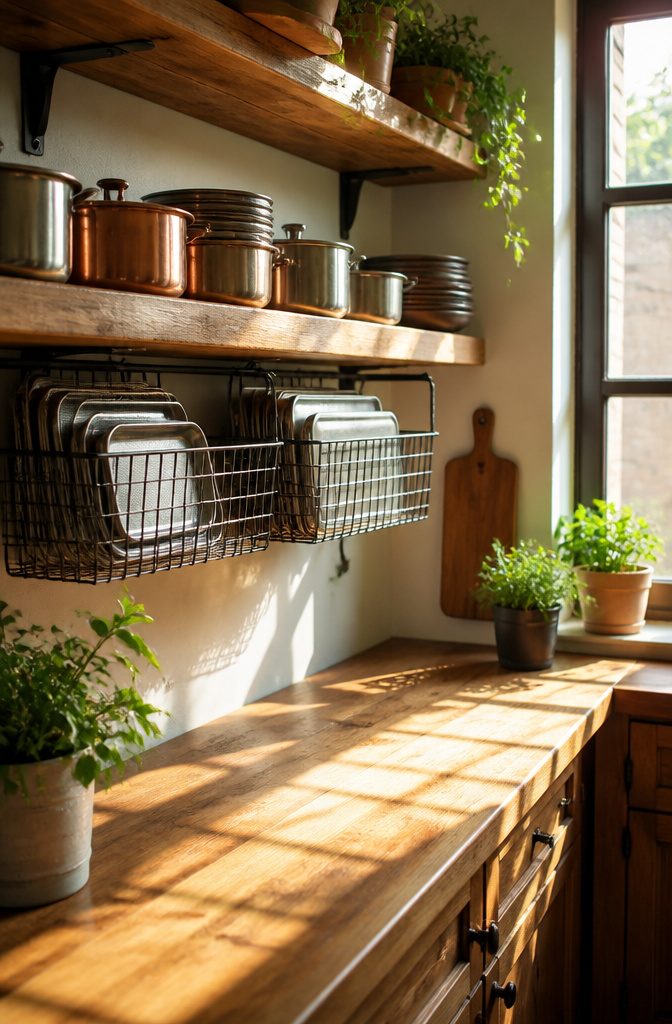
Sliding under-shelf baskets clip onto the rails of an existing shelf and hang a wire or mesh drawer in the air below. The lip of the basket needs to clear the shelf board, so anything thicker than about an inch starts to eat the usable height of the basket itself. Measure your shelf before you order; a three-quarter-inch plywood shelf leaves room for a decent basket, but a chunky two-inch butcher block leaves almost none.
These baskets suit flat things best. A half-sheet pan slides in and out cleanly, and a cooling rack lies flat without drama. A sauté pan with a handle wants to tip, and the handle pokes out the front and catches on knees or cabinet doors. Lids wander too; nothing holds them upright, so they clatter against the basket wire when you pull it out.
Installation takes a screwdriver or sometimes just thumb pressure on the clips. Renter-friendly versions exist that grip by friction, though a loaded basket tests that grip every time you yank it forward. I would not trust friction mounts for a stack of cast-iron griddles, but for two aluminum sheet trays and a silicone mat, the weight stays reasonable.
11. Hang Lightweight Pans on a Magnetic Strip
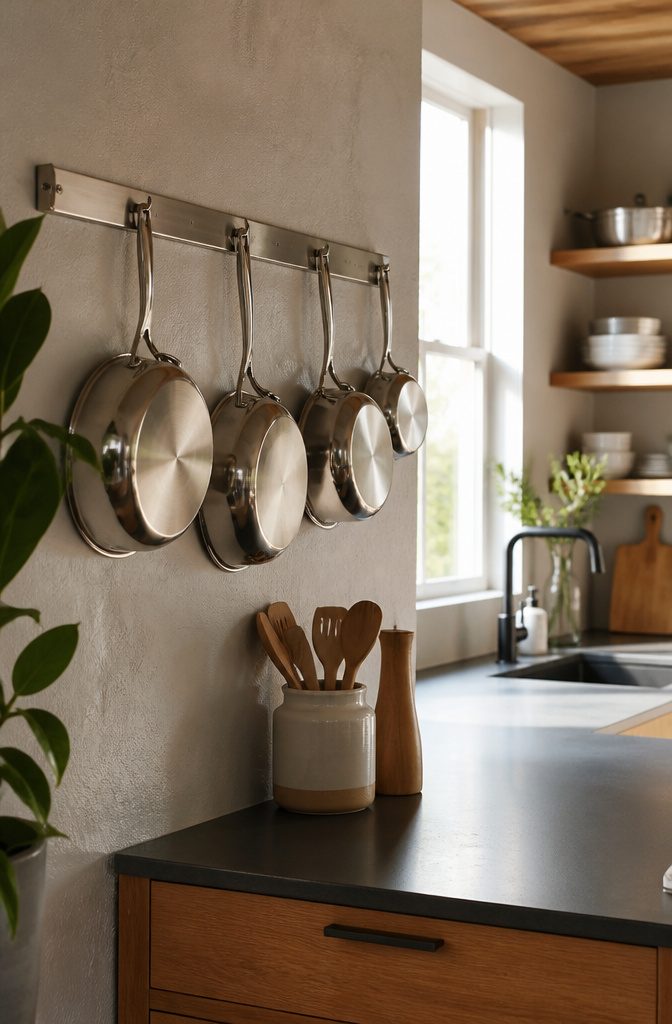
The magnetic strip trick works best for the pans you actually grab mid-cook: small saucepans, a crepe pan, maybe a lightweight skillet. Only ferrous metals stick, which means your cast iron will hold but most aluminum and copper pans slide right off unless there’s an iron core hidden in the base. Before you commit, test the bottom with a refrigerator magnet.
Weight is where this idea fails loud. A standard knife strip tops out around a pound or two of pull force, and a half-full saucepan of marinara sailing off the wall at 7 p.m. teaches you that fast. Heavy-duty tool-bar magnets rated for shop use hold more, but even those have a limit that arrives without warning when a pan gets bumped while hot.
Mounting matters more than the magnet itself. A strip screwed into a single stud with an anchor in drywall only stays put until the load shifts. Two points of contact, minimum, and keep the strip low enough that a drop doesn’t hit glass or a toe.
The strip does free a drawer, and the pans look good lined up like tools in a workshop. Just keep the heaviest stuff on a hook or in a cabinet where gravity is already working for you, not against you.
12. Build a Toe Kick Drawer
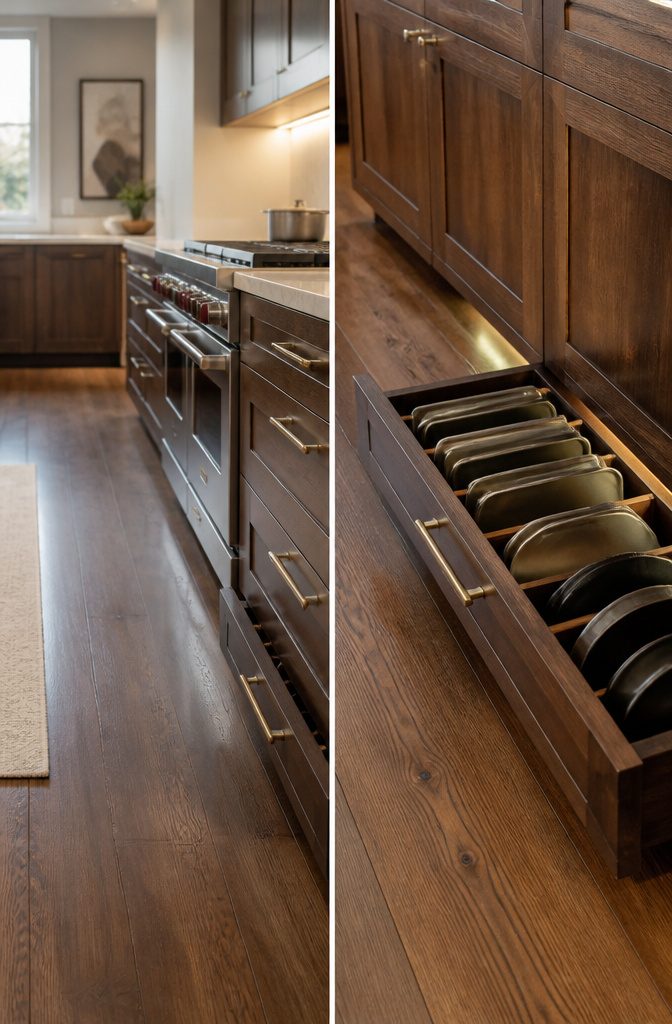
The boarded gap between your base cabinets and the floor is dead space until you pry it open. Nicole from Tikkido built hers into a hidden drawer using IKEA drawer kits, and the project lands squarely in weekend territory because you are building, not buying a finished product that happens to fit.
Four inches of height is about what most toe kicks surrender, which rules out stockpots but welcomes cake pans, baking sheets, lids, and shallow frying pans. That height limit is real; a deep sauté pan will not slide in without fighting the cabinet frame above it.
Floor proximity means moisture. Kitchen floors see splashes, mopping, and the slow seep of humidity from below-slab spaces in older homes. A drawer riding this low needs a bottom panel that can handle occasional damp, and the contents inside should be things you use often enough to rotate before they sit long enough to matter.
What convinced me, reading through the builds, is that this works best as hidden storage for the pieces that clutter upper cabinets without earning their keep there. The cake pans you pull out twice a month, the lid collection that never stacks right. Out of sight, but not out of reach.
Why Organization Matters for Cookware Life
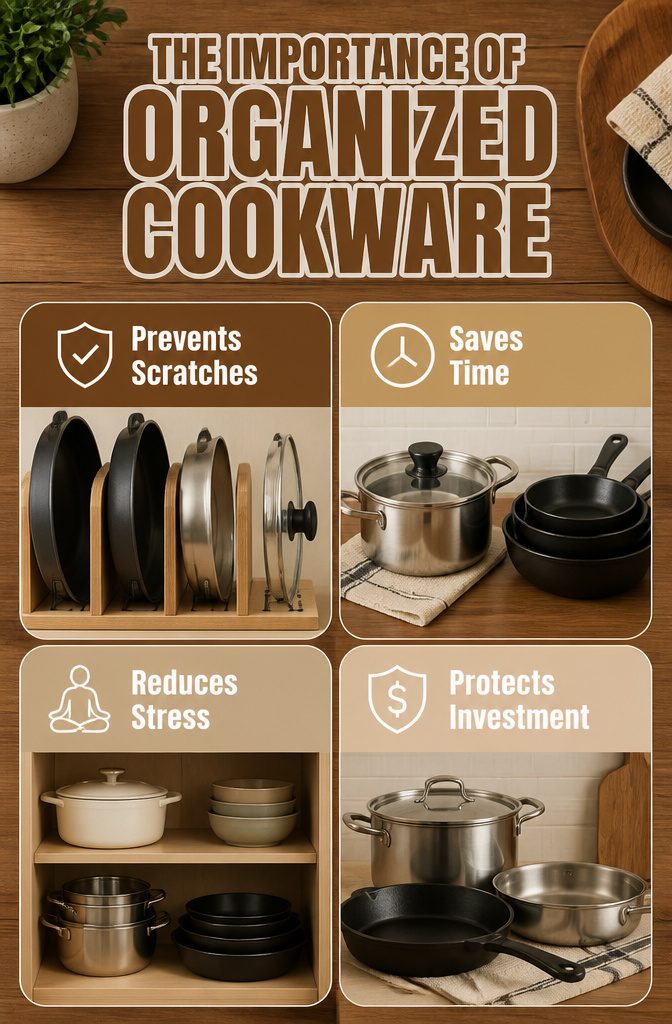
A scratched non-stick pan is usually a pan that got stacked. The coating flakes where metal presses against metal, and once that starts, the pan cooks unevenly and you end up replacing it years before you should. Carbon steel can scratch carbon steel too, so even durable cookware isn’t immune if you’re cramming pieces together without a system.
The real cost isn’t just the damage, though. It’s the twenty minutes spent hunting for the right lid while water boils over, or pulling out three pans to reach the one on the bottom and leaving the rest on the counter. In a home kitchen that gets old fast, and if you’ve ever cooked for guests while digging through a cabinet, you know the frustration multiplies.
An organized storage setup protects the investment you’ve already made and cuts the mental load before you even turn on the burner. When each piece has a defined spot, you grab what you need, cook, and put it back without thinking. That’s the difference between a kitchen that works with you and one that works against you.
How to Stack Without Ruining Anything
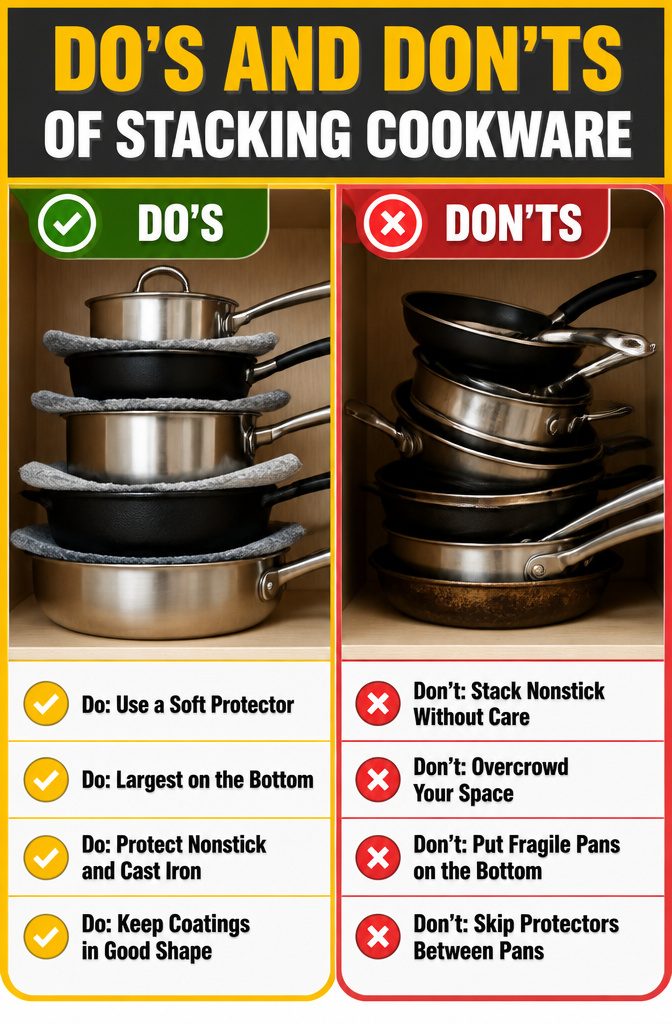
Stacking cookware works fine if you respect the surface underneath each piece. A soft towel or felt pan protector between every item keeps metal from grinding against metal, or against a fragile nonstick coating. The sources I read put the largest pan on the bottom and step down by size, which sounds obvious until you try lifting a heavy Dutch oven off a stack of three lighter pans to get at a skillet. I would rather nest my stainless steel without fuss, since it can take the contact, but nonstick and cast iron both need that buffer. Cast iron carries another wrinkle: the seasoned surface stays intact longer with a divider, and the oil you wiped on last time does not migrate to the pan below. What never belongs on the bottom is anything you cannot afford to bear weight, which in practice means your thinnest nonstick skillet or any pan whose coating already shows wear. The knee and back complaint is real, though. Stacking saves inches of cabinet depth, but unstacking to reach the middle pan turns a two-second grab into a small production.
What Each Cookware Material Needs
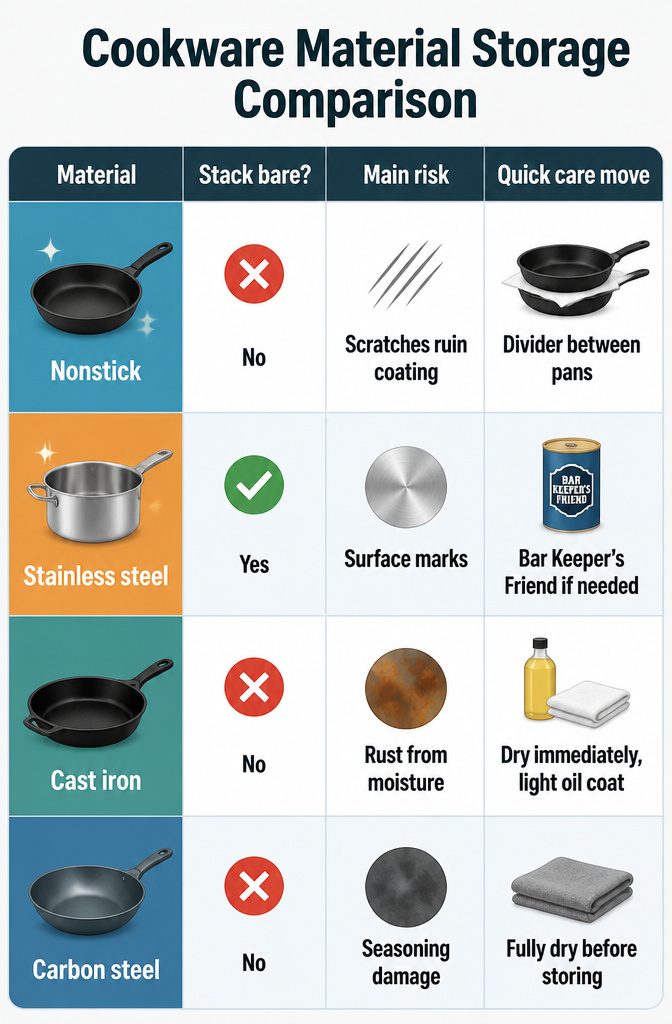
The material sitting in your cabinet changes how you can store it. Nonstick coatings scratch if metal touches them, so those pans need a divider, a paper plate, or a folded kitchen towel between each piece if you stack them. Stainless steel is the forgiving one; you can nest it without protection and scrub out marks later with something like Bar Keeper’s Friend if they develop. Cast iron and carbon steel both carry seasoning you want to preserve, but cast iron has the extra problem of rusting if moisture sits on it. Dry it right after rinsing, rub on a thin layer of oil, and store it somewhere with airflow. Carbon steel dries faster but still needs to be fully dry before it goes back.
| Material | Stack bare? | Main risk | Quick care move |
|---|---|---|---|
| Nonstick | No | Scratches ruin coating | Divider between pans |
| Stainless steel | Yes | Surface marks | Bar Keeper’s Friend if needed |
| Cast iron | No | Rust from moisture | Dry immediately, light oil coat |
| Carbon steel | No | Seasoning damage | Fully dry before storing |
Weight matters too. Cast iron and carbon steel pans are commonly the heaviest in any kitchen, so a hanging rack needs to be extra-sturdy if you go that route. Stacking them works, but unstacking heavy pans every evening gets old fast.
Mistakes That Waste Your Time and Money
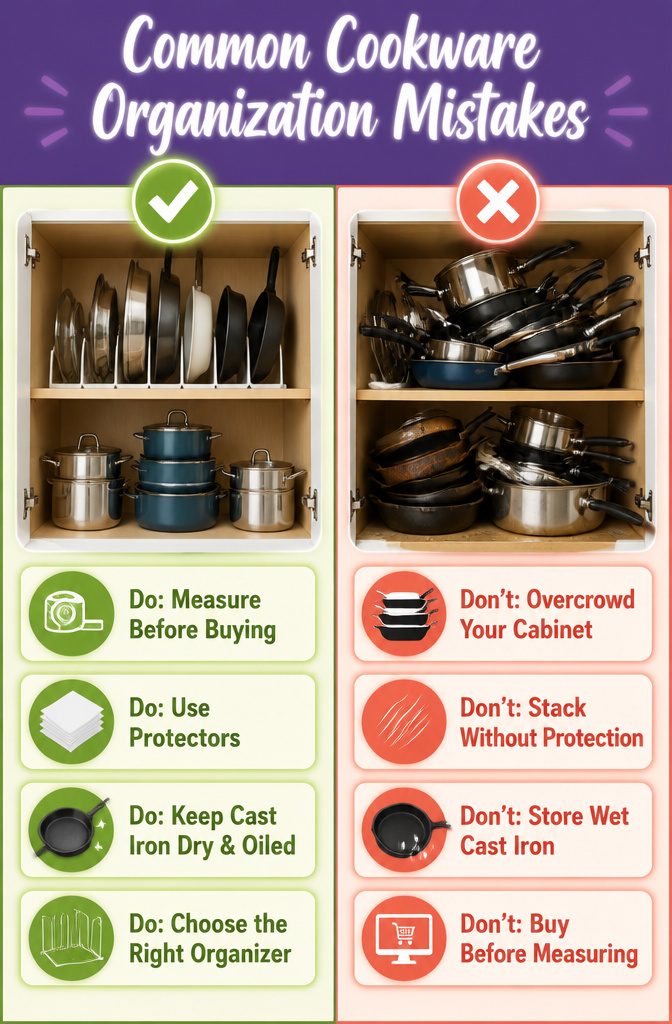
A few missteps tend to undo even the best pots and pans organization ideas before they have a chance to work.
- Overcrowding the cabinet leaves pans wedged too tight. Pulling one by the handle when it’s stuck at the bottom of a stack risks warping the pan or damaging whatever’s above it.
- Stacking without protection scratches nonstick surfaces and chips ceramic coatings. A paper plate, a folded kitchen towel, or a cut-down placemat between pans costs nothing and buys years of use.
- Storing cast iron wet invites rust fast. Iron needs a quick dry and a thin wipe of oil before it goes back, not a damp spot near the sink.
- Buying the rack or divider before measuring the cabinet is the mistake that stings most. The organizer that looked perfect online becomes the thing you return Monday morning.
Frequently Asked Questions
How do you store pots and pans in a small space?
Maximize vertical space with wall racks, ceiling racks, or pegboards so pans hang at eye level instead of stacking in cabinets. Deep drawers with dividers and roll-out drawers also squeeze function out of tight base cabinets, while toe kick drawers reclaim the four-inch gap beneath your cabinets for flat pieces like sheet pans and lids.
Is it OK to stack pots and pans?
Yes, but only with a protective divider between each piece. Paper plates, folded dish towels, felt rounds, or purchased pan protectors all break the contact that scratches nonstick coatings and chips ceramic surfaces. Stainless steel can handle bare stacking, but cast iron and carbon steel still benefit from a divider to protect their seasoned surfaces.
How long should you keep pots and pans?
Nonstick pans last about five years before the coating degrades enough to risk flaking into food. Stainless steel and cast iron can last decades with proper care, as long as they stay unwarped and cook evenly across the bottom. The real limit on nonstick is visible damage to the coating, not a calendar date.
What’s the best way to care for pots and pans?
Care depends entirely on the material. Nonstick needs gentle cleaning with baking soda and a non-metallic sponge, plus plastic or wooden utensils only. Stainless steel tolerates aggressive scrubbing and Bar Keeper’s Friend for marks or rust. Cast iron gets cleaned right after use without soap, then dried immediately and wiped with a thin oil layer before storage to prevent rust.