
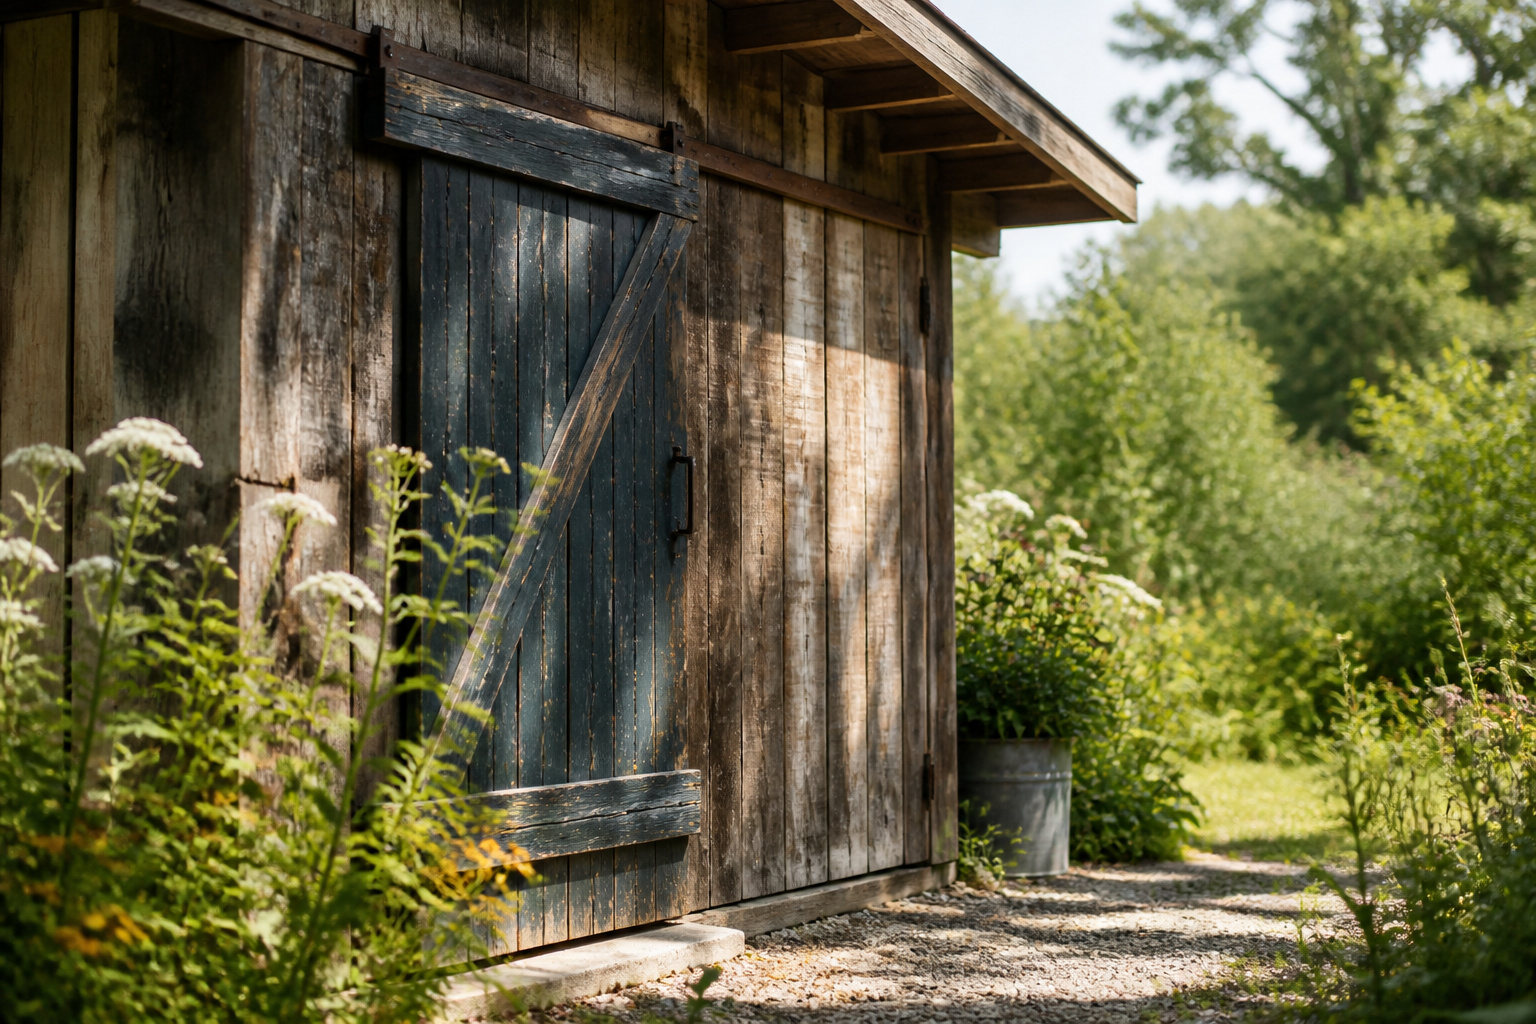
The right simple shed idea depends on how much time you have versus how much character you want. Most of these builds run one to three weekends, and the gap between them is usually spent hunting for reclaimed wood or waiting for denailed boards to sort into usable widths. A $47 farm-store barn-door track can shift the whole look of a boxy utility build, but only if the header plate above the opening is solid enough to carry the weight.
1. Reclaimed Wood Shed
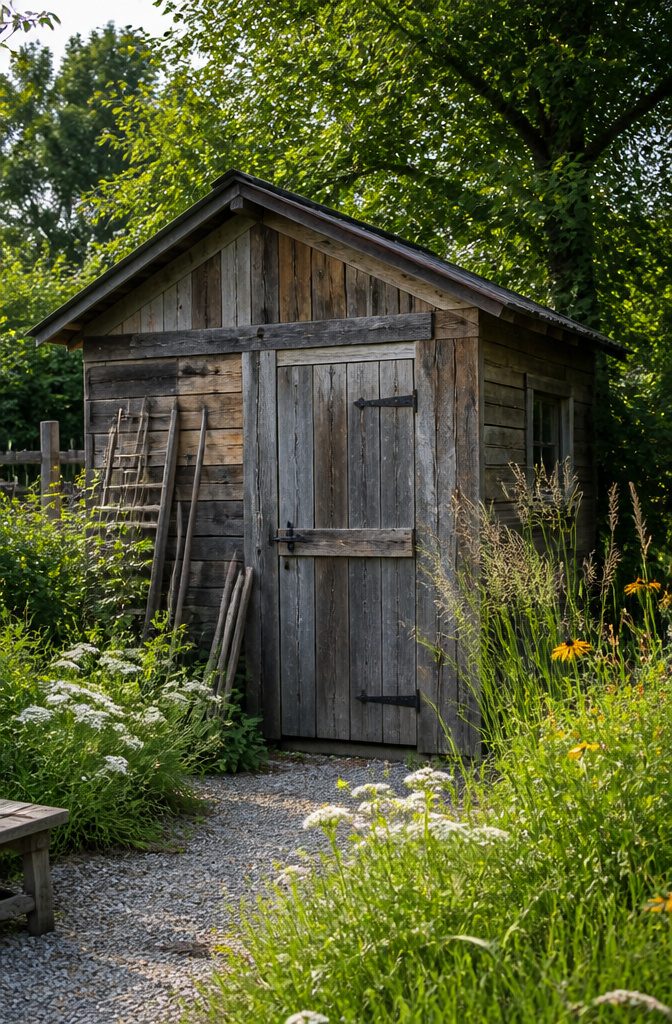
Reclaimed boards turn a basic utility box into something with history, and the hunt for wood is half the project. I found most of mine through a demolition crew taking down a 1940s porch; barn sales and Habitat ReStores are worth a Saturday drive too. Pull every nail you can find, then pull again with a metal detector, because a blade hitting hidden hardware ruins the rustic look and the saw in one second. Rot pockets and inconsistent widths are not flaws here; they are the texture that new lumber cannot fake. The time cost runs about triple what buying fresh studs would take, between sourcing, denailing, and sorting boards into usable widths. For me that trade made sense at around two weekends versus one, since uniformity would have defeated the whole point. The gaps and warp become the character once the walls are up and weathered to silver-gray.
2. Potting Shed With Bench
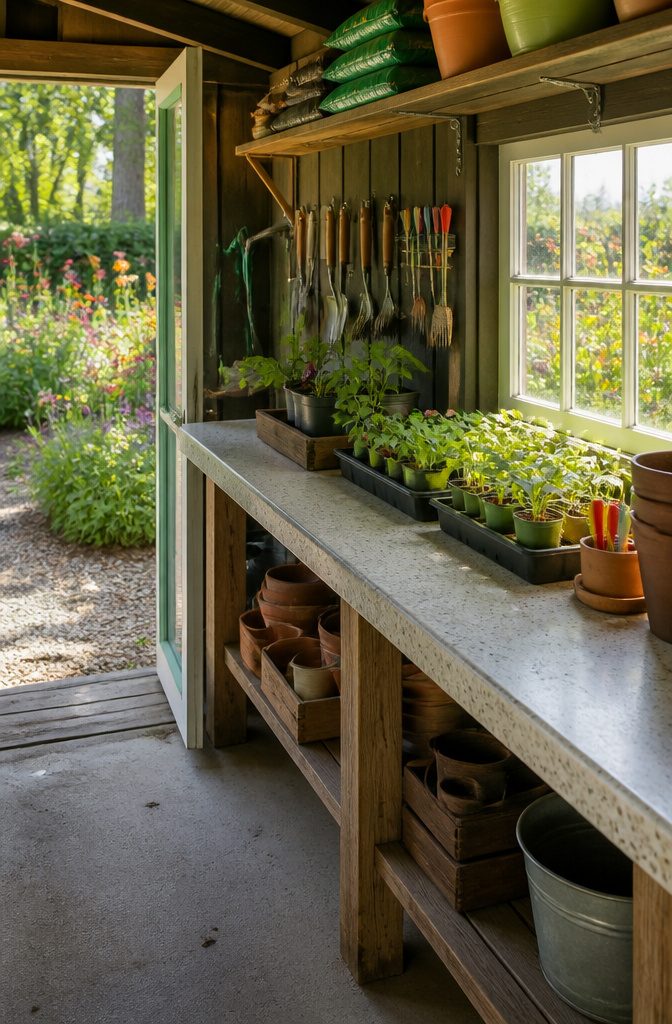
A potting shed lives or dies on its bench. Mine sits at 36 inches high, which sounds random until you spend a spring afternoon transplanting seedlings and realize your back is not screaming. That height came from trial and error; my first attempt was standard kitchen counter height, 36 inches already, but I had doubted it and built lower. Wrong call. Knees and lower back voted no.
The surface is a scrapped kitchen countertop, the laminate kind with the rounded front edge. A contractor friend was swapping a kitchen and let me haul the old one away. Laminate cleans up with a hose, and the slight texture keeps pots from skating around when you are elbow-deep in damp soil. Wood looks nicer but drinks up moisture and swells; I learned that on the first bench, which lasted two seasons before it crowned like a taco.
Above the bench I added a shallow shelf, just deep enough for a row of soil bags. Keeping them off the concrete floor matters more than I expected. Bags left on the ground wick up moisture, turn rock-hard on the bottom, and spill every time you lift them. The shelf cost nothing, just scrap 1x4s from the same countertop haul, screwed to the studs with simple L-brackets.
3. Garden Shed With Shutters
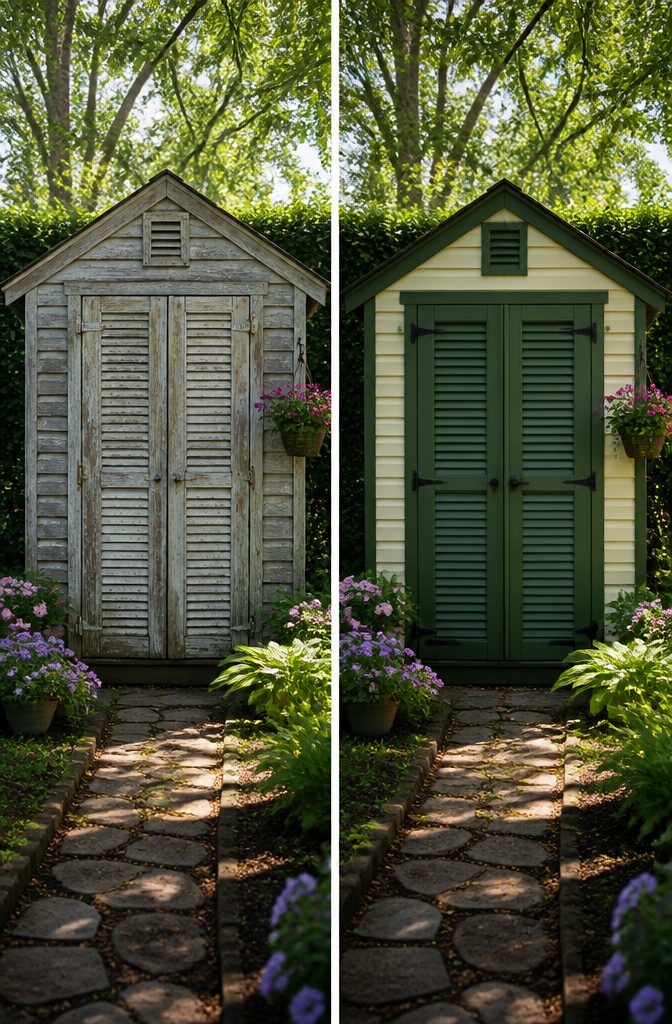
Hollow-core closet doors make surprisingly convincing shutters once they’re cut down and screwed flat against a shed wall. The fake louvers read fine from ten feet away, which is about as close as anyone stands to a garden shed anyway. I found mine curbside on a Saturday morning, but architectural salvage runs about $8–15 per door if you’re buying.
Paint is what keeps them from looking like an afterthought. Match the shutter color to something already on the structure, not the wall itself. On my shed, the shutters carry the same dark green as the door trim, so they look planned rather than tacked on. Skip the cutesy cutout shapes or louver hardware from the craft store; simple strap hinges in black or rusted steel read more convincing and cost half as much.
The fake hardware is the detail that sells it. I used three-inch dummy straps with rounded ends, screwed straight through the door skin into the shed wall behind. Because the doors are hollow, pre-drill and stop when the bit bites, or you’ll punch through to the front face.
4. Shed With Barn Door
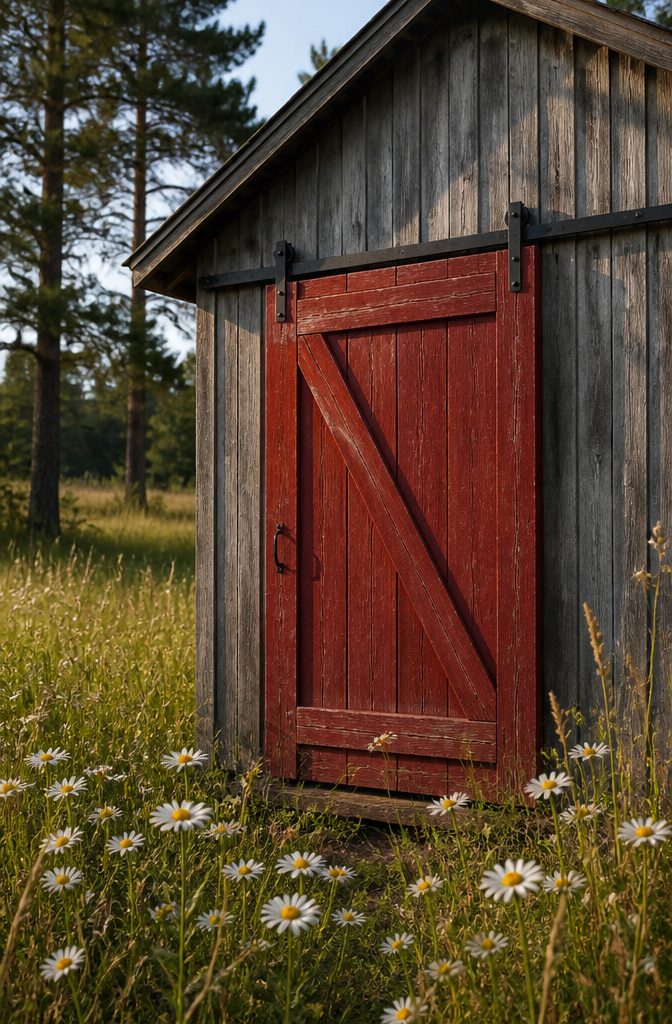
A single barn door on exterior hardware turns even a boxy utility shed into something with a little character. The track cost $47 at a farm store, which was less than half what the big-box places wanted for a similar kit. The door itself came together from three 1×6 boards braced with a simple Z-frame, nothing fancy.
My first try went wrong in two ways. The door ended up heavier than it needed to be because I used construction-grade pine without thinking about weight, and I skipped the stop block at the end of the track. After about a week the door had slammed past the end of the rail hard enough to bend one of the rollers. I rebuilt the door with cedar, which dropped the weight by maybe a third and should last longer outside anyway. A scrap 2×4 cut to length and screwed to the wall as a stop block took ten minutes and solved the rest.
The exterior-mounted track means you do not need a perfect door jamb, which saves time if your shed framing is a little rough. Just make sure the header plate above the opening is solid; that is where all the weight lives.
5. Shed With Window Boxes
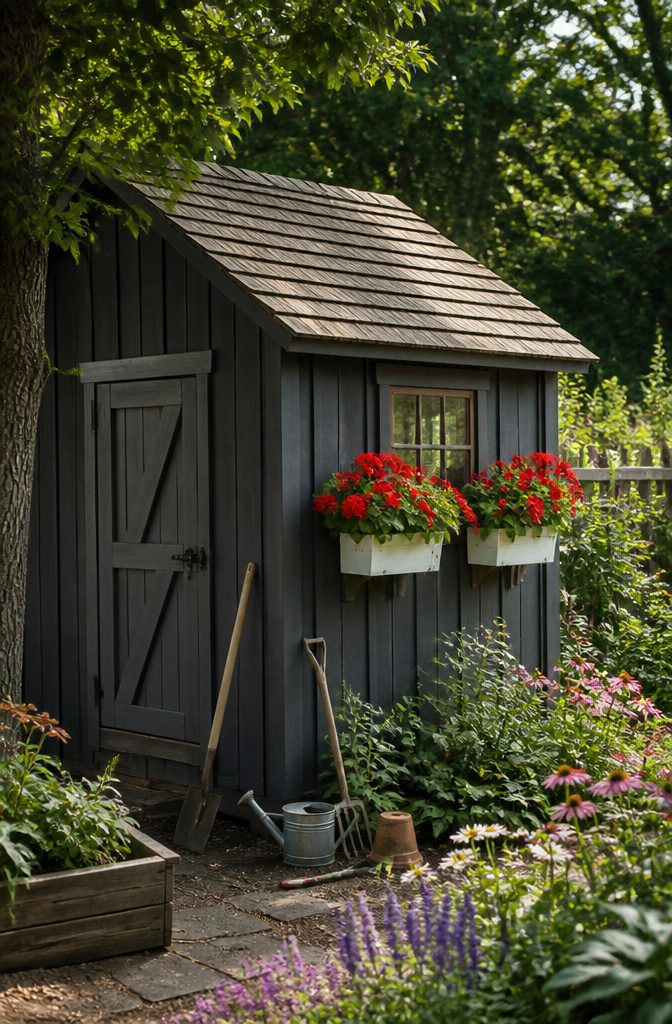
Vinyl gutter end caps snap on and stay put, which makes them the least fussy window box material for a shed that sits through wet seasons and dry ones without attention. Wood rots out in two or three years where I live, and cedar boards thick enough to last cost enough that someone will pry them off later. The gutters look trim, drain already if you drill a few extra holes along the bottom, and run about eight dollars for a ten-foot piece that yields two boxes.
I screwed straight through the gutter back into the shed siding, not the window trim, because trim pulls loose under the weight of wet soil and a gust. Two fasteners per box, set an inch below the soil line so they stay hidden. Annuals work best here since you swap them without disturbing the roots of anything permanent. I use whatever fills out fast; last season it was red geraniums against the gray siding, and the contrast carried the whole wall.
6. Shed With a Porch
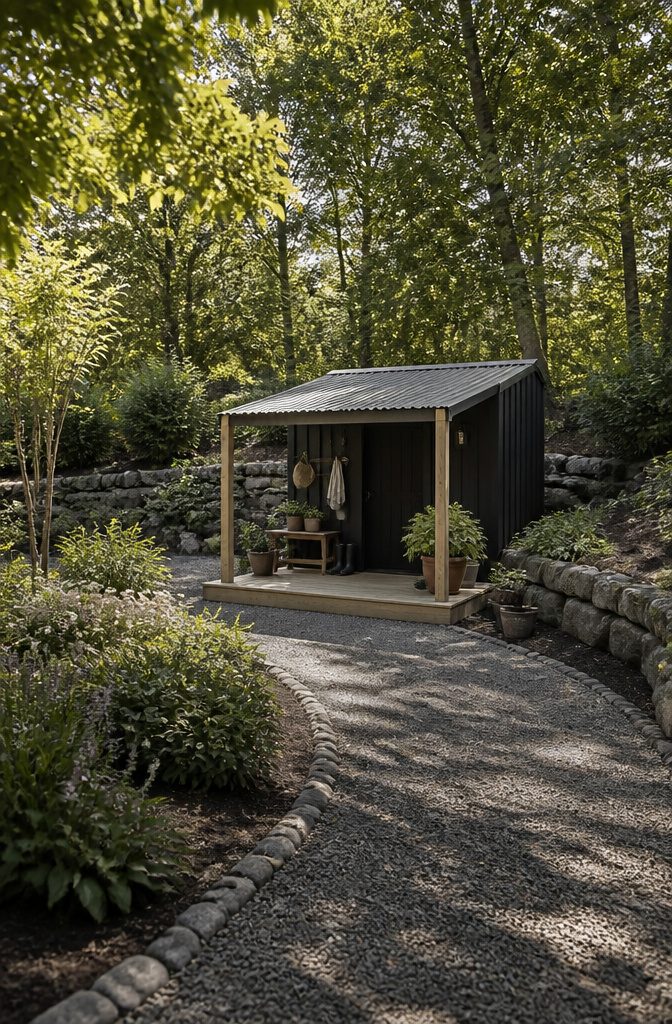
A porch turns a shed from storage into a place you actually want to step inside. Four feet of depth is enough for a metal chair and a spot to leave muddy boots without tracking water through the door. The key is running the same corrugated roofing straight from the main shed over the porch so the two pieces read as one structure rather than an afterthought. Match the roof pitch exactly, or the joint becomes a leak waiting to happen. The posts can be simple 4x4s set on concrete pavers rather than full footings; you are not holding up a house. Paint the trim to match the shed body and the porch disappears into the silhouette. The whole add-on takes a Saturday if the hardware store cuts the roofing to length, and it costs less than a prefab awning that never looks quite right.
7. Vertical Garden Shed Sign
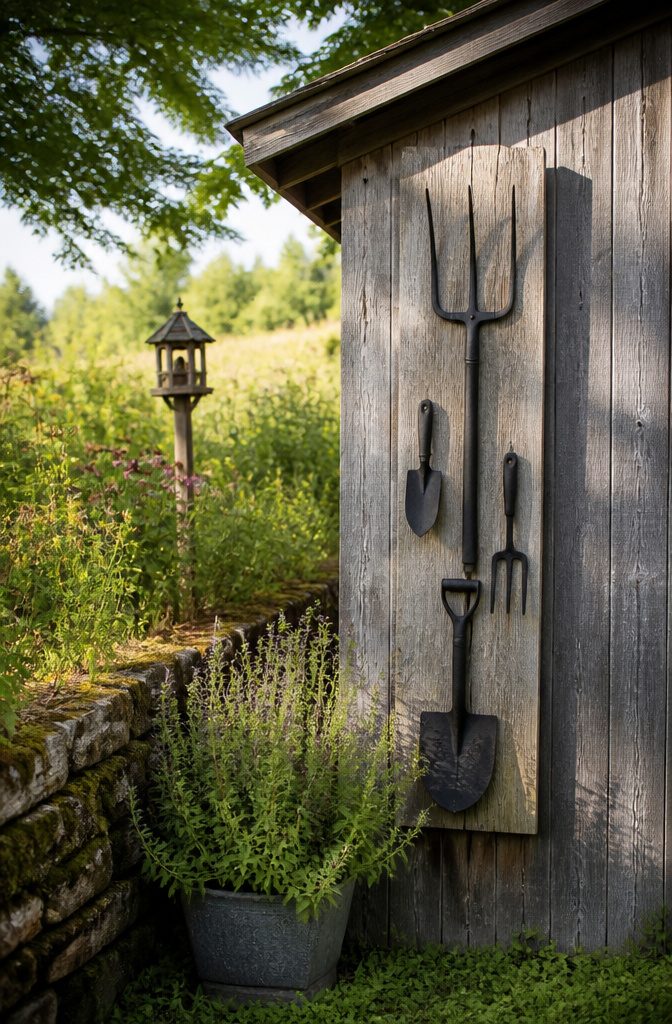
A broken pitchfork still looks like a pitchfork, which is more than I can say for most things I throw out. Mine went through the fence rail last spring when I hit a root I did not know was there, and the tines bent past straightening. Rather than replace it, I pulled two more ruined tools from the pile: three hand trowels with split handles and one cultivator that lost its grip to dry rot.
The arrangement matters more than the tools themselves. I laid them on a 1×10 pine board until the shapes stopped looking like clutter and started reading as one piece. The cultivator went center with its three tines up, the pitchfork hung below it handle-down, and the trowels filled gaps at the edges. One color of spray paint ties it together; I used matte black, and the rust pocking through after two winters actually improved the look. Gloss or satin would have shown every flaw. Rainbow was never an option. A shed sign that tries to be cute ages fast.
I drilled two holes through the board, ran exterior screws into the shed studs, and sealed the back with two coats of leftover deck sealer. No wire, no picture hanger, nothing that rusts through in a humid summer. The tools are heavier than they look, and the whole thing has stayed put through two Northeast winters.
8. Shed With a Garden Gate
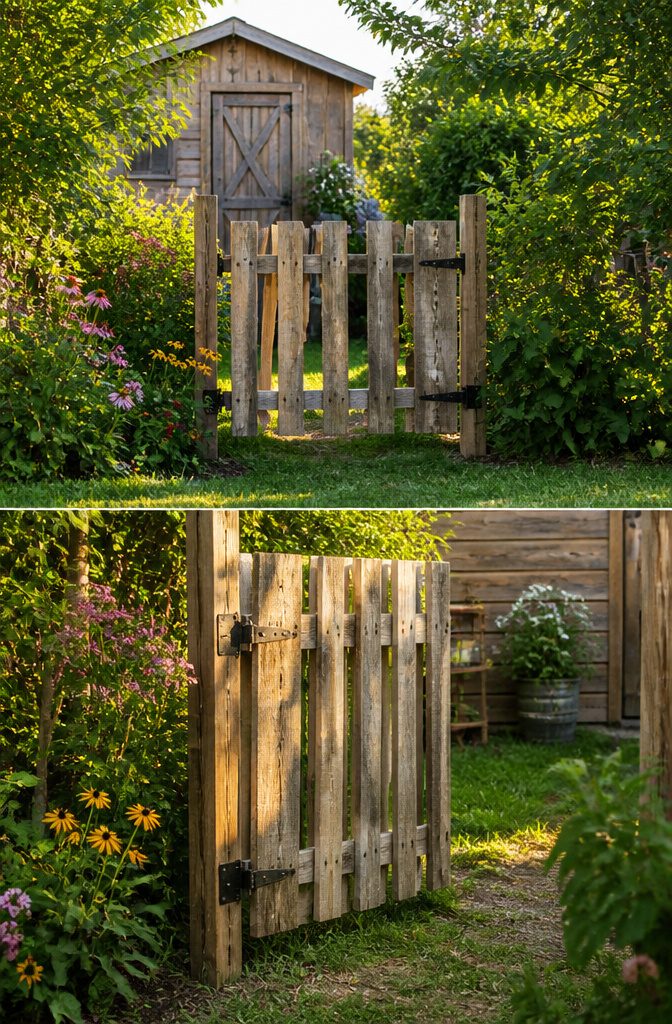
A garden gate built from pallets turns the walk to your shed into something that feels intentional rather than leftover. I pried apart two standard pallets for the slats, which gave me enough weathered pine to fill a 36-inch opening with a little to spare. The 2×4 frame came next, pocket-screwed together flat on the garage floor so the gate stayed square while I worked. Strap hinges went on the shed side of the frame; the long plates spread the load across three slats and keep the weight from tearing out over time.
The detail that matters most is the gap I left at the bottom, roughly two inches of daylight between the slats and the ground. Drainage is the reason. Rain runs off the slats, dirt washes underneath, and without that space the bottom rail sits in wet mulch and rots within a couple of seasons. A gate that scrapes the ground looks finished and tight, but it fails faster. The two-inch gap keeps feet drier too, since mud doesn’t pile against the face the way it would with a tight fit.
9. Shed With Edged Flower Beds
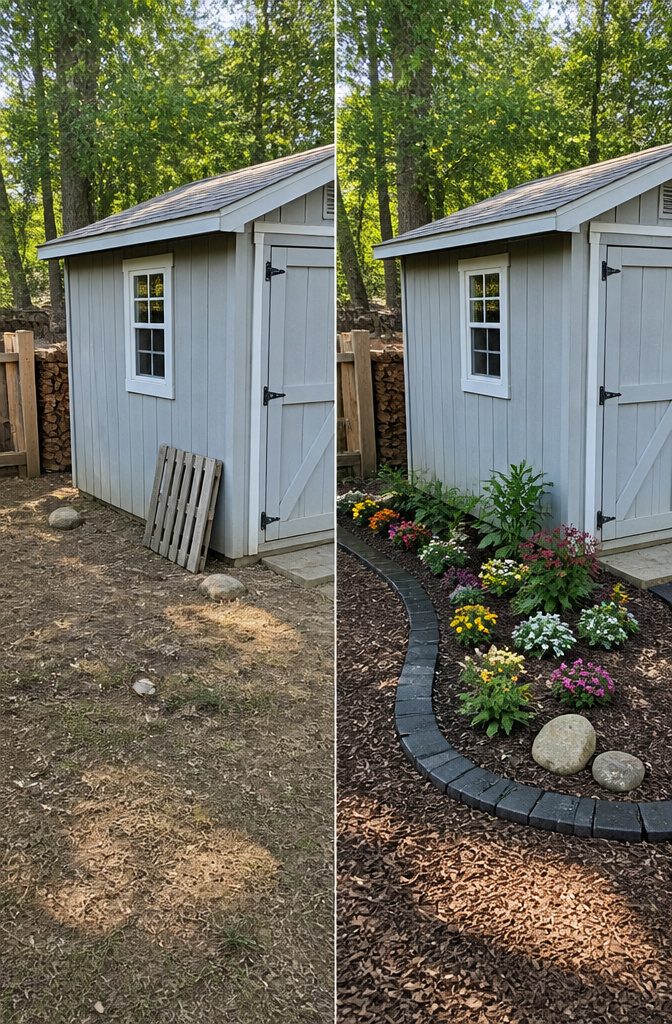
Roof shingles left over from a job site or pulled off during a neighbor’s replacement make a surprisingly clean edging material. I pressed them half-vertical into the soil around my shed foundation, overlapping the tab ends so they curved with the building’s footprint. The asphalt cuts grass roots on contact, so the beds stay defined without the constant trimming that wood edging demands.
The first year they looked raw, almost too dark against the siding. By year three, weathering had grayed them to a tone that reads as intentional rather than improvised. The curve matters more than the color, though. Straight lines fight the shed’s geometry; a gentle arc following the foundation softens the whole structure without requiring any cutting of the shingles themselves.
Budget for this runs near zero if you ask around for discards, but the work is harder on your hands than it looks. Wearing gloves is non-negotiable; the granule surface chews through fabric fast. Depth is the detail that determines whether this lasts: two-thirds buried, one-third exposed, or the freeze-thaw cycle will push them out of line by spring.
10. Shed With Vintage Decor

A rusty bike propped against the shed wall reads as collected garden art; three bikes and a broken wheelbarrow read as the start of a junk pile. The line lives somewhere between two pieces and five, and I find it by stepping back to the fence line every time I add something.
The items that tend to work are the ones with a single, clear silhouette. A metal milk can stands upright and holds its shape from twenty feet away. A wooden ladder leaned against the siding gives the eye a vertical to follow. What tips over the edge, for me, is anything that needs explaining: the bike with no seat, the can with the dented side facing out, the ladder that splays because the ground is uneven.
Editing means removing the piece that fights the others, not adding something new to balance it. Last spring I pulled the milk can and left just the bike and ladder, and the corner finally looked intentional rather than accumulated. The can went back by the compost bin where its shape mattered less than its function.
Reproduction antique signs can fill a blank wall if the colors have already gone soft, but a shiny new metal bucket will undo the weathering on everything around it. Age is the one quality that cannot be stacked.
11. Shed With a Walkway
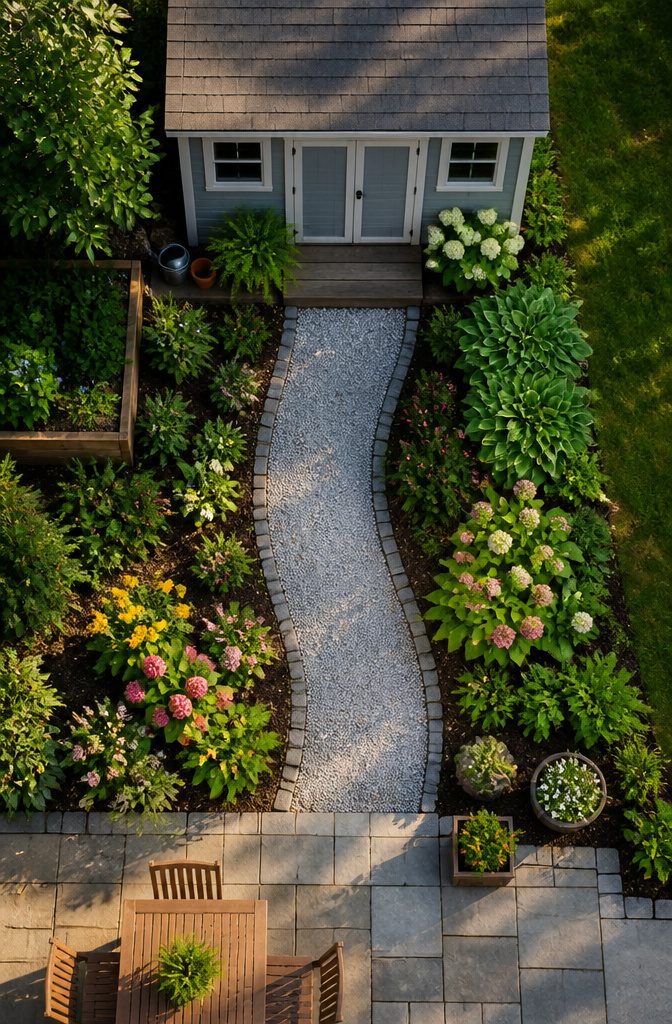
A garden walkway turns a shed from a storage box in the corner into a destination. Mine is crushed limestone over landscape fabric, about forty feet from the patio to the door, and it cost me $62 and one Saturday afternoon. I looked hard at pavers first. The price was not the problem; the problem was what happens after a winter here. Freeze-thaw cycles lift and settle them unevenly, and the joints fill with weeds no matter how much polymeric sand you sweep in. Limestone dust fills its own gaps every time you roll over it.
The surface has held up to wheelbarrows full of mulch and a loaded garden cart for three seasons now. It packs down tighter with use rather than rutting, and the pale color stays visible after dark, which I did not think about until I was walking back with a flashlight the first time. Landscape fabric underneath was the non-negotiable step; without it, you are just feeding a gravel garden.
12. Shed With Seasonal Decor
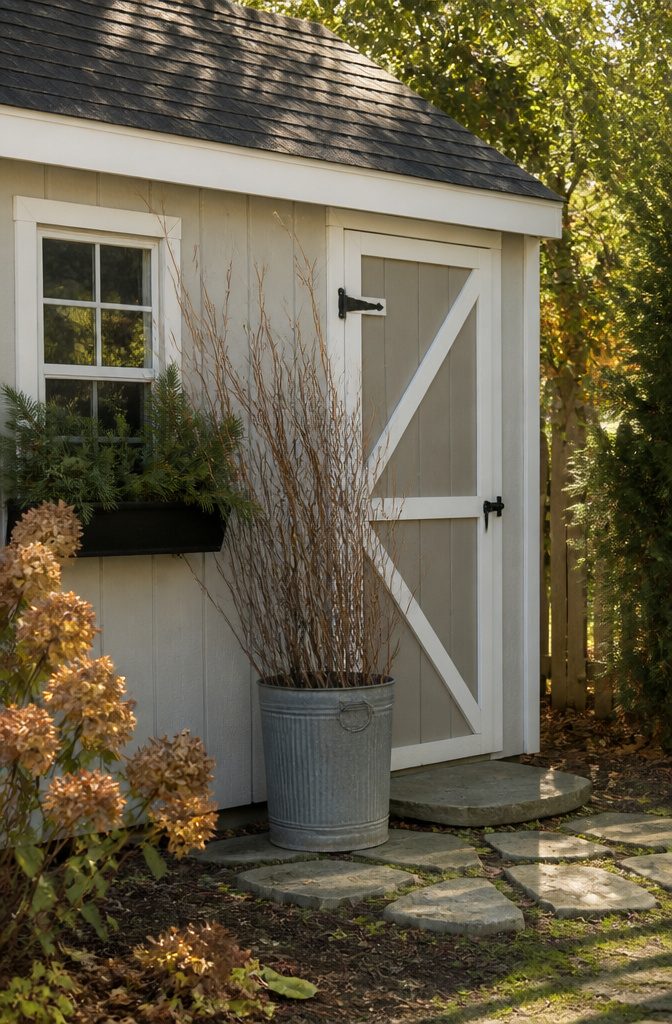
A shed with seasonal decor only works if the rotation stays simple enough to actually happen. I learned that after watching a neighbor’s cute "holiday shed" stay decked in faded July flags straight through November because the full bin system overwhelmed her. The only decoration I store is a single $4 mum, and even that gets planted in the yard once it passes.
Everything else comes from what the yard already offers. Bare branches cut from the oak go in a galvanized bucket behind the door all winter; they catch frost well and cost nothing. Dried hydrangea heads from the side hedge move to a jar for late September through Thanksgiving. One bright blue pot of annuals sits on the step from May until the first hard freeze, then the pot gets scrubbed and flipped upside down until spring.
The trick is keeping the container the same so the eye registers "decorated" even when the contents change. That bucket never leaves its corner. Swapping what goes inside takes ten minutes with pruners, and since nothing gets purchased except that one autumn mum, the yearly spend stays under five dollars.
13. Shed With a Pallet Fence
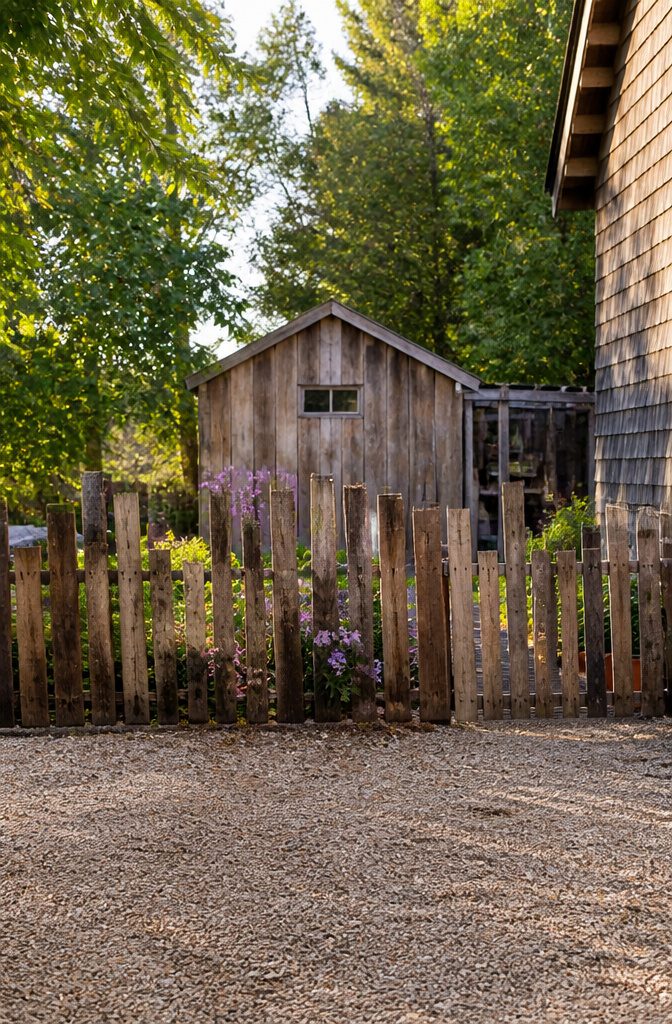
Pallets stood on end make a fence that reads more ranch than prison yard if you resist the urge to even them out. I spaced 4×4 posts every third pallet and drove them two feet into the ground, then screwed the pallets directly to the posts from the inside. The vertical slats catch afternoon light in a way horizontal fencing never manages.
Height variation was the whole point, not a problem to solve. Some pallets ran 40 inches, others closer to 48, and the staggered top line does the work of years of deliberate weathering. If a gap at the bottom bothers you, kick a little mulch against it; the irregularity hides the worst of it.
Three pallets between posts is the span that keeps the wall from bowing when wind hits the broad face. Go wider and you will chase the sag back into line every spring. The 4x4s cost more than the pallets, which were free from a local warehouse, but skipping them turns the project into a weekend of regret.
14. Shed With a Tool Holder
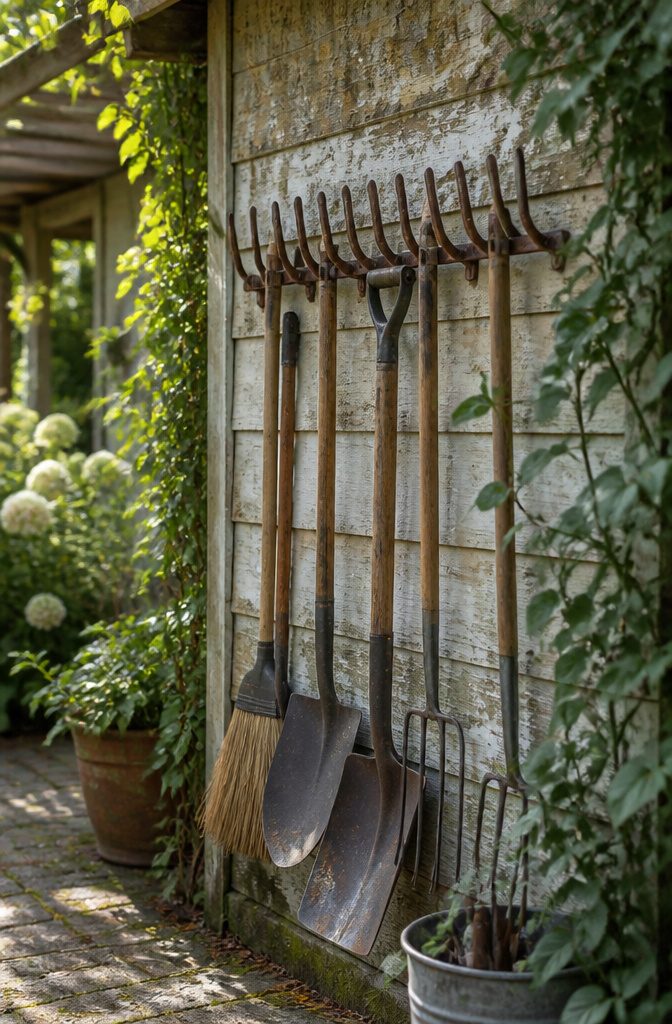
A bow rake head screwed to the shed wall gives twelve tines ready to grip tools, no welding or bending required. Mine came from a garage sale, the ash handle rotted through but the steel still sound. Wire brushing took off the loose rust, then a quick wipe with naval jelly left the surface dark and stable. The tines themselves do the holding: narrow ones pinch a trowel by the blade, wider gaps cradle hand forks, and the flat back of the head props a cultivator at a usable angle where the tang slips behind the curve.
Placement matters more than the mounting. I hung mine under the eave overhang, far enough from the drip line that rain never reaches it directly. The wall stays dry there, so the rust treatment actually lasts, and tools come out clean instead of slick with runoff from the roof. A couple of three-inch deck screws into the shed framing hold it flush; the rake head is light, but the leverage of pulling tools free will work loose anything driven only into sheathing.
15. Shed With a Roof Garden
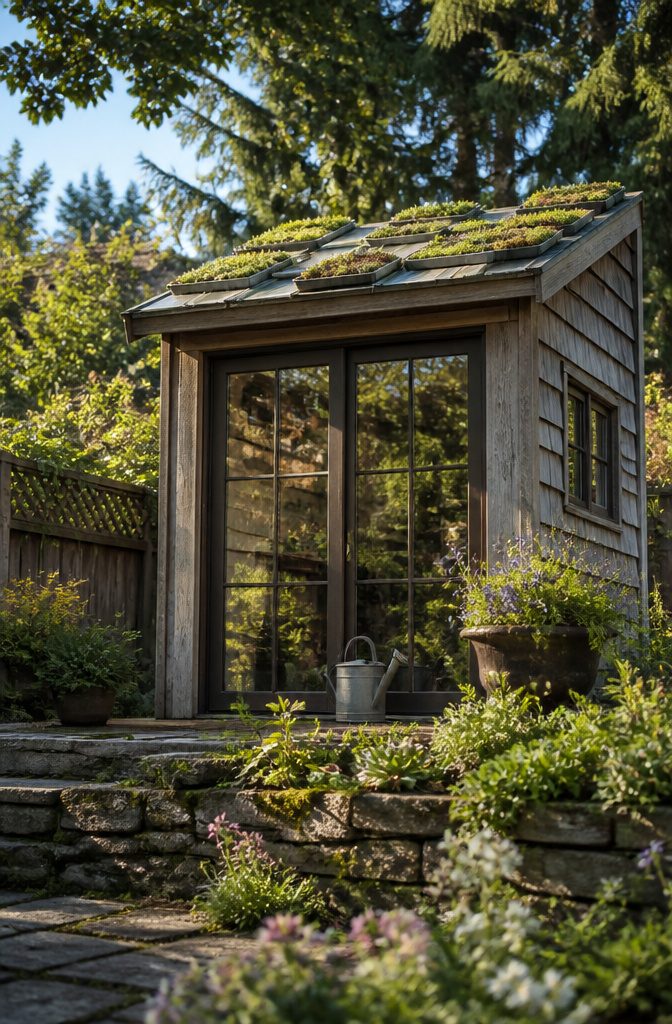
A shed roof is basically a shallow planter waiting to happen, but total weight matters more than total load. A roof that can handle two feet of snow spread across winter is not the same thing as a roof carrying that same weight in soil every single day.
I used old baking sheets with drain holes punched through, maybe an inch and a half of growing mix, and sedum starts from the garden center. Sedum works because it roots shallow and stores water in the leaves, so a missed watering in July does not mean a dead plant in August. The trays sit right on the shingles. No extra structure, no liner, just the sheet metal keeping everything contained and the holes letting extra water run off.
For the first month those plants needed me more than I expected. The mix dries fast in a shallow tray on a roof that catches afternoon sun. I kept a step ladder against the back wall and watered every evening until the roots had knitted enough to pull moisture from below the surface. After that, the sedum mostly handled itself.
16. Shed With Firewood Storage
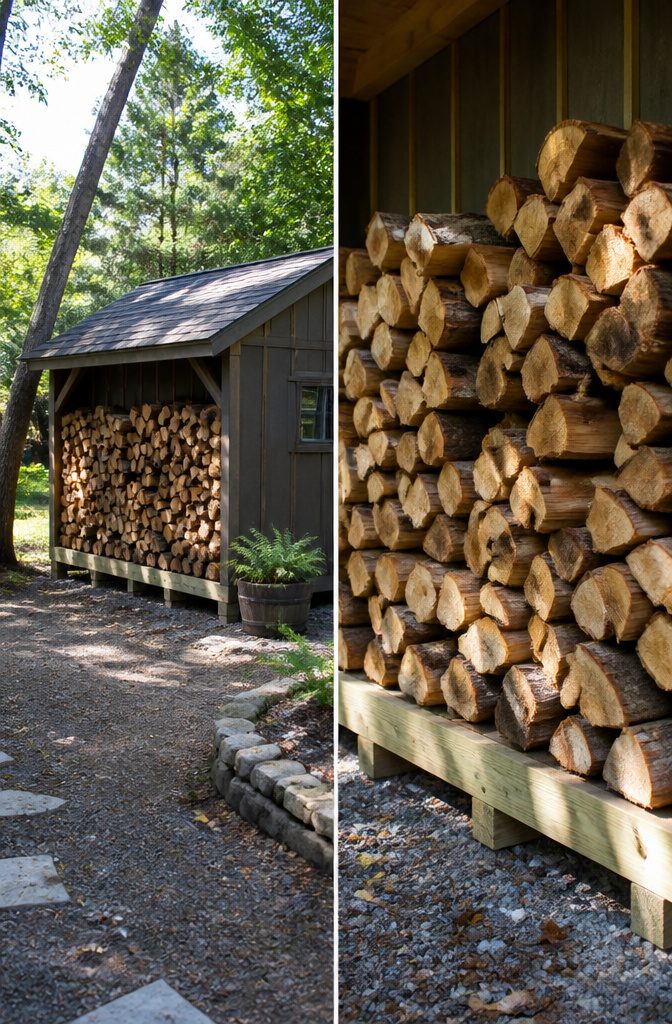
Splitting a shed wall into a six-foot open bay turned out to be the cheapest upgrade I made to the whole build. The north side gets no sun, so the wood stays shaded, and leaving three walls open lets air move through the stack instead of trapping moisture against it. Oak needs a year, softwood six months before it burns clean, and that airflow gap is what makes the timing honest.
I keep the stack four to six inches off the shed wall with a couple of pressure-treated runners laid on gravel. The wood never touches siding, never wicks dampness upward, and the whole bay stays roofed so rain hits only the front edge. Tarping firewood tight against a wall was my first mistake years ago; the center rotted before I ever lit a match.
17. Shed With a Greenhouse Feature
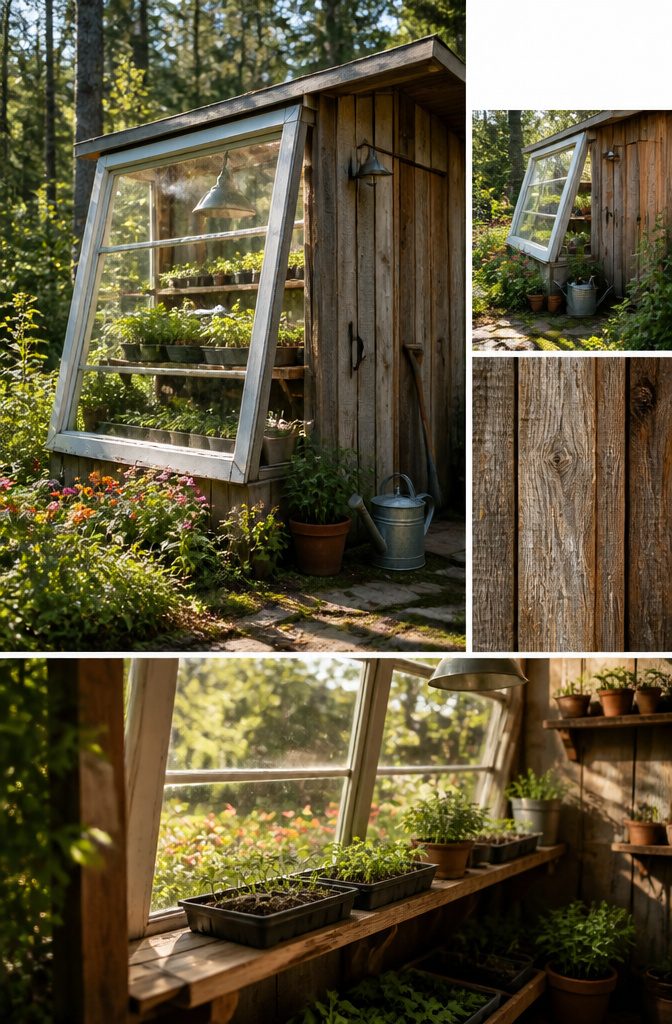
A south-facing wall is where the light lives, and that is exactly where I cut out the window and framed in a 6-foot slab of salvaged patio-door glass I pulled from a neighbor’s curb pile. The frame is pressure-treated 2×4, painted white on the inside to bounce light down onto the plants, and the whole setup cost me the price of a tube of exterior caulk and an afternoon with a reciprocating saw.
Heat builds fast in a glass box. Last March I stuck a thermometer in there out of curiosity and watched it swing from 103°F by mid-afternoon down to 55°F the same night. That range is brutal for fruiting plants, and I learned it the hard way when a tomato seedling dropped its flowers in protest. Now I use the space for what it actually does well: starting peppers, brassicas, and annual flowers six weeks before my last frost date, then hardening them off on the bench outside. A hand-crank vent I added at the peak, just a repurposed skylight opener I found at a Habitat ReStore, buys me maybe ten degrees of control on the warm days. Tomatoes stay in the main garden where the soil moderates the root zone.
18. Shed With Built-in Shelving
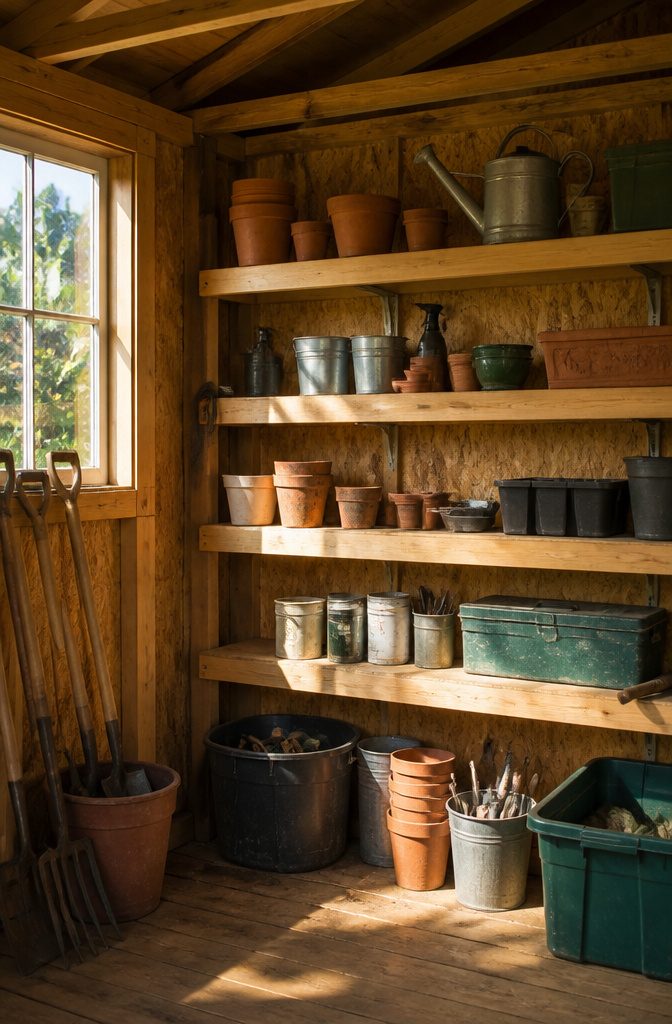
Wall-mounted shelves in a shed keep the floor clear for the stuff that actually has to sit down there. I built mine from 2×4 ledgers screwed flat into the studs and 1×12 pine boards dropped on top; no metal brackets at all. The ledgers cost a few dollars each in lumber versus maybe eight to twelve bucks per bracket, and notching the studs to let the ledger sit flush took about twenty minutes with a circular saw and chisel. That time pays back the first time you don’t knock a shelf loose brushing past with a rake handle.
The top shelf runs shallow, just six inches deep, and holds the bottles I don’t want at knee height: stabilizer for the mower, wasp spray, the spare two-stroke oil. Everything else drops to the main shelves at twelve inches, which is enough for a milk crate or a stacked row of seedling trays. Pine dents if you drop a sledge on it, but at this price you can swap a board in ten years and not feel it.
19. Shed With a Workbench
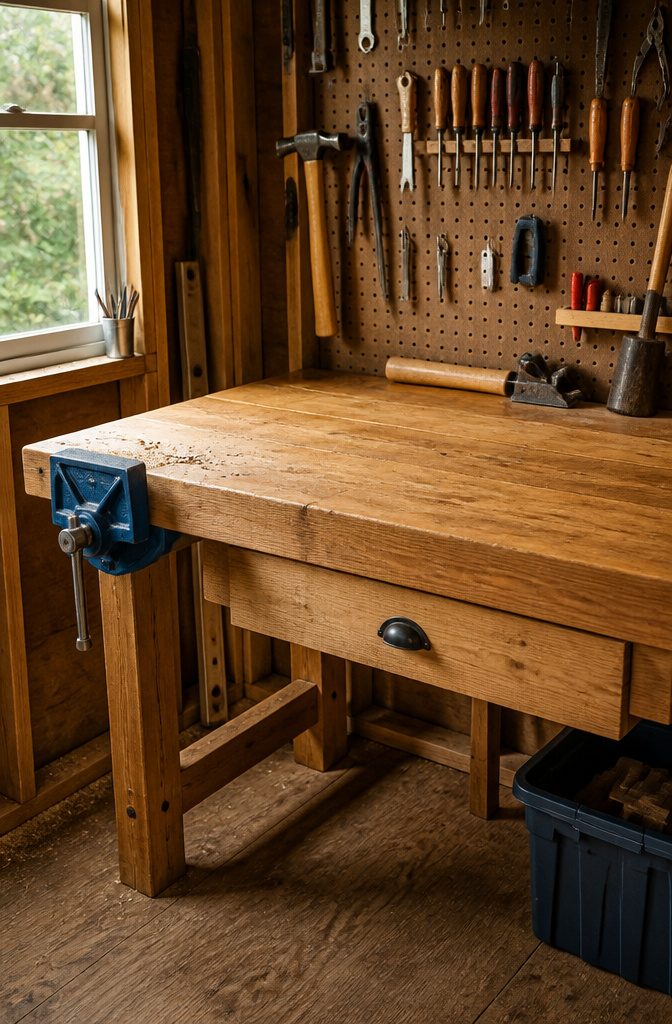
A workbench changes what a shed is for. Mine is a 2×6 top bolted through the back wall with carriage bolts and fender washers, which keeps it still when I set a hand plane against a board. Without that anchoring, the whole bench walks across the floor with every stroke.
The vise sits in the front left corner, not the center. Center placement looks balanced in photos, but the corner leaves the whole right side free for long boards and keeps your body out of the door swing. I learned that after bumping into the jamb for about a week.
One drawer underneath holds blades and a few small planes. That is all the storage the bench needs; everything else lives on a pegboard behind it where I can see it. A drawer for blades alone is worth building, since rust starts the day they rattle against other steel in an open tray.
20. Shed With a Playhouse Feature
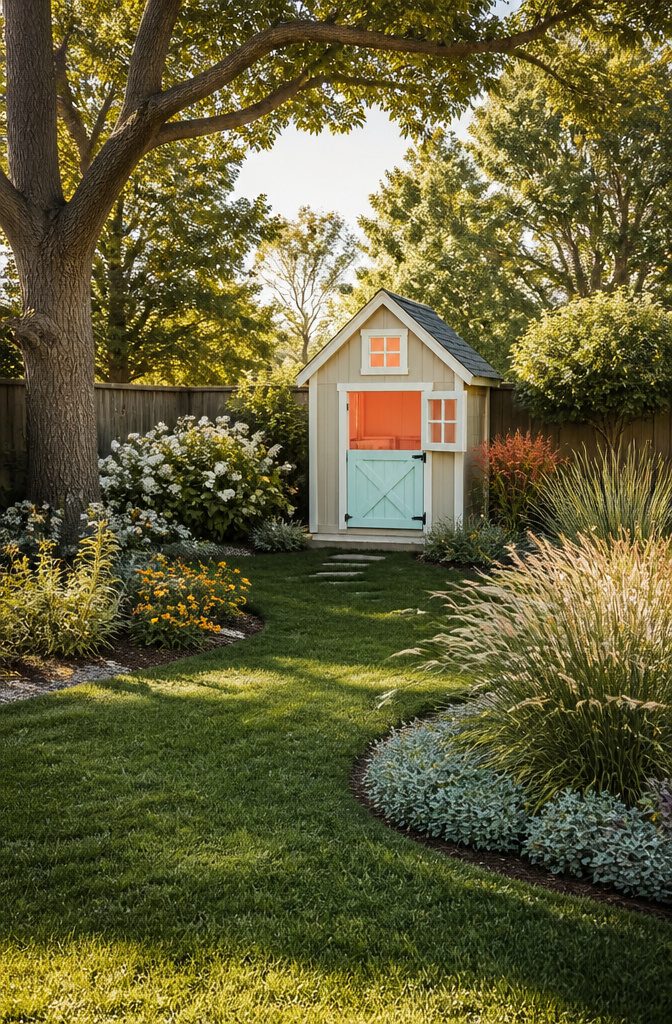
A shed that doubles as a playhouse needs one detail that sells the illusion to kids: the window should sit higher on the wall than you would place it for storage alone. I eyeballed ours at about four feet off the ground, which meant my niece could stand on tiptoes and pretend she was running a shop or a ticket booth. The Dutch door came next, cut in half with a simple hinge kit so the top opened independently. She spent more time passing pinecones and leaves through that split opening than she ever did with the plastic kitchen set sitting inside.
The interior paint was where I gave in completely. Bright coral on the walls, a color I would never choose for my own space, but it made the little room feel like hers rather than a corner of my toolshed. The moment I knew it worked was a Saturday morning when she walked past the actual toys I had dragged outside and headed straight for the door, carrying a stack of paper "mail" she had drawn the night before.
Reversing it later took an afternoon. The Dutch door hardware unscrewed, the two halves went back together as a solid panel, and I painted over the coral with the sage green I had wanted from the start. The window stayed. It still lets in decent light for potting bench work, and the height reminds me that a good simple shed idea is one that changes with what you actually need.
Frequently Asked Questions
Is it cheaper to build your own shed?
That depends on what you already have and what it needs. If you own an existing shed, fixing it up is often far less expensive than starting from scratch, and you may avoid new permit requirements under grandfather clauses. Run a real cost comparison before deciding; lumber, hardware, and a new slab add up fast.
What are some inexpensive DIY garden shed ideas?
Reclaimed wood walls, pallet fencing, salvaged shutters, and crushed-limestone walkways all cost next to nothing and look intentional rather than cheap. Most of the 20 ideas in the article rely on curbside finds, job-site leftovers, or farm-store hardware rather than big-box kits.
How can I enhance my existing shed?
Add one detail at a time and let each season guide the next. A bench at the right height, a window box from vinyl gutter, or a simple barn-door track changes how the whole structure reads. The article shows enhancements that cost under $50 and take a single Saturday.