A cabinet-based kitchen island costs $1,200 to $3,000 in materials and takes one to three weekends if you skip plumbing and electrical.
Most people buy materials before they test the footprint on the floor, which is how a 78-inch island ends up blocking the dishwasher door.
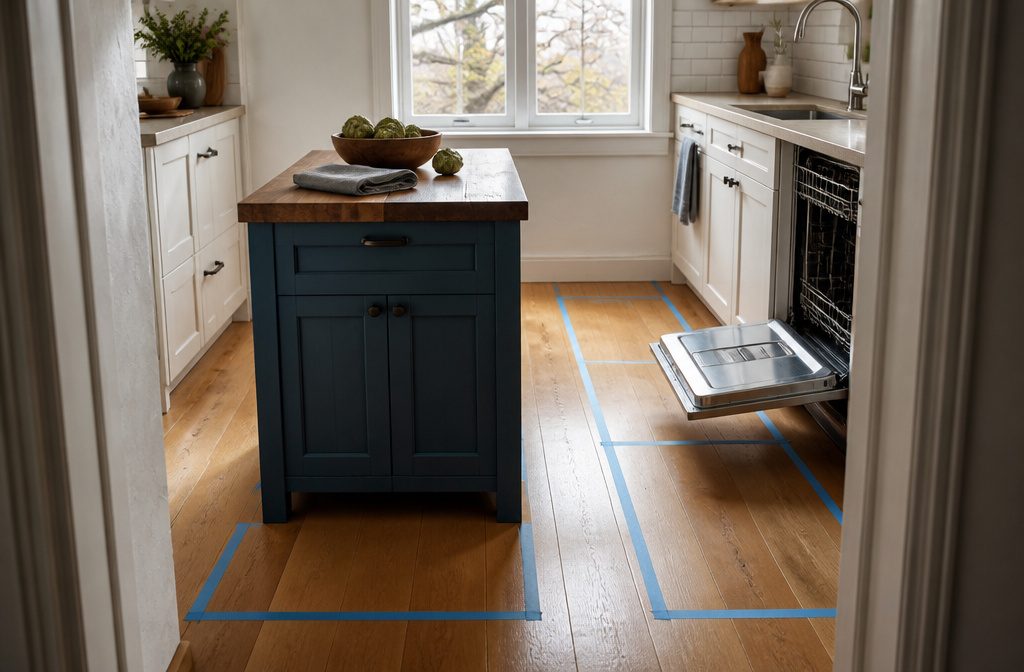
The 42-inch clearance figure matters more than the cabinet dimensions, and painter’s tape shows you whether it works before the first cut.
1. Choose the Island Type and Build Route
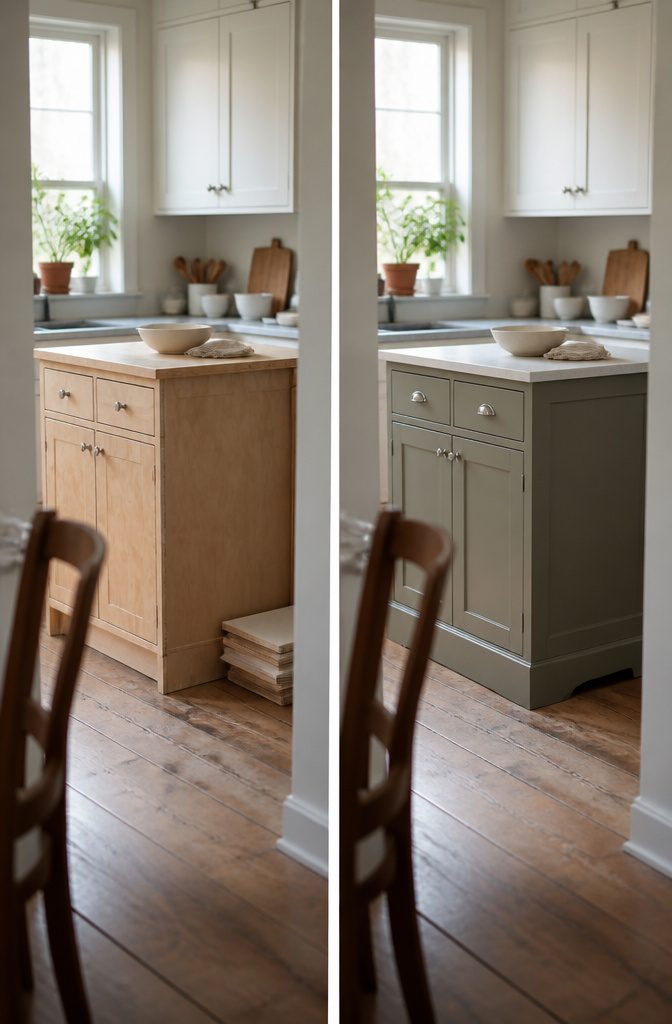
You can build a small island three different ways: from base cabinets, by converting a dresser, or from scratch with a framed box.
Base cabinets give you square boxes and hardware already in place, which cuts the hardest work. A dresser conversion works when you want something mobile or furniture-like, and it’s the cheapest route if you find one free.
Framing from scratch gives you full control over size, legs, and open shelves, but you’re responsible for every dimension and finish detail.
I pick base cabinets for most projects because they balance speed and storage without needing millwork skill.
Stock cabinets dressed with panels land in the middle: faster than framing, cleaner than bare boxes. A framed build is worth it only when the shape is unusual or you want a furniture look that cabinets can’t deliver.
A dry island is realistic over a weekend or two.
Once you add plumbing, wiring, or a cooktop, the job changes: permits, inspections, and licensed trades come into it, and older homes throw up floor and wiring surprises the moment you open things up.
2. Measure and Test the Footprint Before You Buy Anything
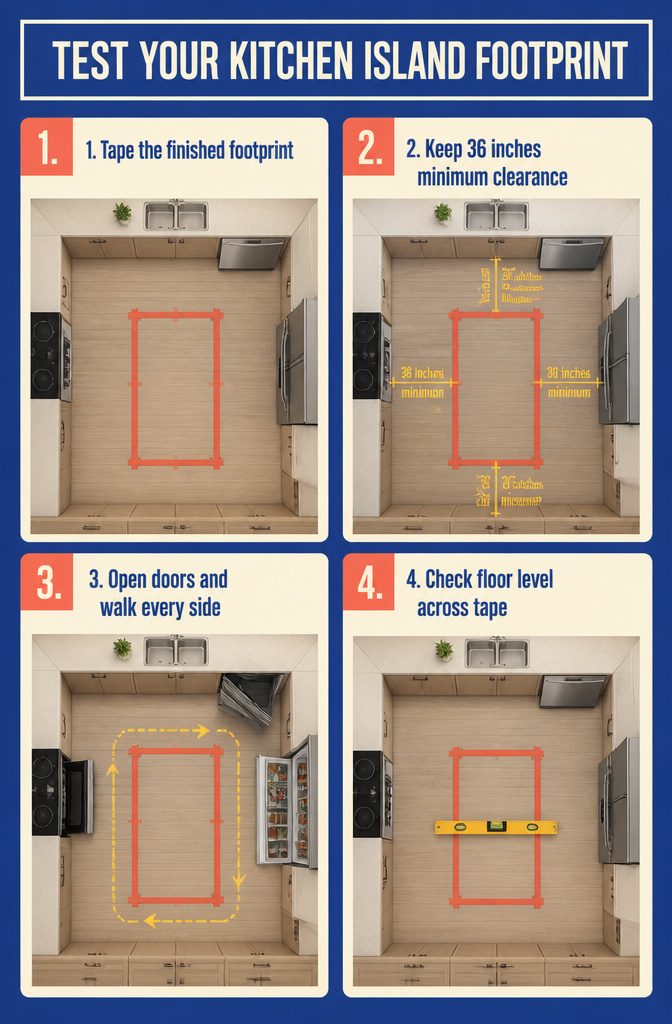
- Tape the full finished footprint on the floor using painter’s tape before you buy materials. Include cabinet widths, panel thickness, any filler strips, and countertop overhang. The finished dimensions matter, not just the cabinet box sizes.
- Test the clearance around all four sides. You need 36 inches minimum, 42 inches for comfortable movement, and 48 inches if the kitchen sees heavy traffic or multiple people working at once. Walk the space, open the refrigerator, swing the dishwasher and oven doors, and check whether bar stools would block the path.
Viewing the dimensions in person, rather than on paper, can bring to life any doubts you may have had about its size and scale in relation to the overall dimensions of the room.
If the layout feels tight in tape, it will feel worse once the island is built.
- Check the floor for level across the taped area. Even a small drop will show up later as twisted cabinet faces and gaps where the countertop meets the base.
3. Gather Materials and Cut the Base Frame
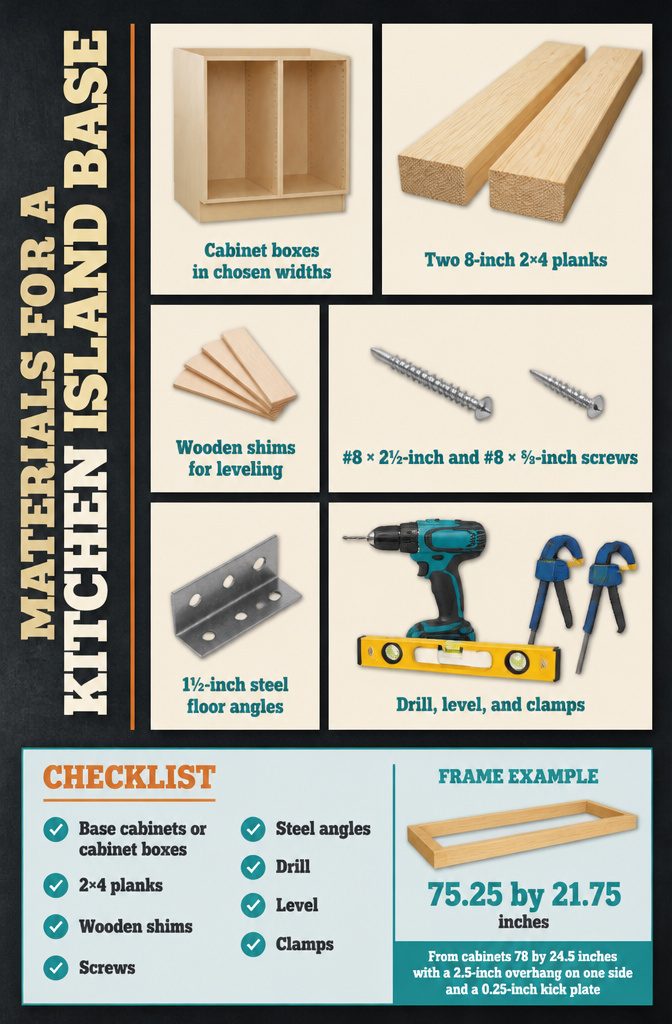
Before any cutting starts, you need an honest bill of materials and a clear measurement strategy, because there really is no universal cut list for this kind of build.
Start with these materials:
- Base cabinets or cabinet boxes in the widths you chose
- Two 8-inch 2×4 planks for the platform frame
- Wooden shims for leveling
- #8 × 2½-inch screws for cabinet assembly and #8 × ⅝-inch screws for mounting
- 1½-inch steel angles to anchor the frame to the floor
- Power drill, level, and clamps
The base frame dimensions depend on your cabinet widths, side-panel thickness, any filler strips, and the toe-kick overhang you want.
For a build using cabinets that measure 78 by 24.5 inches, a 2.5-inch overhang on one side and a 0.25-inch kick plate brought the base frame to 75.25 by 21.75 inches.
You subtract the overhang and kick thickness from each side that shows it, then cut accordingly. Measure your actual cabinets and panels before marking lumber.
4. Level, Shim, and Fasten the Cabinets
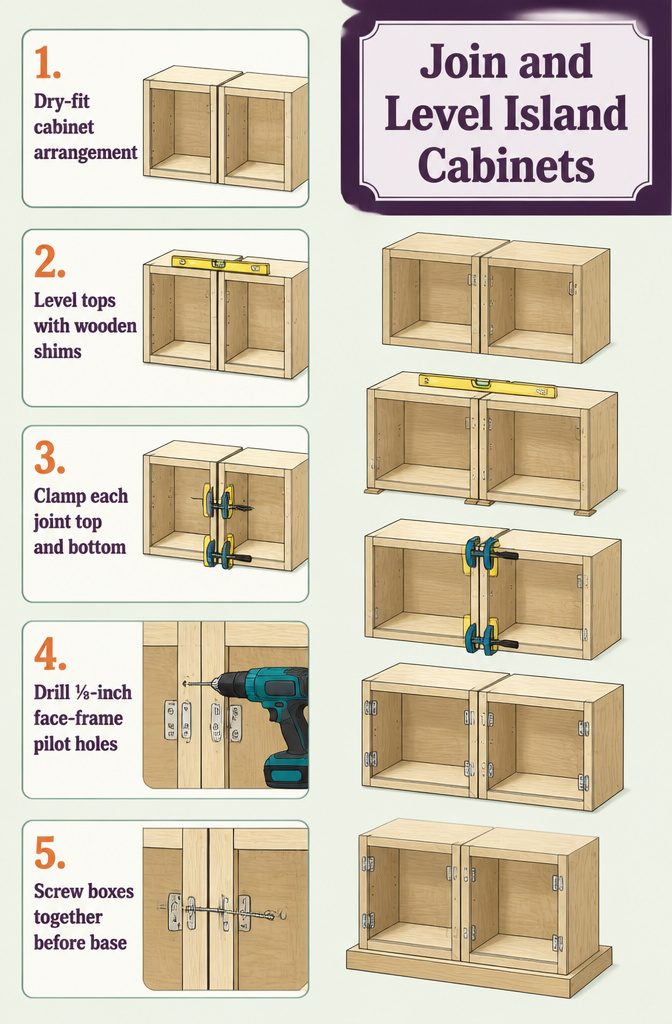
- Dry-fit the cabinets first. Line them up where they’ll sit and check that the arrangement works before you commit to fasteners.
- Use a level to confirm the cabinets are flush with one another. If they tilt or wobble, slip wooden shims underneath until the tops align.
- Clamp the boxes together with two clamps per joint, one near the top and one near the bottom, to hold them steady while you drill. Use protective pads or scrap blocks so the clamps don’t dent the face frames.
- Drill ⅛-inch pilot holes in the face frames adjacent to each door hinge. Never connect cabinets through the side panels; they can’t hold the weight and will pull apart.
- Fasten the cabinets together using #8 x 2½-inch cabinet screws through the pilot holes.
- Screw the boxes together before attaching them to the base. That sequence keeps the whole assembly acting like one unit.
- Adjust doors and drawer fronts after the boxes are fixed in place. Doing it earlier means small shifts during fastening throw the lines off again.
5. Anchor the Island and Route Utilities if Needed
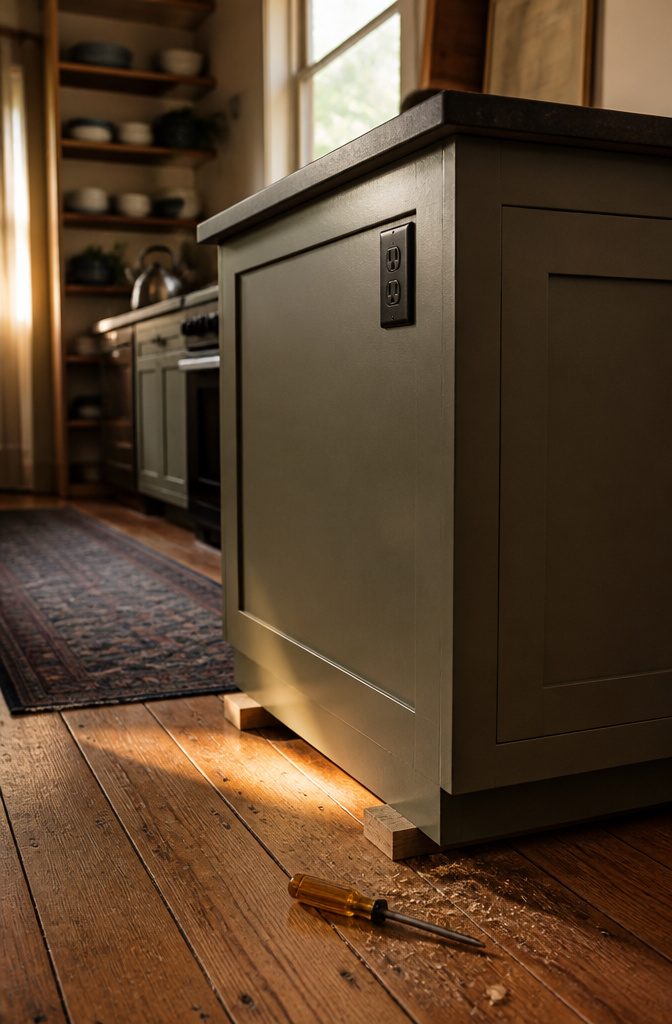
Cabinet islands need to be fixed to the floor so they don’t shift when you lean on them or pull a drawer open.
The method depends on what sits under your finished floor. Wood subfloors take mounting blocks or L brackets fastened through the toe-kick area; concrete slabs need concrete anchors and a hammer drill.
I cut two eight-inch two-by-fours, place them just behind the cabinet footprint, screw them down, then position the island over them and fasten through the toe-kick into the blocks.
If you’re working over a floating floor, check whether fastening through it voids the warranty before you drill anything.
Permanent islands need outlets under National Electrical Code requirements in most states.
The rule exists because you’ll use mixers, griddles, and other appliances at the island, and running a cord across the walkway is a trip hazard that can send hot things flying.
If you don’t have electrical experience, hire a licensed electrician for this part. Wiring usually routes through a nearby support wall, but code requirements vary by jurisdiction and should be confirmed locally before rough-in starts.
6. Add Shelves and Prepare Storage Zones
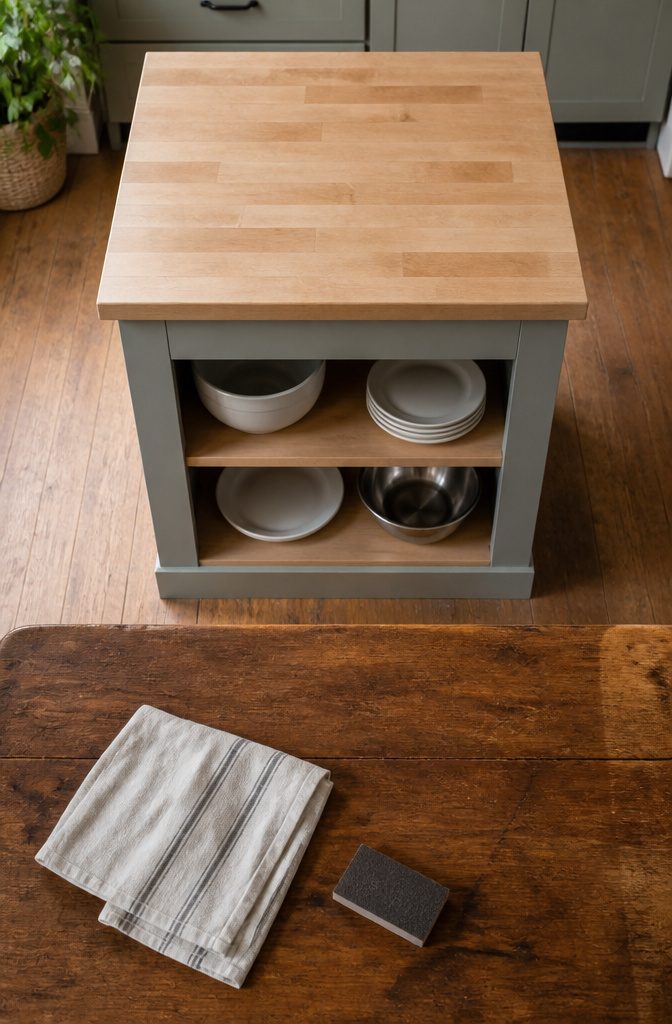
Storage needs to be thought through before you close up the island, and the logic runs by zone.
One side handles prep tools and mixing bowls, another holds serving dishes or glassware, a third might tuck a trash pullout near the sink.
A small island rarely fits more than one or two zones, so decide which matter most before you commit to drawer positions or open shelving.
If you started with a dresser base, remove the bottom drawer and its metal tracks using a screwdriver or drill. Sand the frame where the tracks attached, measure the opening, and cut replacement shelves from plywood or solid wood boards.
I paint the interior surfaces with a waterproof paint after sanding and priming, because kitchens are damp and raw wood swells.
For MDF components, a PVA primer works well since that material soaks up the first coat. Cabinet drawer fronts get Bullseye 1-2-3 primer, then finish paint in whatever matches your lower cabinets.
Finish panels come next.
Quarter-inch MDF covers any support walls or exposed seams, and flat trim hides the panel joints. Baseboards along the bottom tie the island back to the room.
7. Select and Support the Countertop
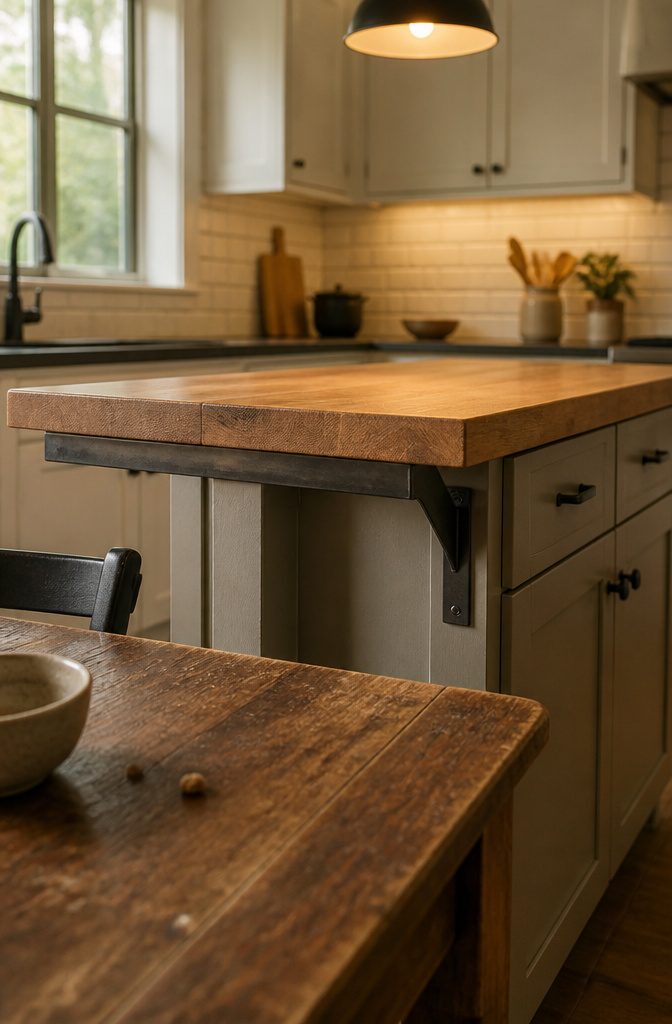
The countertop lands the budget conversation. Butcher block costs less, cuts easier with standard tools, and sits at the simplest end for DIY work.
Laminate runs cheaper still but limits your edge options. Quartz and granite look clean and hold up well, though granite runs $60–$100 per square foot and both materials add weight, lead time, and stricter support rules.
Support depends on the overhang and the material.
Most overhangs past 9 inches need brackets, corbels, or steel angles underneath. For attachment, 1½-inch steel angles work.
If you’re joining two pieces of butcher block or carrying a long span, a mini stud wall fastened to the floor and the cabinet base keeps the seam from splitting and balances the load across the whole top.
Pick the countertop and the support plan before the cabinets ship.
Hiding a bracket or a leg in the layout beats bolting one on after the slab arrives. Stone especially should follow the fabricator’s spacing rules, not a guess made on site.
8. Install the Countertop and Secure It
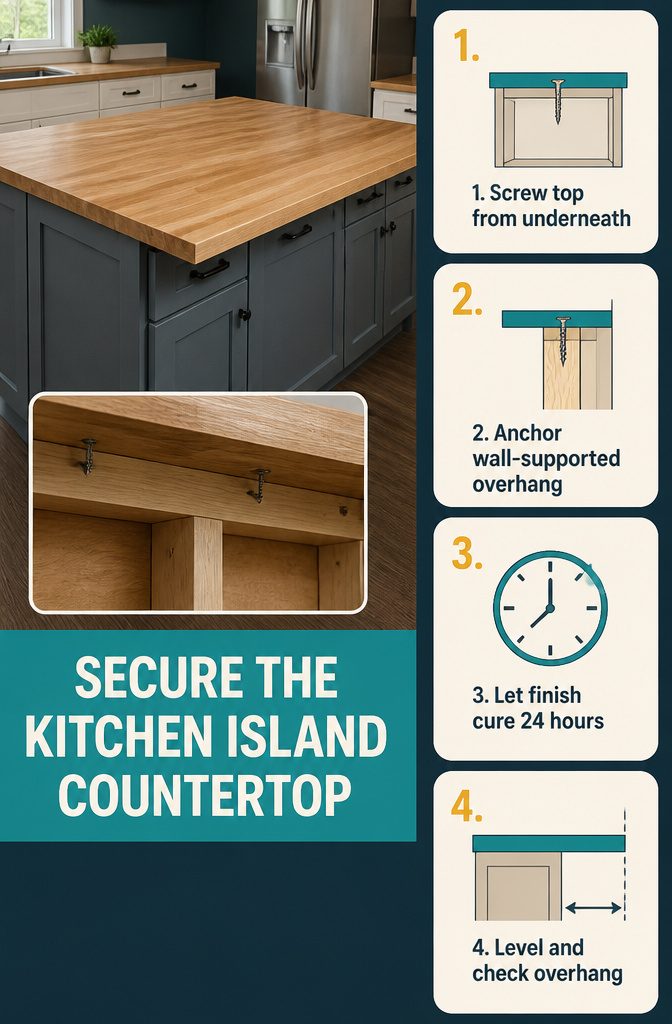
- Screw the countertop into the cabinet tops from underneath, driving fasteners through the cabinet frame and into the butcher block or plywood base. Space screws every 12 to 16 inches along the perimeter where the countertop meets solid structure.
- If your island includes a wall-mounted support frame, fasten through the top of that stud wall into the countertop as well. This anchors any overhang that extends beyond the cabinet footprint.
- For butcher block or laminate surfaces, let any finish cure for 24 hours before placing weight on the island. Oil-based polyurethane needs longer; water-based finishes set faster but still benefit from a full day undisturbed.
- Check that the overhang is level and consistent on all sides. A 17.5-inch overhang on the seating side gives comfortable legroom for barstools; shorter overhangs work for purely prep-focused islands.
9. Finish the Sides, Add Trim, and Paint
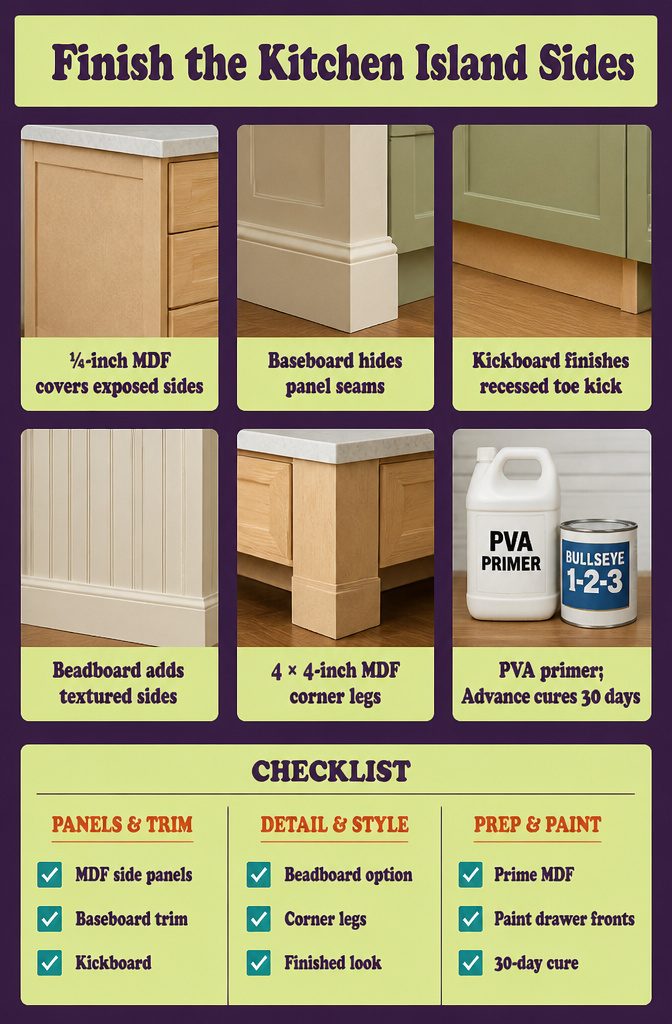
Once the cabinets are secured and storage is in place, the last push is panels, trim, and paint. This is what takes a set of boxes and makes them read as one piece.
- Cover exposed sides with ¼-inch MDF panels. Flat trim hides the seams, and baseboard along the bottom ties the island to the room.
- Add a kickboard if your cabinets have a recessed toe kick. It hides the supports underneath and gives the base a finished line.
- Beadboard works if you want texture on the sides instead of flat panels.
- Furniture legs cut from ⅝-inch MDF — I use 4 by 4 inch — add weight to the corners and help the island feel like a piece rather than a run of cabinets.
- Prime with PVA primer if you used a lot of MDF. It stops the material from soaking up paint. For drawer fronts, Bullseye 1-2-3 holds better.
- Paint with Benjamin Moore Advance, which needs a 30-day cure. Paint the drawer fronts before the build so they’re ready to install right away.
What Size Fits a Small Kitchen
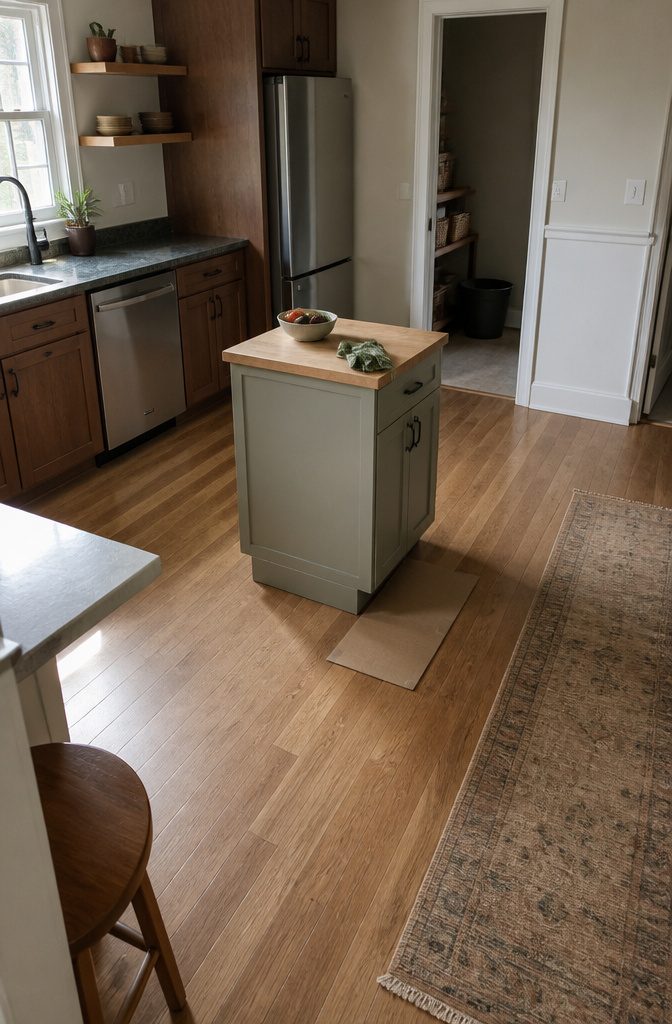
The smallest functional island runs about 2 by 4 feet, though you can stretch to 3 by 5 feet if the room allows it.
I think of this as the footprint that gives you useful prep surface without forcing you to turn sideways every time someone walks past.
Beyond about 84 inches long and 36 inches deep, you start entering full-size territory, and clearance becomes the limiting factor before the island itself does.
Fit depends more on movement patterns than on a fixed number.
The minimum clearance between the island and any wall or cabinet is roughly 36 inches, but 42 inches feels better in a kitchen where two people work at once or where you open appliances into the aisle.
Less than 36 inches stops feeling comfortable fast, especially when drawers and doors are open.
I usually test the footprint with cardboard before committing to any build, because an island that blocks the dishwasher door or the fridge swing becomes a problem you live with every day.
How Much Clearance You Actually Need
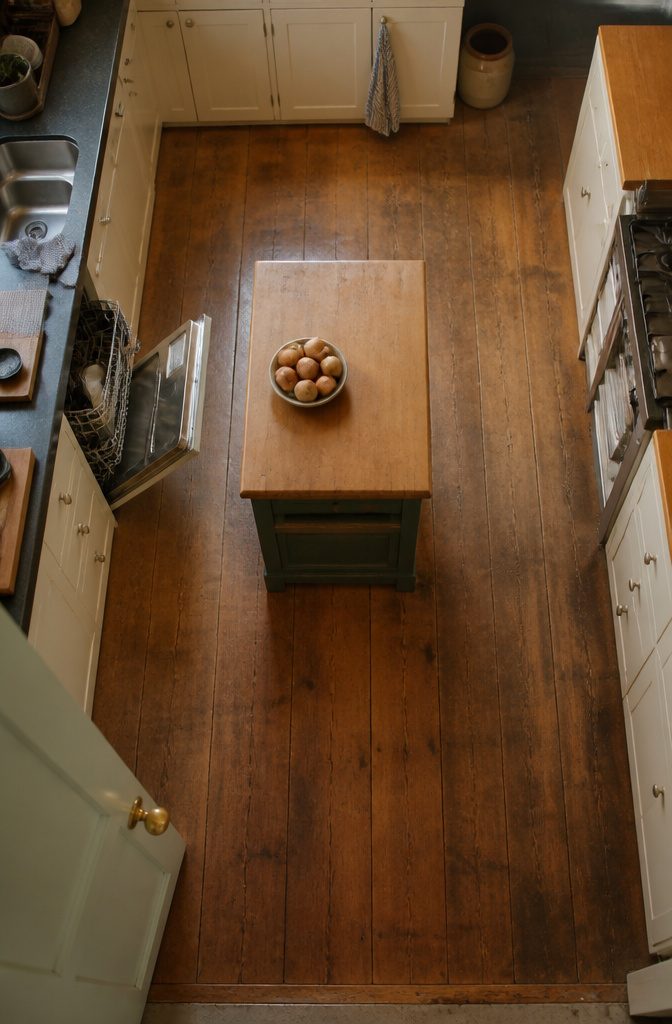
The figure that comes up most often is 42 to 48 inches of clearance on all sides of the island, which gives one cook room to work without feeling boxed in every time a drawer opens.
That range works well in most kitchens, but it’s not absolute.
Some sources put the walkway minimum at 36 inches, and others call 42 inches comfortable for one person while reserving 48 inches for kitchens where two people cook at once or appliances swing into the aisle.
If your kitchen is tight and you rarely have more than one person prepping at a time, 36 inches can work without turning the room into an obstacle course.
Go below that and the island starts to feel like it’s in the way more than it helps.
The number you land on depends on how many people use the space, where the fridge and dishwasher doors open, and whether the island sits in a main traffic path or off to one side.
Adding Seating Without Blocking Storage
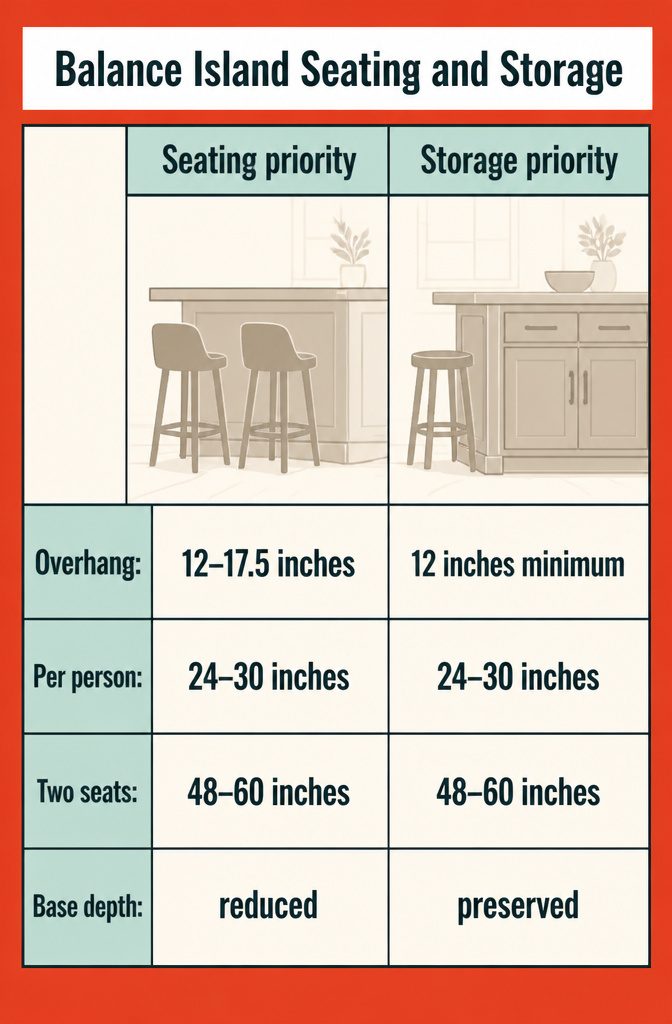
If you want seating, plan on a 12-inch overhang as the bare minimum and 15 inches if you want comfortable knee clearance. Seventeen and a half inches feels generous without needing extra bracing on most materials.
Each person needs about 24 to 30 inches of width along the edge. Twenty-four inches works for quick meals; 30 inches gives elbow room when the whole family sits down at once.
Seating and storage compete for the same footprint.
Adding chairs means giving up base cabinet depth on that side, so decide early which matters more. A two-seat setup fits a 48- to 60-inch span, which still leaves room for drawers or shelves on the opposite face.
Push past three seats and you’re committing most of the island to the overhang, with storage squeezed into the ends or dropped altogether.
On builds with stone tops or spans wider than four feet, check whether the overhang needs corbels or hidden brackets before the top goes on.
What a DIY Island Costs
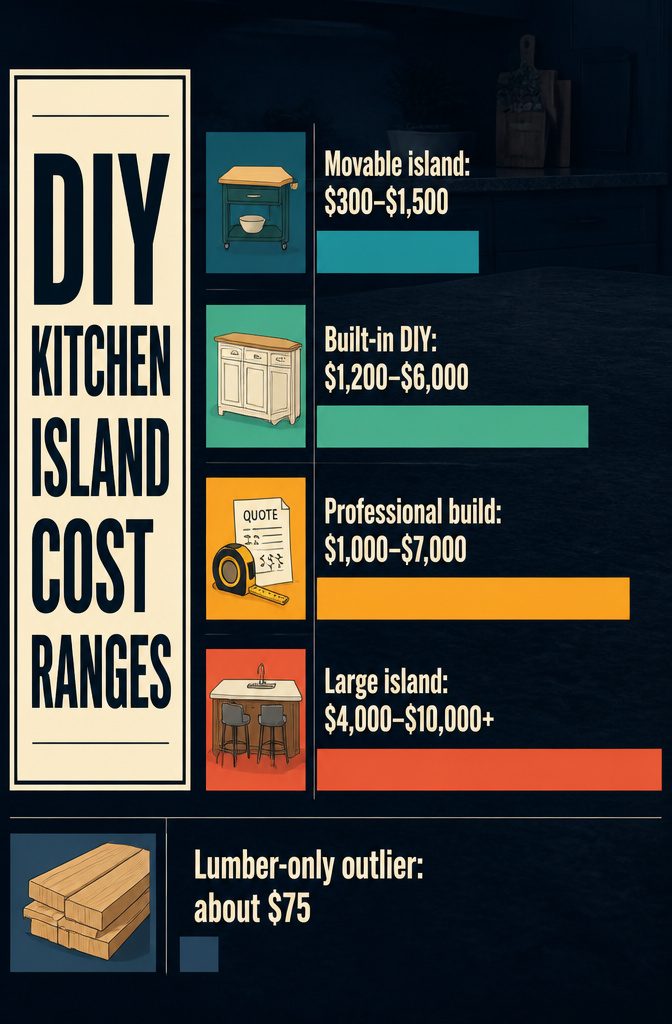
A simple movable island costs about $300–$1,500, and that’s the fastest route if you want storage and prep space without carpentry.
A built-in DIY island lands around $1,200–$6,000 before you add plumbing or electrical. Professional quotes range from $1,000 for pre-made to $7,000 for custom work, but you can undercut that if you’re doing the build yourself.
Size and features drive the price faster than anything else. A small no-seating island runs $1,200–$3,000 in materials.
Add seating and you’re looking at $2,000–$5,500, mostly because the top gets wider and you need overhang support. Large islands push $4,000–$10,000 or more once cabinetry and countertop dimensions climb.
One commenter built theirs for about $75 in lumber only, excluding paint and stain.
That’s the floor if you’re scrounging materials and keeping finishes minimal. The ceiling jumps fast once you add a sink, which pulls in plumbing rough-in and venting, or a cooktop, which needs electrical circuits and clearance planning.
How Long the Build Takes
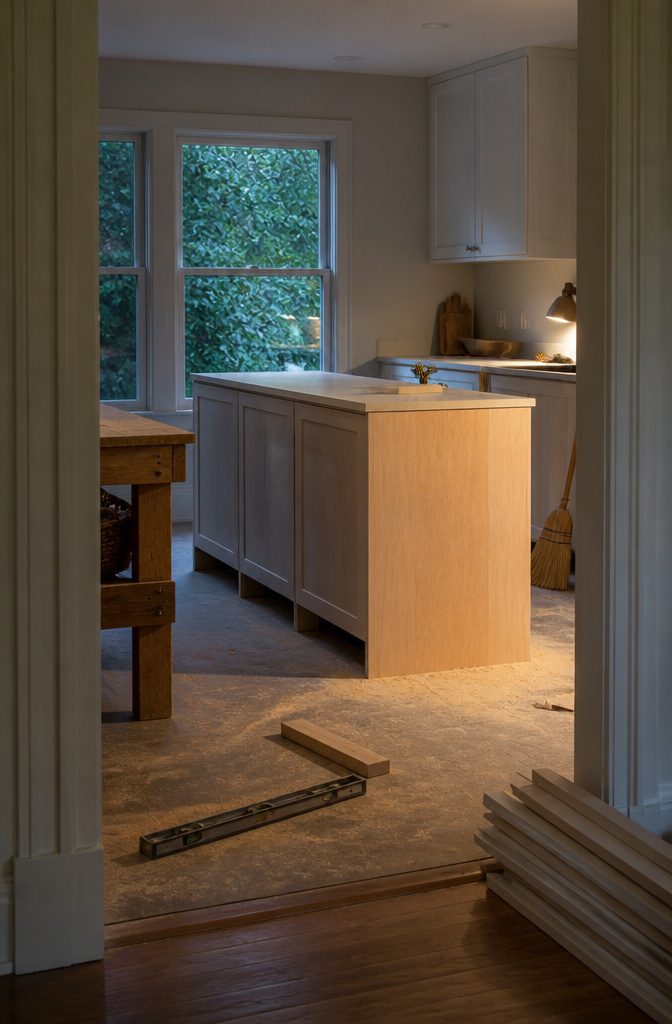
A basic dry island—cabinets, countertop, no plumbing or wiring—usually takes one to three weekends if you’re working at a relaxed pace and have built something similar before.
That assumes you’ve already settled on a design and ordered materials. If this is your first cabinet assembly or you’re cutting custom pieces, add time for mistakes and re-cuts.
Bringing in utilities changes the calendar. A large island with a sink, dishwasher, or cooktop can stretch across three to six weekends, because you’re routing supply lines, running electrical in conduit, and often waiting on an inspector between stages.
I find that people underestimate how much of that time is cleanup, not actual construction.
Drywall dust from a new outlet box, sawdust from trim cuts, and the back-and-forth of getting a countertop level all add hours you didn’t plan for.
Skill level matters more than the instructions let on. An intermediate builder working alone might finish a straightforward cabinet island in two to three days of focused work.
A beginner should expect twice that, and there’s no shame in it—learning to shim a cabinet dead-level or scribe a side panel to an uneven wall takes trial and error the first time through.
Frequently Asked Questions
Is it cheaper to buy or build a kitchen island?
A movable island is usually cheapest at $300–$1,500, while a built-in DIY island runs $1,200–$6,000 before plumbing or electrical work.
Building saves money when you use stock cabinets and simple materials, but the gap closes once you factor in tools, mistakes, or custom work.
Buying a pre-made island makes sense if you want something fast and don’t need it fitted to exact dimensions.
How much does it cost to build a kitchen island?
A small island without seating costs $1,200–$3,000 in materials, while one with seating runs $2,000–$5,500.
Large islands push $4,000–$10,000 or more once cabinetry and countertop size climb. Adding a sink or cooktop can take the total past $12,000 because plumbing, electrical circuits, and venting all enter the scope.
What can I use instead of a kitchen island?
A small dresser on wheels gives you movable prep space and storage without the footprint of a fixed island.
A narrow console table or a kitchen cart works in tight layouts where clearance won’t allow a full island. Both options let you tuck them away when you need the floor space back.
What’s the smallest a kitchen island can be?
The smallest functional island runs about 2 by 4 feet, though you can stretch to 3 by 5 feet if clearance allows.
Anything smaller than that stops giving you enough prep surface to justify the space it takes up. Fit depends more on movement patterns than on a fixed minimum size.
Is it easy to make your own kitchen island?
A basic dry island takes 1 to 3 weekends if you have built something similar before and you are working at a relaxed pace.
The job gets harder once you add plumbing, wiring, or a cooktop because permits, inspections, and licensed trades come into it. Beginners should expect twice the time of someone with intermediate carpentry skill.
What’s the best countertop material for a small kitchen island?
Butcher block costs less, cuts easier with standard tools, and sits at the simplest end for DIY work.
Quartz and granite hold up well and look clean, though granite runs $60–$100 per square foot and both add weight and stricter support rules. Light-colored materials reflect more light and make a small kitchen feel larger.
How much space do you need for a kitchen island?
You need 36 inches minimum clearance on all sides, 42 inches for comfortable movement, and 48 inches if the kitchen sees heavy traffic or multiple people working at once.
Go below 36 inches and the island starts to feel like it blocks more than it helps. The number you land on depends on how many people use the space and where appliance doors open.