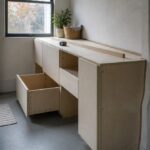
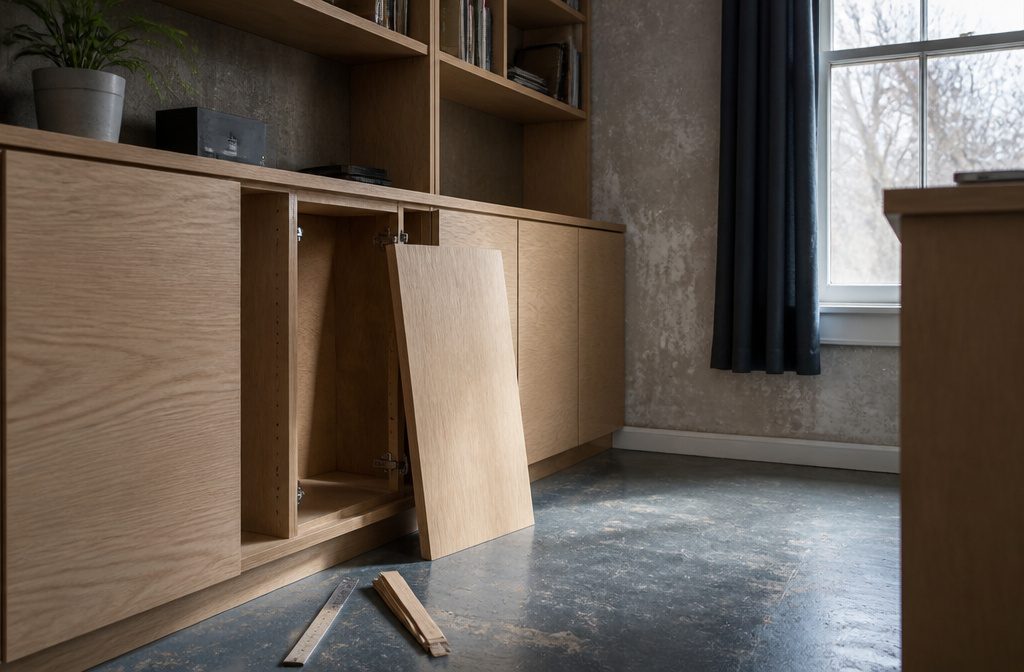
A full set of DIY office cabinets built from 3/4-inch plywood takes four weeks from planning through final assembly, and the hardest part isn’t the joinery or the finish.
It’s measuring the wall before you cut anything, because cabinets built to square drawings won’t fit walls that bow a quarter inch over four feet.
Shimming and scribing close that gap, but only if you catch it during layout instead of after the boxes are assembled.
1. Plan the Space and Layout
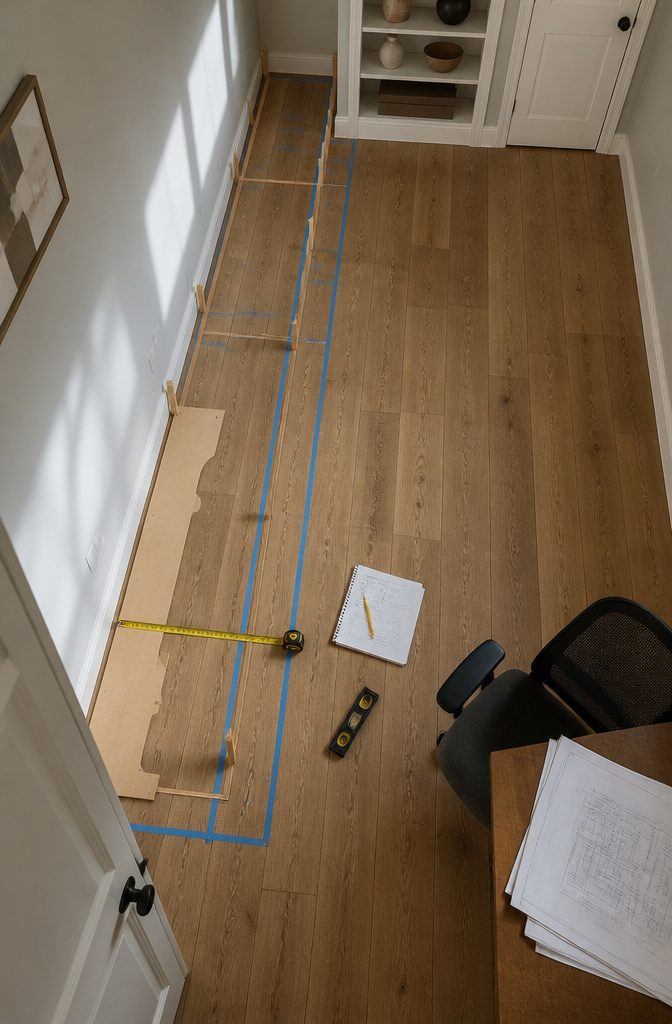
The first decision is whether the room can actually hold what you’re planning. Measure the wall length, the ceiling height, and the depth you can give up without blocking doorways or natural light.
Most office built-ins run 24 inches deep to match standard desk height, but measure the walkway you’ll leave behind. Less than 36 inches of clearance and the room will feel tight every time you pull out a chair.
Once dimensions are down, map where the cabinets will attach. Use a stud finder and mark stud locations inside the cabinet footprint.
Every cabinet section should fasten into at least two studs for stability. Check for outlets, light switches, HVAC registers, and thermostats in the path of the units.
I’ve seen projects stall because a thermostat sat exactly where the upper cabinet needed to go. Moving electrical or HVAC usually means calling in a professional, so catch it early.
It’s critical to not just measure, but to also take stock of the angles and surfaces where the built-ins will be installed. When irregularities in flat, level, square, and plumb are minor (less than 1⁄4 in. over 4 ft.), these details can be recorded on your drawings and accommodated by making allowances for shimming or scribe-fitting during installation.
That tolerance matters because you’ll be shimming and scribing to fit.
Anything beyond a quarter inch over four feet and you’re better off making a template from quarter-inch plywood strips, tracing the actual wall contour, and transferring it to your workpiece in the shop.
If you’re building cabinets off-site, measure doorways, hallways, and stairwells to confirm assembled units will actually fit through. Large built-ins often need to be broken into modules that travel separately and assemble in place.
Plan for 1/8 to 3/16 inch of clearance between the face frame and the wall when fitting into a niche. That gap gives you room to maneuver during installation and keeps caulk joints manageable.
2. Prepare the Site and Materials
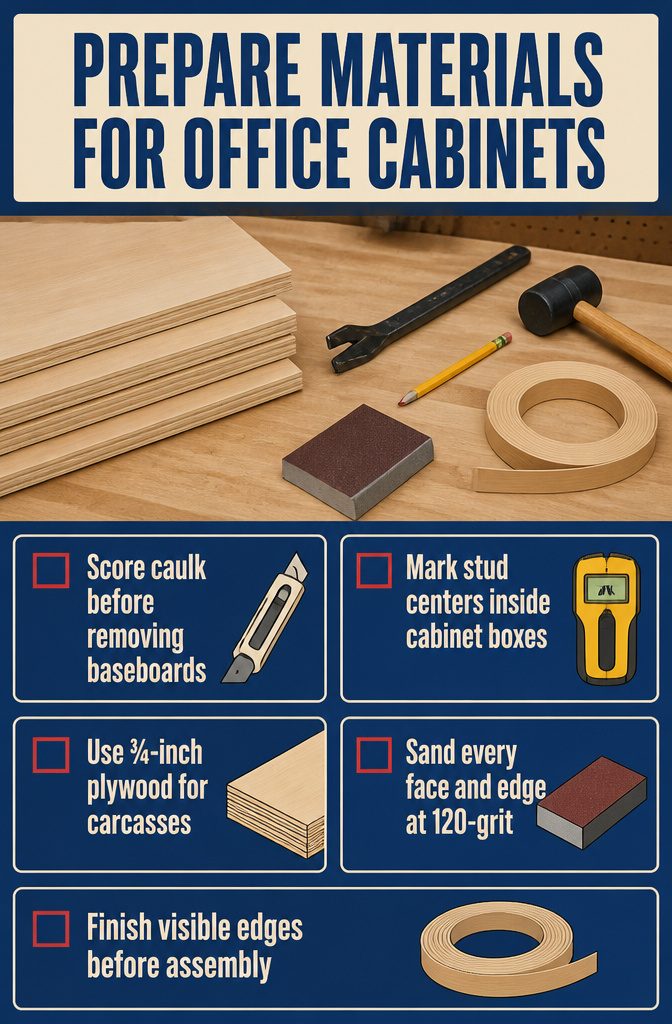
- Remove baseboards where the cabinets will sit. Score the caulk line with a utility knife first, then work a pry bar behind the trim and tap it with a mallet. Pull gently if you plan to reuse the pieces. Stripping the baseboard lets the cabinet backs sit flush against the wall instead of leaving a gap.
- Mark stud locations on the wall. Use a stud finder and mark each center point with a pencil. Transfer those marks to the inside of the cabinet carcasses where you’ll be driving screws later. Four screws per cabinet side, straight into studs, is standard.
- Cut the plywood parts. Use 3/4-inch plywood for the cabinet carcass — sides, top, bottom and toe kick. Drawer boxes take 1/2-inch stock, and drawer bottoms use 1/4-inch. A circular saw with a straightedge guide handles full sheets; finish cuts go to the table saw for clean, square edges.
- Sand all pieces before assembly. Getting into corners after the box is together is miserable. Run 120-grit over every face and edge now.
- Finish visible plywood edges. Any edge the reader will see once the cabinet is installed gets edge banding, veneer tape, or a coat of filler and paint before you build. Fixing raw plywood after installation shows every time.
3. Build or Position the Base Cabinets
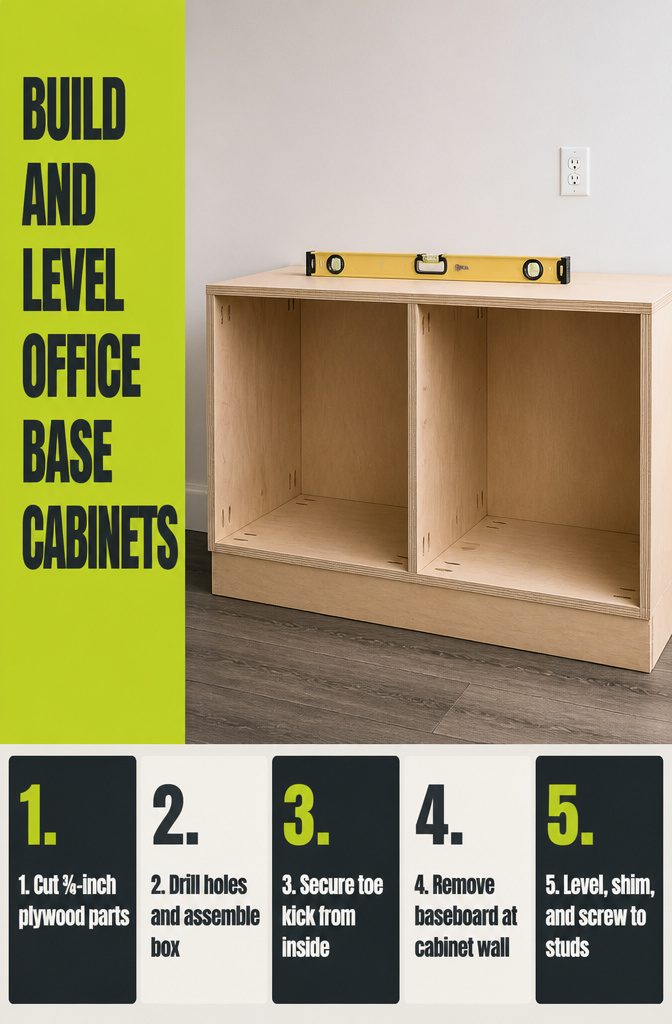
- Cut plywood parts to size using a table saw for clean, square edges. For each cabinet box, you need two sides, a top, a bottom, and a toe kick, all cut from 3/4-inch plywood.
- Drill pocket holes along the inside edges of each piece where they will join, then assemble the box with 1-1/4-inch pocket screws and wood glue. Clamp a scrap 2×4 against the pieces while driving screws to hold everything steady.
- Tap the toe kick into place at the base and secure it with pocket screws from the inside.
- Remove the baseboard where cabinets will sit by scoring the caulk line first, then prying it off carefully with a crowbar if you plan to reuse it.
- Mark stud locations inside each cabinet using a stud finder, then drill countersink holes where screws will go.
- Level and shim the cabinet until it sits plumb, then drive 3-inch screws through the back into wall studs—four per cabinet on each side. Premade cabinets follow the same attachment pattern.
- Prime and paint the assembled boxes with two coats of primer followed by two coats of paint before final installation if you want a factory-clean finish.
4. Build and Install Shelves, Upper Units, and Desk Surfaces
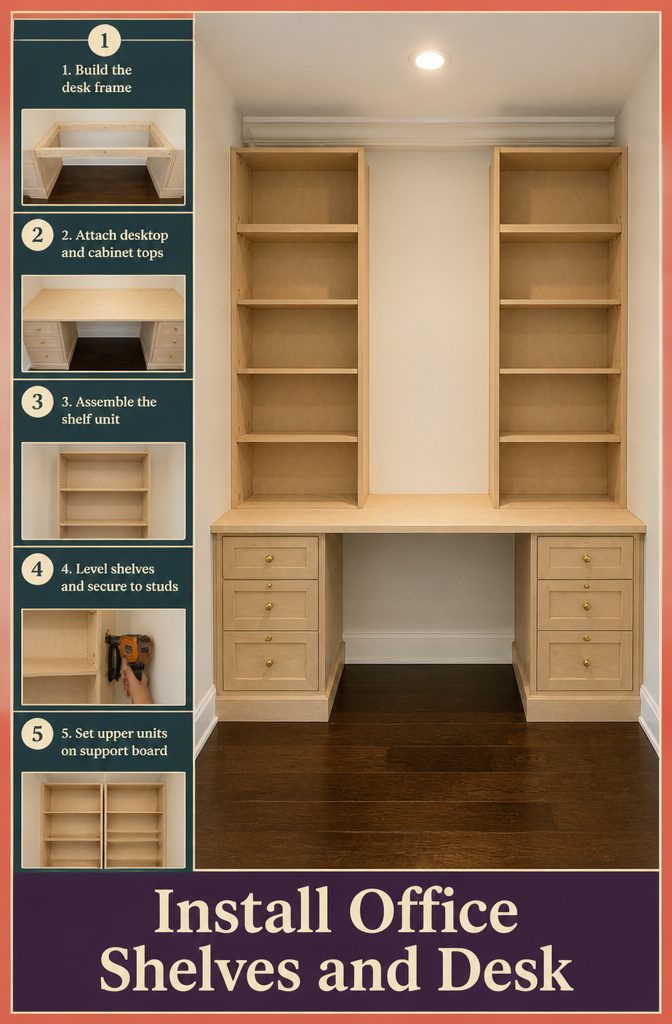
- Build the desk frame first: I cut 1×3 poplar into a frame about 51 inches wide by 24 inches deep, joining the pieces with pocket holes and glue. The frame screws into the side walls of the base cabinets with 1-inch screws, then into wall studs with 3-inch screws. Standard desk height is 28 inches, and this frame sits at that mark.
- Add the desktop and cabinet tops: I measure and rip ¾-inch sande plywood to size with a circular saw, then attach it to the frame and cabinet boxes using 1½-inch brad nails. The desktop spans the full 51-inch width and matches the 24-inch depth of the cabinets below.
- Cut and assemble the shelves: The same ¾-inch plywood rips down to about 72 inches long by 11.25 inches deep. I join the shelves with pocket holes and wood glue, spacing them about 14 inches apart vertically. Total height runs around 36 inches for the unit.
- Secure the shelves to the wall: I angle a brad nailer through the sides of the shelf unit into wall studs, then check that each shelf sits level before moving to the next.
- Install upper shelving in sections: For tall built-ins, I build two identical units and set them on an MDF support board that runs across the top of the lower cabinets. This splits the weight and makes installation easier to handle alone.
5. Build and Install Drawers or Doors
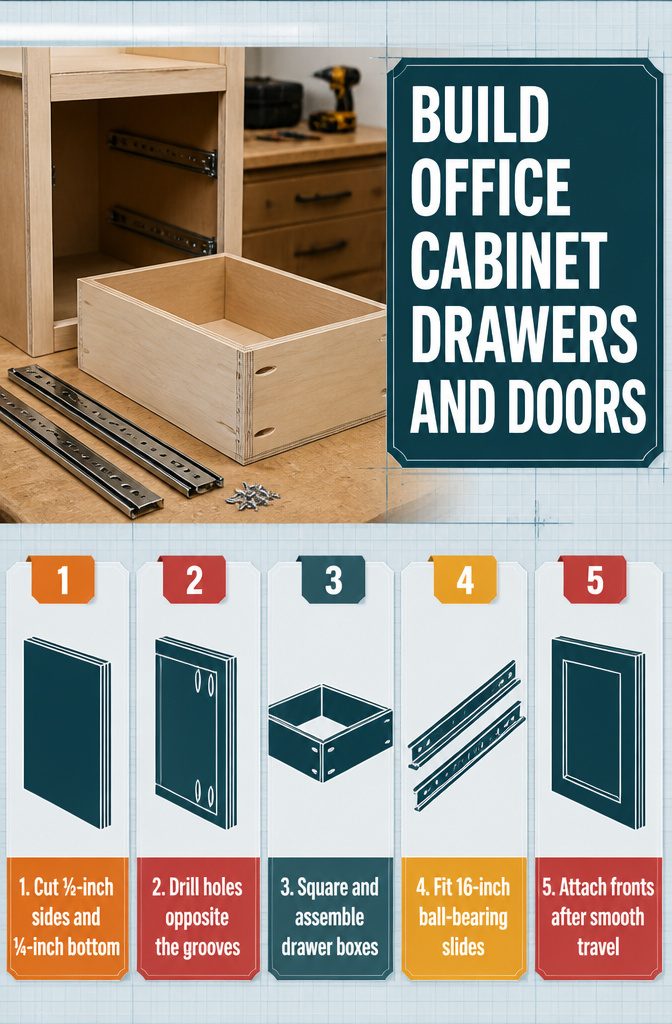
- Cut drawer parts from 1/2-inch plywood for the sides, front and back, and 1/4-inch plywood for the bottom. Set your blade height to 1/4 inch and the fence to 3/8 inch, then run a groove along the inside faces of each piece to hold the drawer bottom.
- Drill pocket holes on the front and back pieces using the 1/2-inch setting on your jig. Drill on the side opposite the groove so the holes sit on the outside of the box and stay hidden.
- Assemble each drawer box by joining the front to the sides with pocket screws, sliding the bottom panel into the grooves, then attaching the back piece. Check that corners meet square before the screws go in.
- Install 16-inch ball-bearing slides by propping the bottom slide up with a spacer, aligning it flush with the cabinet edge, then pulling it open to expose the screw holes. Use spacer blocks or flip the cabinet on its side for upper slides.
- Attach drawer fronts once the boxes are mounted and sliding smoothly. For doors, order them to the exact size of the face-frame opening, then trim 1/16 inch off the top and test-fit with shims to mark the closing edge for a 3° bevel cut.
6. Add Backs, Trim, and Details
7. Add Backs, Trim, and Details
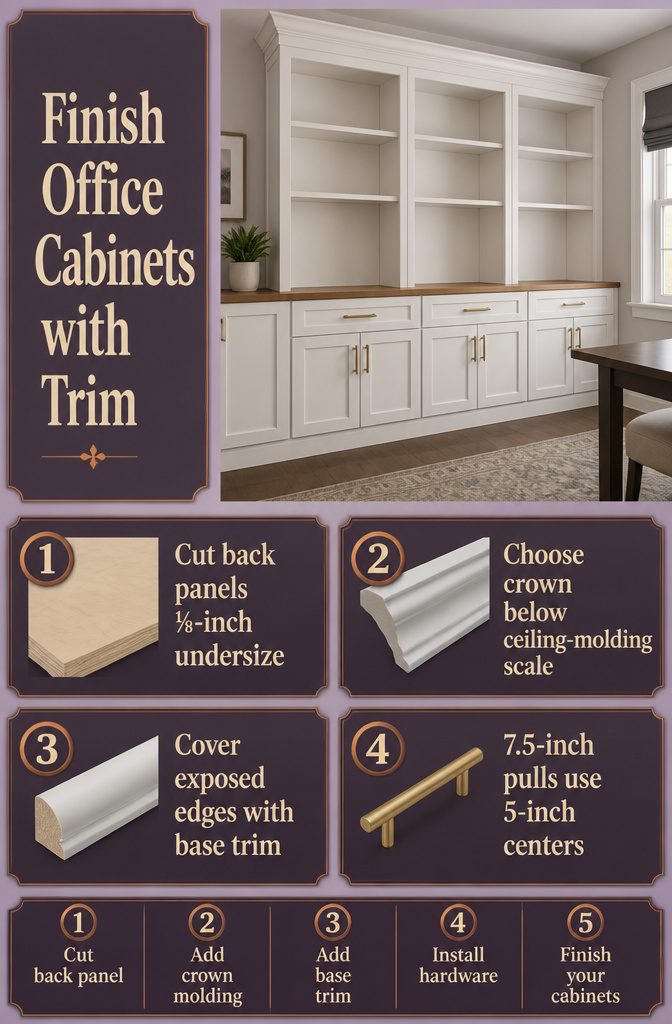
- Cut and nail the back panel from 1/4-inch plywood, trimmed 1/8 inch shorter on all sides. Some built-ins leave the back open so the wall color shows through. Others gain stability or hide an ugly back wall with a thin panel. If you go with plywood, measure each opening and subtract an eighth all around so the panel sits inside the frame without binding.
- Attach crown molding to the top. Choose a profile at least an inch smaller than ceiling molding so the cabinet doesn’t compete with the room trim. Colonial, Shaker, and Modern profiles are common. The hard part is cutting compound miters at corners. Some carpenters stand the molding vertically on the saw instead of flat because the setup is easier. Attach with a finish nailer and fill the joints with caulk for a clean seam.
- Add base trim along the bottom and side edges. Use half-round or flat trim to cover raw plywood edges and hide the legs or kick plate. Wood glue and brad nails hold it in place.
- Install drawer pulls and door handles. I prefer pulls on drawers and handles on tall doors. On one project, 7.5-inch handles with 5-inch hole centers worked for standard drawers, and 11-inch handles with 8-inch centers fit tall cabinet doors. Brass or gold hardware pops against white cabinets. A cabinet alignment tool makes drilling consistent.
7. Prepare and Finish the Surfaces
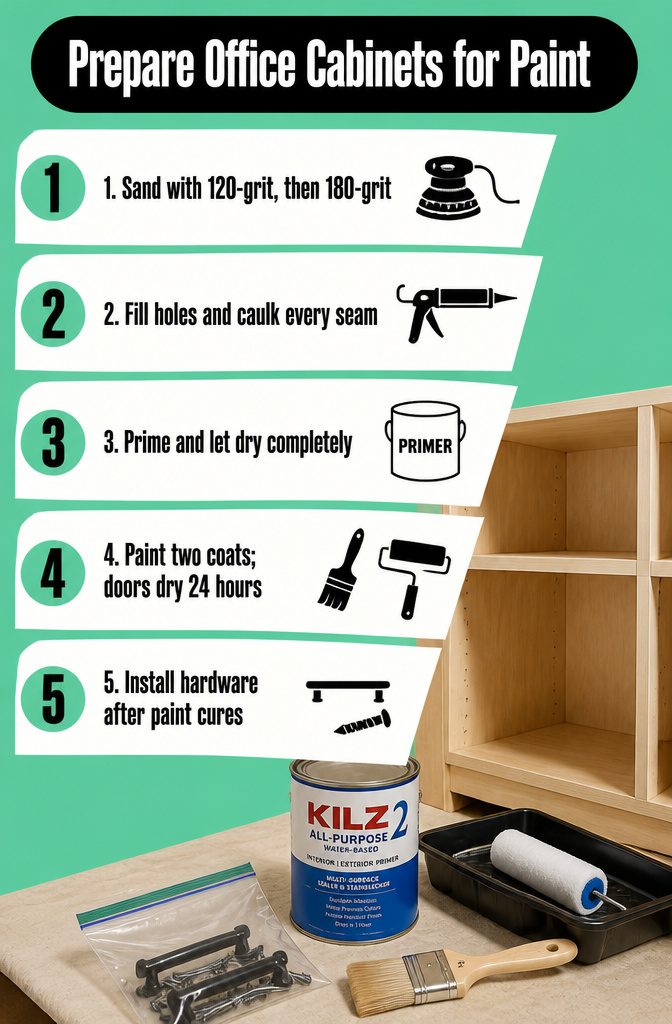
- Sand everything with 120-grit paper first, then 180-grit. A random-orbit sander works for large flat surfaces; otherwise work by hand or with a sanding block. Run a block plane over sharp corners a couple of times before you sand.
- Fill all visible pocket holes with wood filler. If you glued veneer or trim to plywood edges, fill those seams too so they read as one piece.
- Caulk every gap and seam where cabinets meet walls, ceiling, or each other. It takes time, but skipping it leaves the project looking unfinished.
- Prime with a water-based all-purpose primer like Kilz 2. Let it dry completely.
- Paint with cabinet-grade enamel. Cut the edges with a 2-inch angled brush, then roll two coats with a 4-inch foam roller for a smooth finish. Anew Gray or Accessible Beige by Sherwin-Williams, or Frost and Graphic Charcoal by Behr all work. Let doors dry flat for 24 hours before reinstalling.
- Install hardware once the paint is fully cured. Keep screws and pulls in a ziplock during finishing so nothing gets lost.
- Run any cabinet lighting wiring before you close everything in. An electrician can tie new lights into an existing outlet behind the unit if you’re not using it anymore.
8. Check the Installation and Complete the Setup
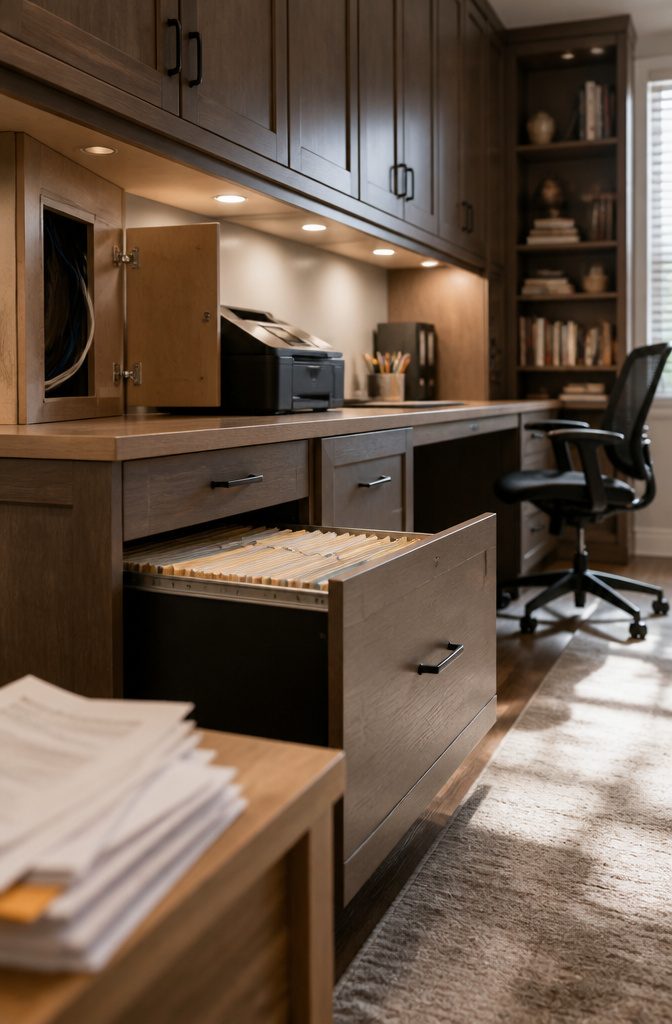
Once the cabinets are assembled, attach them to wall studs before you load them with anything. This isn’t optional.
Books, binders, and office equipment add up fast, and cabinets that aren’t anchored will tip. Locate the studs, drill through the cabinet back into them, and use screws long enough to bite into solid wood.
If you added lighting inside or under the cabinets, connect the wiring now and test each fixture before you close up access panels.
If you’re converting the bottom drawer into a file cabinet, install plastic hanging-file rails cut to the interior width of the drawer box.
They snap in without tools, and standard hanging folders drop right into place. This whole build takes about four weeks from planning through final assembly, so finishing the details now means the workspace is actually ready to use.
File Drawers and Hanging Rails
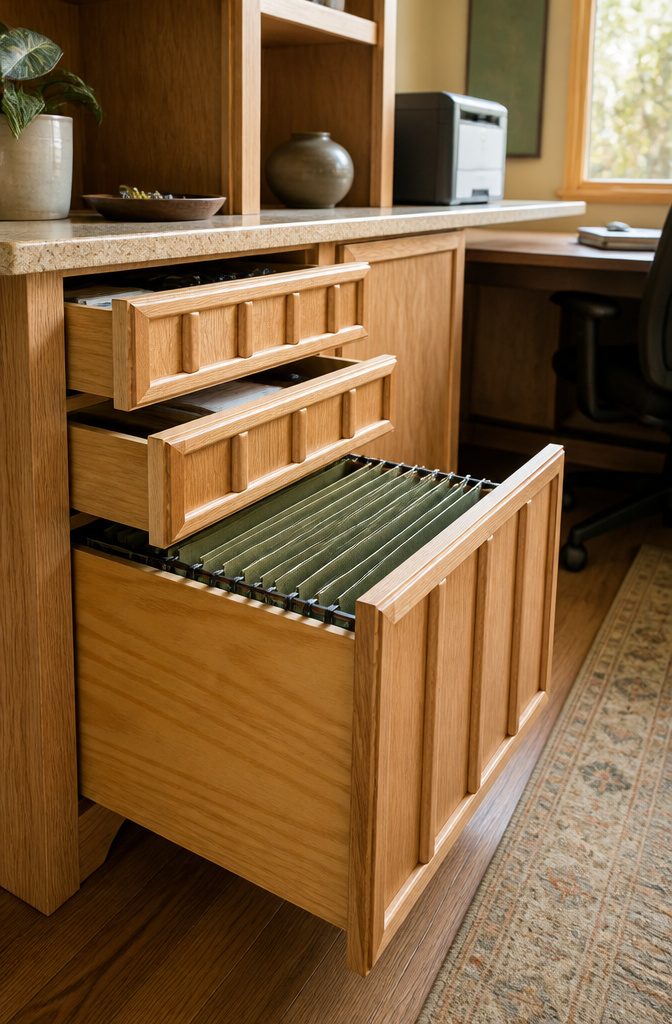
The bottom drawer works well as a file cabinet once you add plastic hanging-file rails cut to fit the drawer width. The rails snap onto half-inch plywood sides without screws or hardware, so the install is fast.
You measure the interior width of the drawer, cut the rails to length, and press them into place along the top edge of each side. Hanging file folders drop right in after that.
The upper drawers handle office supplies and printer accessories. If you built three drawers total, the top two stay shallow for pens, paper, and cables while the file drawer sits below.
I added twenty-six half-round molding pieces to each drawer front for a paneled look, which dresses up plywood without changing the drawer box itself.
The molding goes on after the drawer is assembled but before finishing, so you can sand and prime everything at once.
Bought Cabinet Doors and Hinge Choices
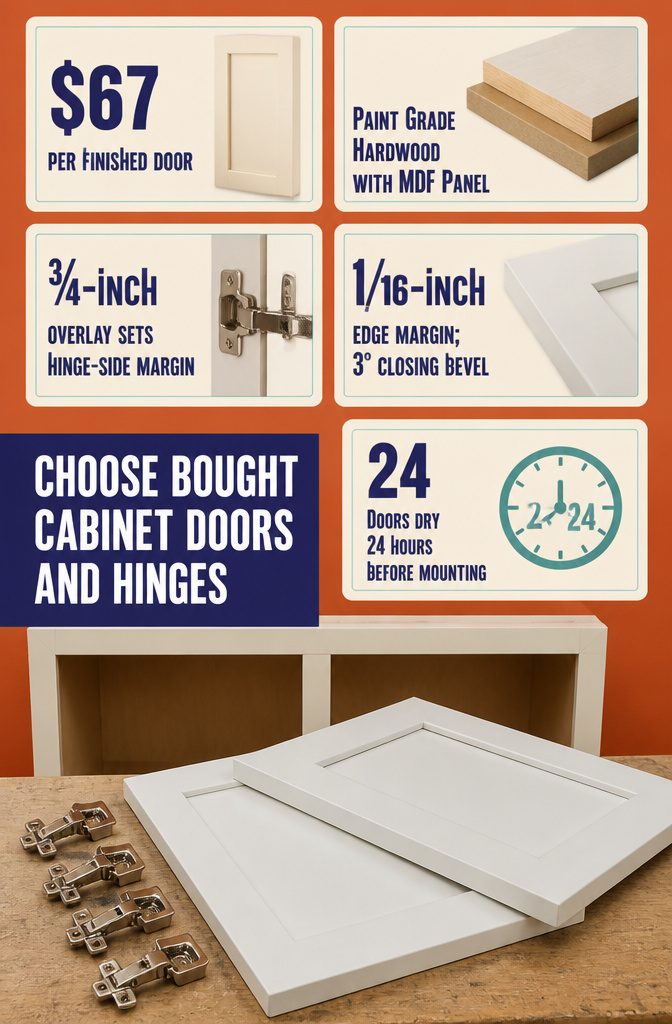
I ordered the cabinet doors online rather than building them, partly because making shaker doors from scratch demands accuracy I didn’t need to prove and partly because four finished doors landed at $67 each, or $268 plus shipping.
The supplier I used lets you enter exact height and width, choose your hinge hardware up front, and specify rail and stile size in the same order.
I went with Paint Grade Hardwood with MDF Panel, which is the cheapest option that still takes primer and paint cleanly, and added Salice soft-close compact hinges with a 2.5-inch rail and stile.
The doors arrived a week later, sanded and ready for finish.
Hinge choice matters earlier than you think because it sets the door margin. I used 3/4-inch overlay hinges, which means the doors cover the face-frame opening by that amount and the hinge side overhang is already determined.
The rest of the edges I trimmed to leave 1/16-inch margins all around. I dry-fit each door, marked it, and cut increments as small as 1/32 inch with a track saw until the gap was even.
On the closing edge I cut a 3-degree bevel so the door clears the frame when it swings shut. After priming, sanding, and two coats of enamel, I let the doors dry for 24 hours before mounting them.
Plywood as the Base Material
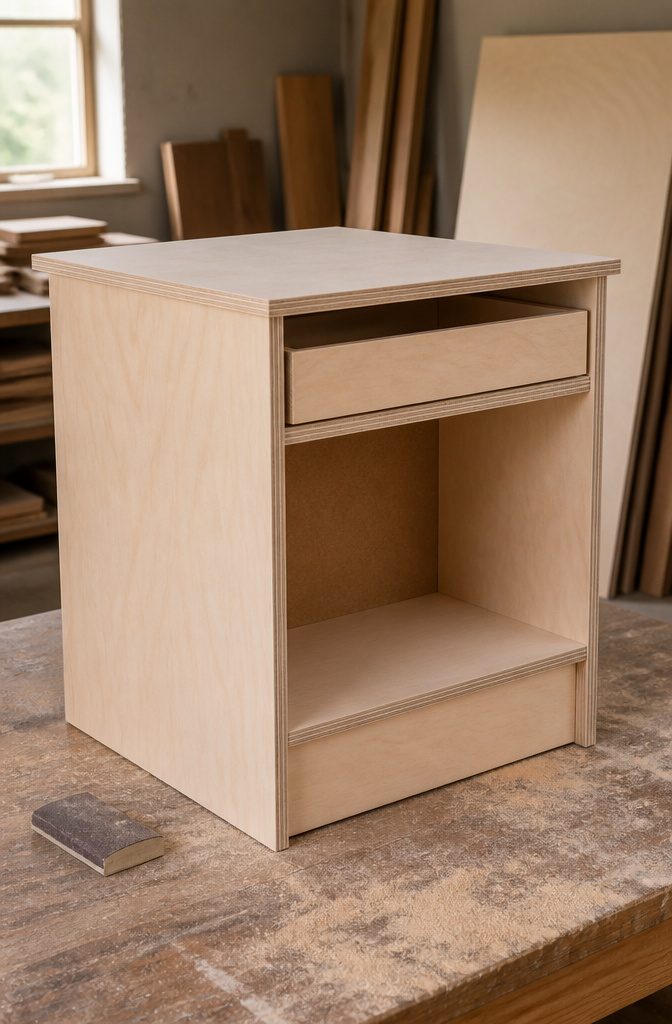
I cut all my cabinet parts from 3/4-inch plywood for the main structure — the sides, top, bottom and toe kick.
Thinner stock doesn’t hold up to the weight of shelves, hardware and the daily slam of a drawer closing, and going thicker adds cost without helping much.
For drawer boxes, I drop to 1/2-inch plywood, which keeps the drawers light enough to pull smoothly on their slides without feeling flimsy.
Drawer bottoms and cabinet backs can use 1/4-inch material; they’re not load-bearing and the thinner sheet makes pocket-hole joinery easier in tight corners.
If the top surface will be painted, sande plywood works fine and takes primer well. A 4-by-8-foot sheet yields six shelves at typical office depth, and another sheet covers a desktop around 51 inches wide.
Frequently Asked Questions
What is the best material for DIY office cabinets?
3/4-inch plywood works best for the cabinet sides, top, bottom, and toe kick because it holds up to weight without adding unnecessary cost.
Thinner 1/2-inch plywood is fine for drawer boxes, and 1/4-inch material covers drawer bottoms and cabinet backs. Sande plywood takes primer well if you’re painting the finished piece.
How should I secure DIY cabinets to the wall?
Fasten each cabinet into at least two wall studs using screws long enough to bite into solid wood.
Four screws per cabinet side, driven straight into studs, is standard. Books and office equipment add up fast, and cabinets that aren’t anchored properly will tip.
Is building cabinets cheaper than buying?
Building from plywood costs less than buying finished cabinets, but you pay in time and tool access.
Ordering premade cabinet doors at around $67 each saves on the specialized equipment and skill needed to build shaker doors from scratch while keeping the overall project affordable.
Why buy cabinet doors instead of building them?
Making doors from scratch demands accuracy, skill, and tools most DIYers don’t have on hand.
Doors are 95% of what you see when you look at cabinets, so they need to be free of imperfections. Ordering them prebuilt keeps the finished project looking polished without adding complexity to the build.
How much do unfinished cabinet doors cost?
Unfinished shaker doors run about $67 each, with prices varying by size, style, and options like hinge hardware. Shipping adds to the total, but the doors arrive sanded and ready for primer.
Can you replace existing cabinet doors with new ones?
Yes. Unfinished doors can be ordered to any size, so you can pull old kitchen or office cabinet doors, refinish the bases, and mount new doors to the existing boxes.
Measure the opening and order after the bases are built for better accuracy.
Do cabinet door hinge holes come predrilled?
Yes, when you order hinges with the doors. The holes are drilled exactly where you need them, and installing the hinges takes minutes once the doors are painted and cured.
What type of paint should I use on cabinet doors?
Cabinet-grade enamel gives the smoothest, most durable finish.
Prime first with a water-based all-purpose primer, then roll two coats of enamel with a 4-inch foam roller. Sand between coats with 180-grit paper to knock down brush and roller marks.