
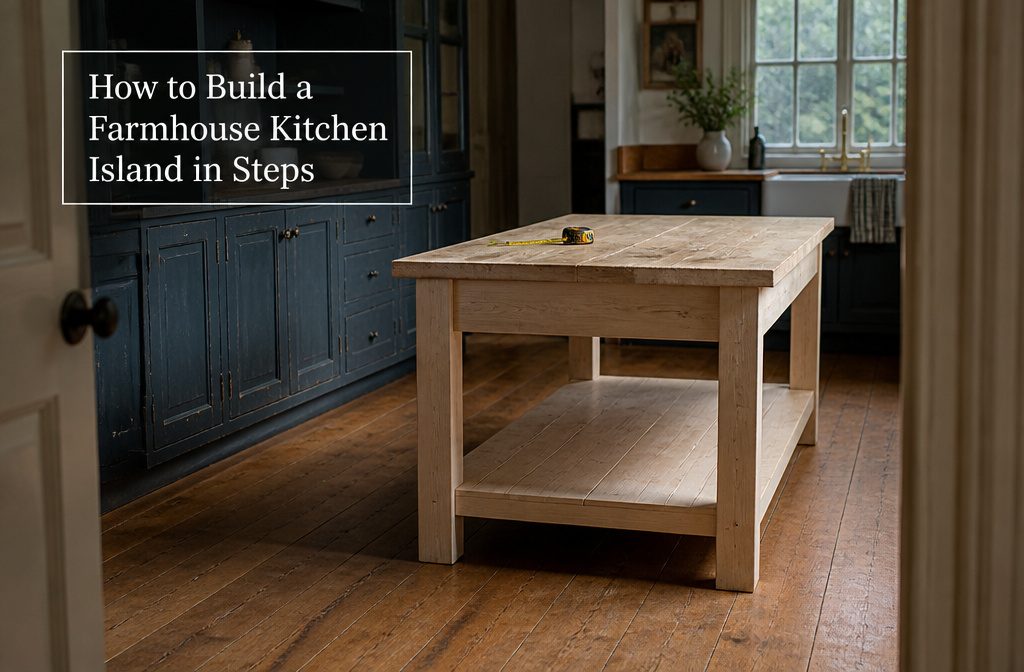
A farmhouse island built from scratch runs $150 to $400 in materials and finishes in a weekend if you own a drill and a Kreg Jig.
Most builders add too much clearance or skip it entirely, then find out the island blocks the room the day they screw the legs on.
The number that matters is the space left over after you subtract the footprint, not the size of the island itself.
1. Plan the Island’s Size and Layout
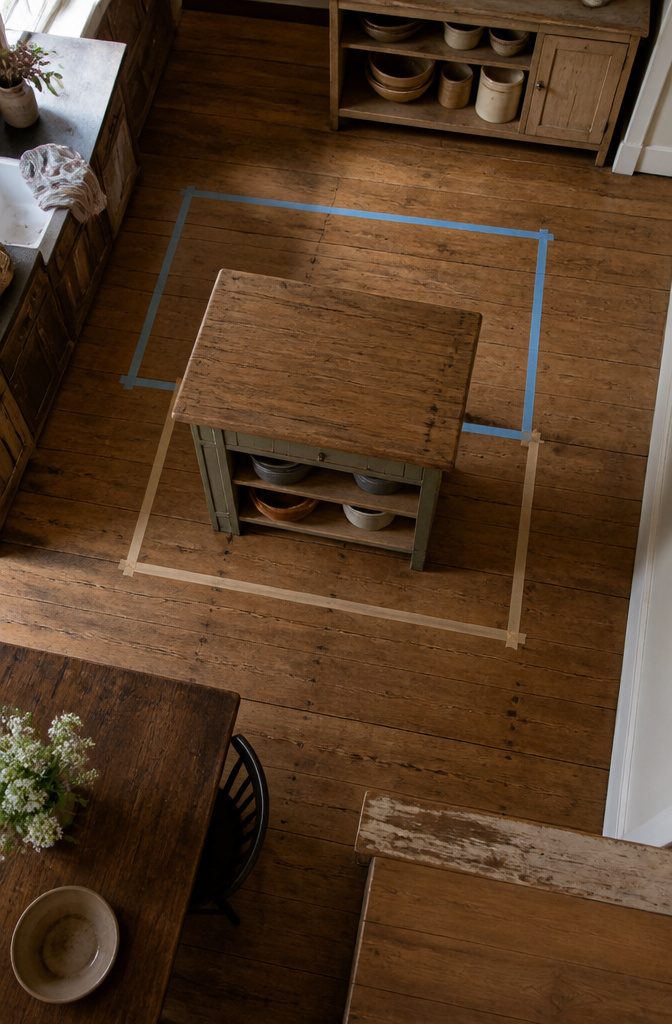
Start with the space you have, not the size you want.
A farmhouse island lives in the room the same way a table does — you should be able to walk around it without turning sideways, and cabinet doors and drawers on both sides need room to open.
I hold to 36 inches of clearance on the working sides and 42 inches if the island faces an appliance that swings out. Anything tighter and the kitchen stops working the moment two people are in it.
A build around 4 feet long by 2 feet wide fits most medium kitchens and gives enough surface for prep without dominating the floor.
That said, the number that matters is the one left over after you subtract the island from the room.
One builder shortened her plan from 54 inches to 46 inches because the longer version ate the walkway. Measure the space first, mark the footprint on the floor with tape, and live with it for a day before you commit to lumber.
Function decides whether you go bigger or smaller. If the island is purely prep space, a narrow build keeps it out of the way.
If it doubles as a bar or a place to eat, you need overhang on one side and legroom underneath. I’d rather see a shorter island that moves well than a long one that blocks the stove.
2. Choose Your Farmhouse Materials
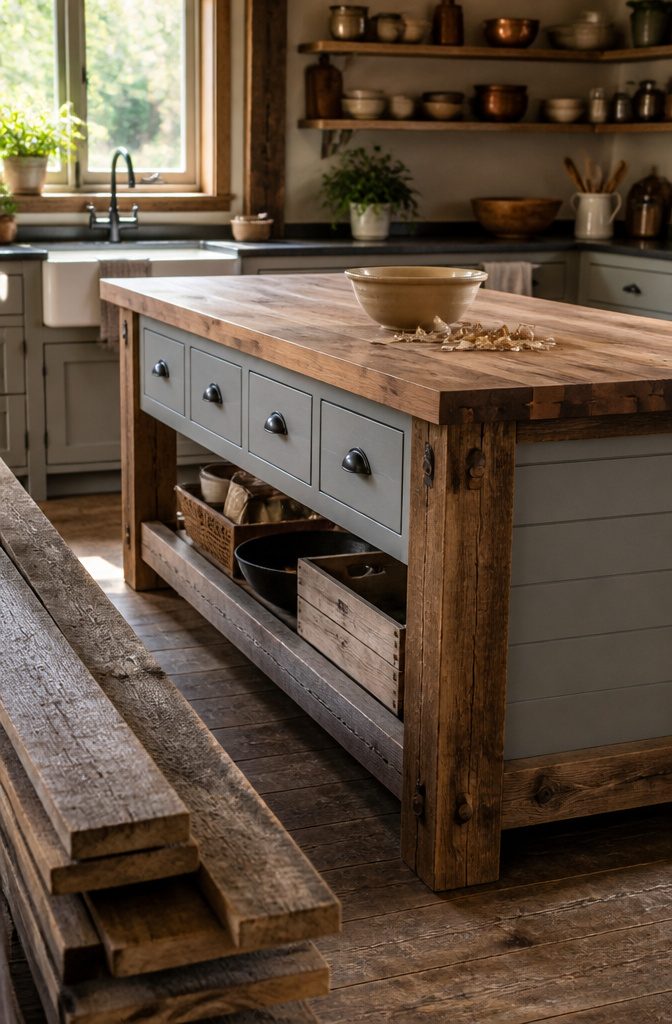
The farmhouse look sits on exposed wood and textured panels. For the base, reclaimed wood or exposed wood beams form legs and supports that give you a solid, traditional frame.
The countertop needs something with grain: butcher block brings warmth and a working surface that gets better with age, while reclaimed wood offers weathered character straight out of the gate.
I prefer butcher block when the island will see prep work, reclaimed when the look matters more than knife marks.
Shiplap paneling on the sides adds the texture people expect from farmhouse construction.
It breaks up flat expanses and reads as intentional rather than bare. One builder joined three used 2×6 boards for the top with pocket hole screws, which keeps the joinery simple and the lumber cost low if you source boards yourself.
Finish with vintage or antique metal hardware. Drawer pulls and handles in aged finishes tie the rustic materials together without competing for attention.
Stick to a neutral palette for paint: whites, creams, soft grays. The wood should carry the color, not fight it.
3. Cut and Assemble the Base
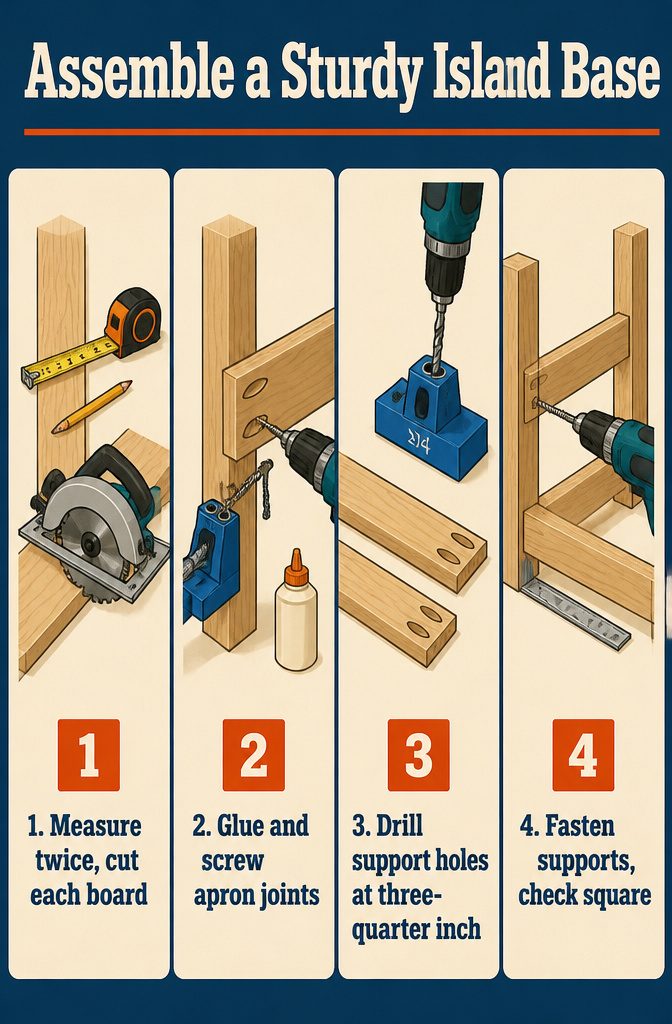
- Cut the leg and apron boards to length as you go, not all at once. Measure twice before each cut to avoid wasting material on a mistake you cannot undo.
- Set the Kreg Jig to 1 1/2 inches and drill pocket holes in the aprons where they meet the legs. Drive 2 1/2-inch pocket-hole screws through each joint, adding a bead of wood glue on the mating surfaces before you clamp them. The glue matters more than most people think—it distributes stress across the joint instead of loading everything onto the screws.
- For the shelf supports, reset the jig to 3/4 inch and drill pocket holes at each end. If you turn the supports wide-side-out for visual weight, the pocket holes end up on top instead of underneath. That means screwing down through the shelf slats into the supports, then countersinking each screw so wood putty hides it later.
- Use 1 1/4-inch pocket-hole screws to attach the supports to the legs. Keep checking square with a framing square as you fasten—small shifts compound fast on a piece this size.
4. Build and Attach the Top and Shelf
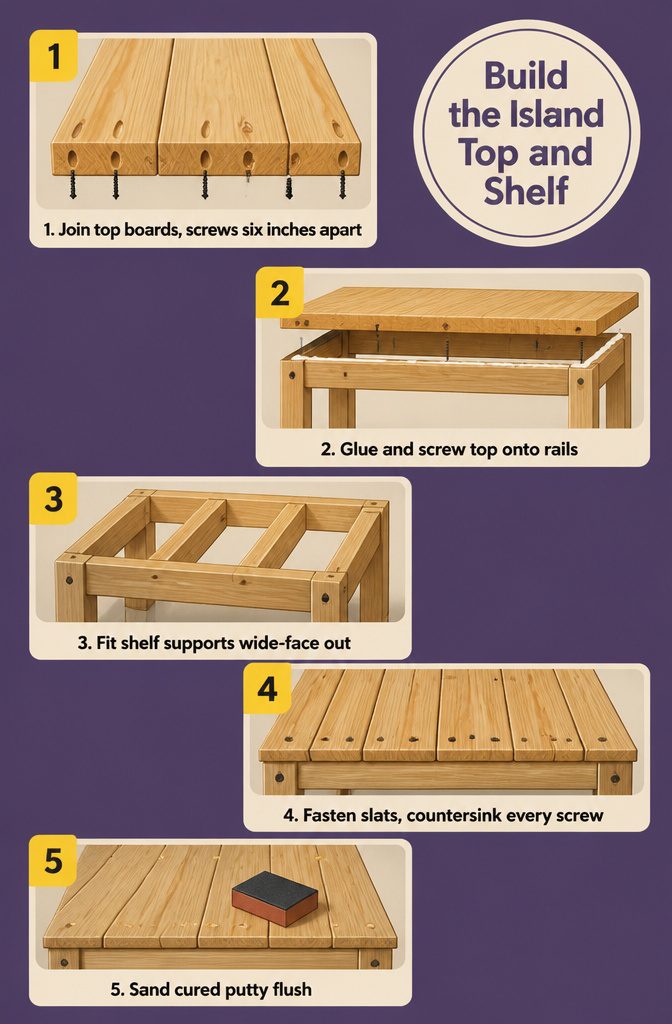
- Join the 2×6 boards edge to edge with pocket-hole screws to form the top. Space screws about 6 inches apart along each joint, driving them from the underside so the top face stays smooth.
- Flip the assembled top over and position it on the base. Run a bead of wood glue along the top rail of the frame, then drive pocket-hole screws up through the rails into the underside of the top to lock it in place.
- Install the shelf supports across the frame, wide face out. This orientation means the slats attach from above instead of being hidden underneath.
- Lay the shelf slats across the supports and fasten each one with screws driven straight down through the face. Countersink every screw head so it sits below the surface—you’ll fill the divots with wood putty later to conceal them.
- Sand the putty flush once it cures. The shelf will show its joins, but the filled holes disappear under stain or paint.
5. Stain, Paint and Seal the Island
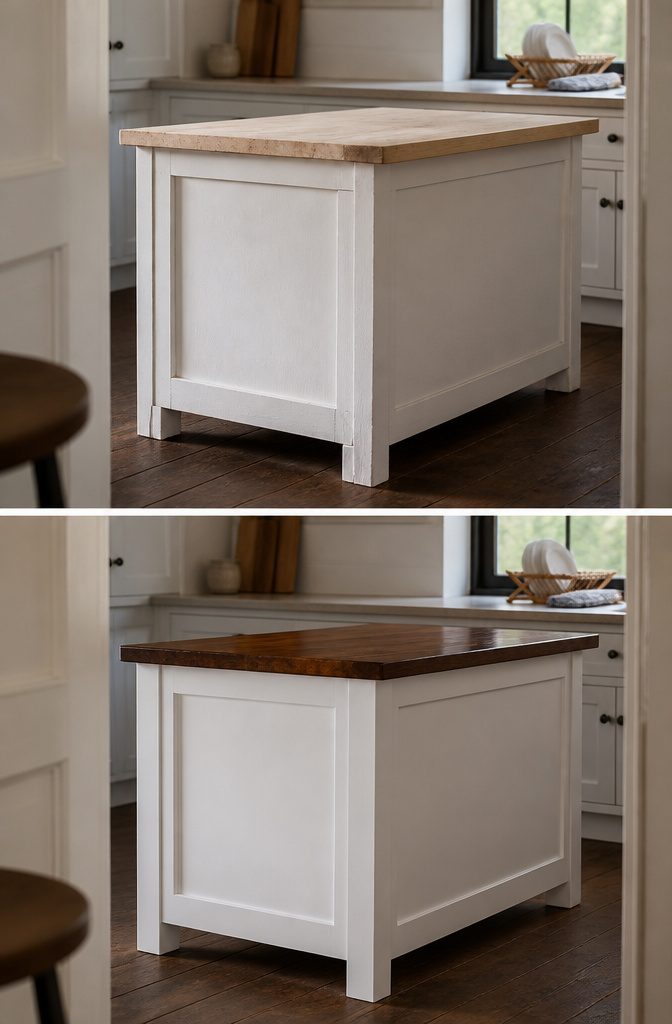
- Stain the butcher-block top with Rustoleum Ultimate Wood Stain in black cherry, working with the grain in long strokes. Let the stain dry overnight before moving to the next step.
- Tape off the edges of the stained top with painter’s tape so no primer or paint gets on the wood grain.
- Prime the base and side panels with a coat of wood primer. Let it dry completely, usually two to three hours depending on humidity.
- Apply two coats of white paint to the base, letting each coat dry before adding the next. The second coat should cover any streaks left from the first.
- Remove the tape from the top once the base is dry.
- Seal the entire island with three coats of Rustoleum satin polyurethane, covering both the stained top and the painted base. The polyurethane protects the finish from water and daily wear. Let each coat dry for at least four hours before applying the next.
6. Apply Peel-and-Stick Tile to the Sides
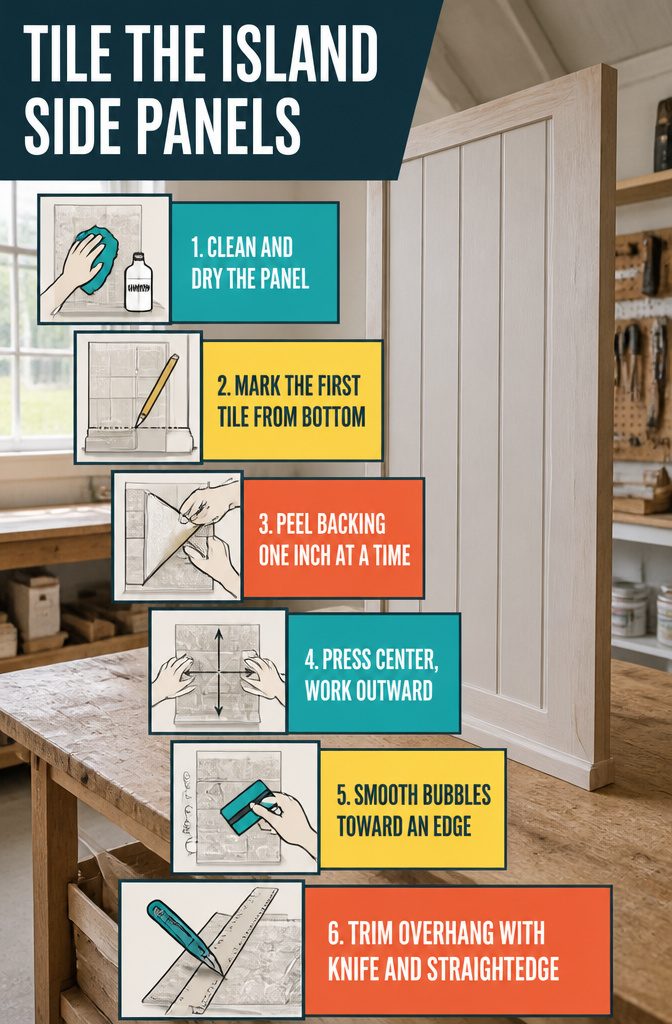
- Clean the surface thoroughly with isopropyl alcohol or a degreaser, then let it dry completely. Any dust, grease or moisture breaks the adhesive bond before the tile ever touches the wood.
- Measure each side panel and mark where the first tile goes, working from the bottom up. A level and straightedge keep the rows straight, because one crooked starter tile throws off everything above it.
- Peel the backing slowly from one corner only, an inch at a time. Fast peeling tears thin tiles or curls the edges before you press them down.
- Position the exposed corner, check alignment with your marks, then press the center of the tile first. Work outward toward the edges with steady pressure while you peel more backing.
- Smooth air bubbles toward the nearest edge with a credit card or plastic scraper. Trapped air lifts the tile within a few days.
- Repeat row by row, checking each tile with the level before moving to the next. Adjust quickly if one sits crooked; most peel-and-stick adhesives give you about thirty seconds.
- Trim edges with a utility knife and straightedge where tiles overhang the panel. Score the face once, bend along the line, then cut the backing.
- Check gaps at inside corners. If they bother you, add tile-edge trim in the same finish as your hardware.
What Gives an Island the Farmhouse Look
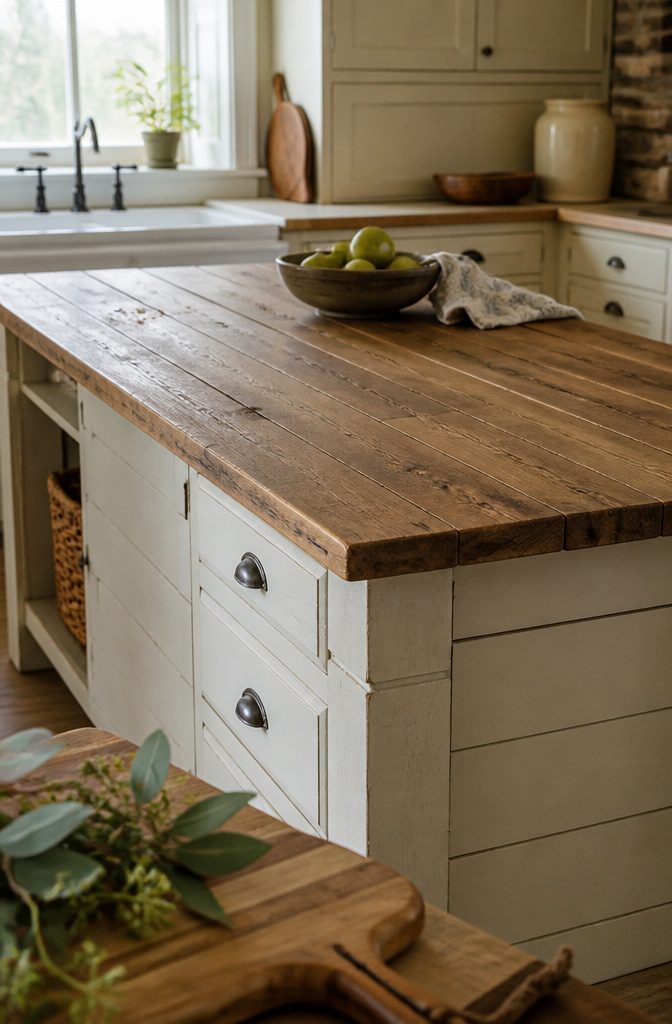
The farmhouse look turns on natural materials, neutral tones, and pieces that could have been handed down. Wood is the center of it: reclaimed boards for countertops, exposed beams that show joinery, shiplap paneling on the sides.
These surfaces carry texture and grain patterns that give the island weight without looking polished. Stone shows up less often, but when it does, it stays in rough finishes rather than high-gloss slabs.
Color stays in a narrow band. Whites, creams, and soft grays dominate, and they work because they let the wood read clearly.
A two-tone island with a stained top and painted base is one of the strongest moves in the style, and it solves the visual problem of an island that sits too heavy or too plain.
The stain brings warmth to the work surface, the paint grounds the base, and the split keeps the piece from blending into the floor or the cabinets.
Hardware finishes the look.
Vintage or antique metal pulls, aged finishes, anything that reads as older than the room itself. That detail matters more than size.
Peel-and-Stick Tile Patterns That Work
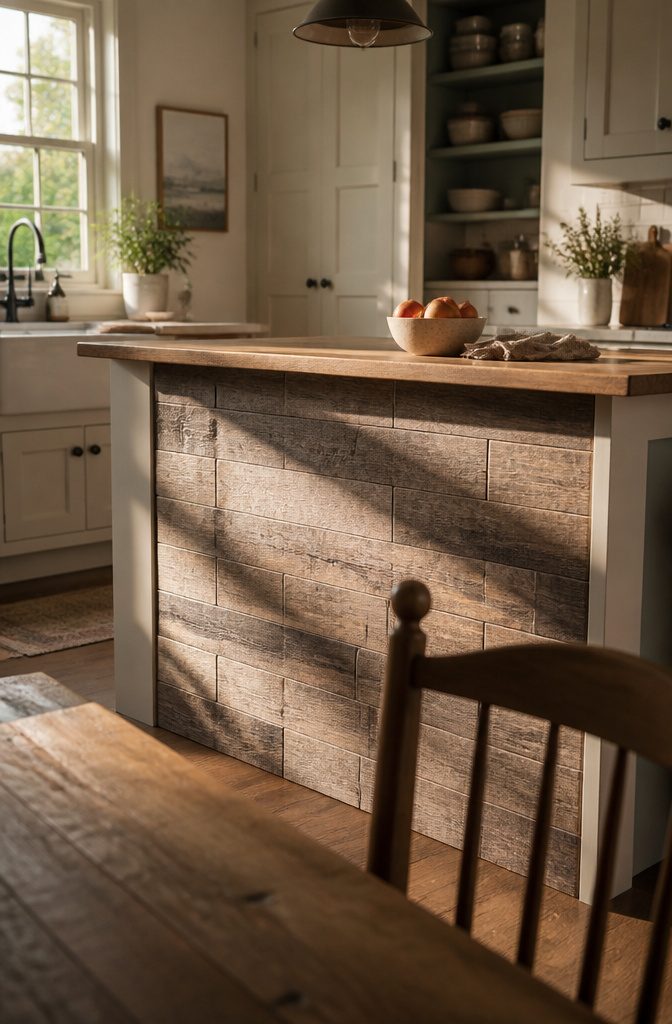
I reach for 3D textured vinyl tiles when I want farmhouse warmth on the sides of an island without the weight or cost of real wood planks or brick.
These peel-and-stick options mimic the grain of reclaimed barn wood, the irregularity of whitewashed brick, or the texture of stacked stone, and the dimensional surface reads as material rather than printed image.
Warm browns anchor the look in older farmhouse kitchens, muted grays suit modern farmhouse spaces with painted cabinetry, and soft whites keep a small kitchen from closing in.
The practical win is durability. Vinyl tiles rated for kitchens are waterproof and heat-resistant, so a spill or a hot pan set too close won’t ruin the finish.
Scratch resistance matters when chairs scrape the island base, and stain resistance keeps cooking mess from marking the surface permanently.
UV-light resistance prevents fading in kitchens with strong afternoon sun. Installation cost drops to zero if you apply them yourself, and material cost runs well under traditional tile, stone veneer, or tongue-and-groove paneling.
Frequently Asked Questions
How large should my farmhouse kitchen island be?
A build around 4 feet long by 2 feet wide fits most medium kitchens and provides enough surface for prep without blocking traffic. Leave 36 inches of clearance on the working sides and 42 inches if the island faces an appliance that swings out.
Measure your space first and mark the footprint on the floor with tape before you commit to lumber, because the number that matters is what’s left over after you subtract the island from the room.
What peel-and-stick tile designs work best for a farmhouse kitchen island?
3D textured vinyl tiles that mimic reclaimed barn wood, whitewashed brick, or stacked stone work best for farmhouse warmth on island sides.
Warm browns anchor the look in older farmhouse kitchens, muted grays suit modern farmhouse spaces with painted cabinetry, and soft whites keep a small kitchen from closing in. The dimensional surface reads as material rather than printed image.
Can peel-and-stick tiles withstand daily use on a kitchen island?
Vinyl tiles rated for kitchens are waterproof and heat-resistant, so a spill or a hot pan set too close won’t ruin the finish.
They resist scratches when chairs scrape the island base, repel stains from cooking mess, and hold up to UV light in kitchens with strong afternoon sun.
Are peel-and-stick tiles a budget-friendly option for a farmhouse kitchen island?
Material cost runs well under traditional tile, stone veneer, or tongue-and-groove paneling, and installation cost drops to zero if you apply them yourself.
You avoid the expense of a professional installer while still getting a finished look that mimics more expensive materials.
How do you apply peel-and-stick tiles on a kitchen island surface?
Clean the surface thoroughly with isopropyl alcohol and let it dry completely, then measure and mark where the first tile goes.
Peel the backing slowly from one corner, position the exposed corner, press the center first, then work outward while you peel more backing.
Smooth air bubbles toward the nearest edge with a credit card or plastic scraper, repeat row by row, and trim edges with a utility knife where tiles overhang the panel.
What makes a kitchen farmhouse style?
The farmhouse look turns on natural materials, neutral tones, and pieces that could have been handed down. Wood is the center of it: reclaimed boards for countertops, exposed beams that show joinery, shiplap paneling on the sides.
Color stays in a narrow band of whites, creams, and soft grays, and hardware in vintage or antique metal finishes completes the look.
What type of wood is best for a kitchen island?
Butcher block brings warmth and a working surface that gets better with age when the island will see prep work, while reclaimed wood offers weathered character straight out of the gate when the look matters more than knife marks.
Either material carries the grain and texture that give the island weight without looking polished.