Designing a room spans anywhere from rearranging what you already own to a full refresh with new furniture, and the right approach depends on how the space actually gets used.
Most rooms fail because they look good in photos but don’t support the activities that happen in them daily, or because the layout blocks natural movement and makes simple tasks harder than they should be.
The process starts by defining zones for each activity, then layering in furniture scaled to the room’s dimensions—a coffee table sits 18 inches from the sofa, walkways need at least 30 inches of clearance, and rugs should be at least 8×10 feet to anchor a seating area without making the space feel smaller.
1. Decide How the Room Should Feel and What It Needs to Do
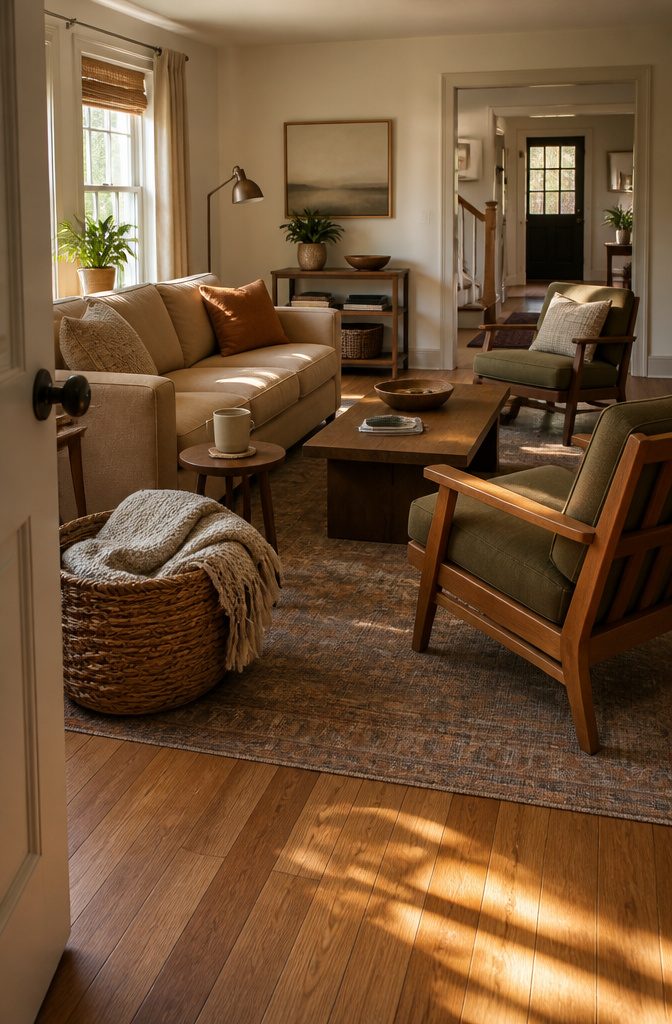
Start by naming what the room has to support.
Who uses it, when, and for what. A living room that hosts three kids after school needs different seating than one where you work alone most afternoons.
A bedroom shared by two people who go to sleep at different hours calls for task lighting that doesn’t bleed across the whole space.
List the activities first, then match the layout and furniture to them instead of decorating around a look and hoping function follows.
Once the practical layer is clear, decide on the feeling.
Relaxed, focused, social—the mood shapes every choice after it, from how much pattern you bring in to whether the seating faces inward or opens to the rest of the house.
I start there because a room that works but feels wrong still fails, and a beautiful room that doesn’t support how you actually live in it gets abandoned or resented within weeks.
2. Gather Inspiration and Define a Direction
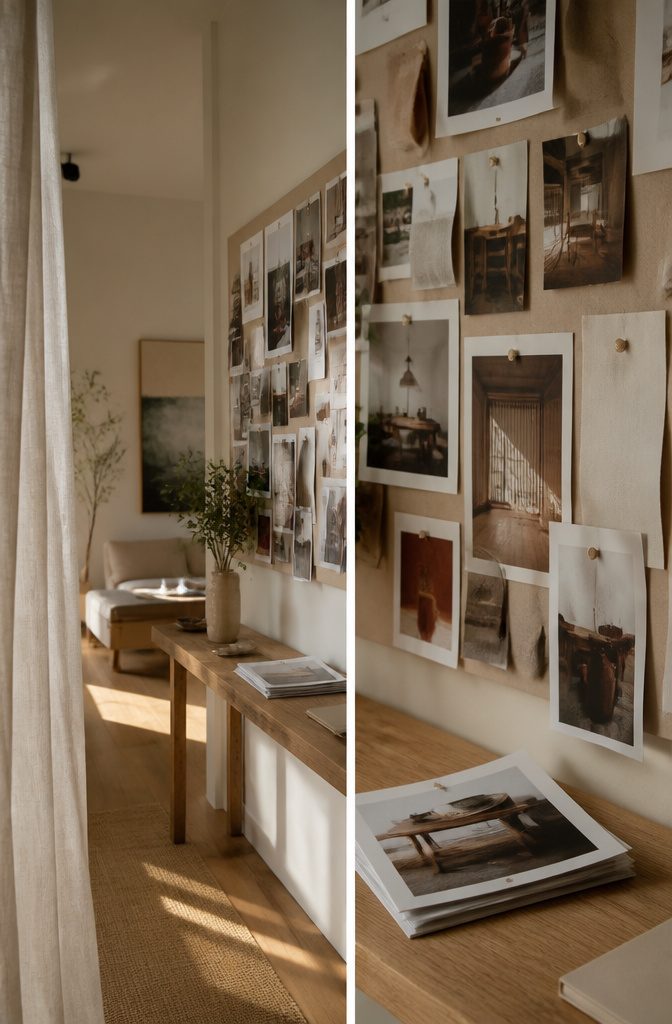
I collect images before I touch anything in the room itself. Pinterest is usually where I start, but magazine tear-sheets and Instagram saves work just as well.
You’re finding a direction, not copying a finished space wholesale. A catalog spread from Pottery Barn might look polished, but it was styled for a photo shoot, not for the way anyone actually lives.
I’m after mood first: how I want the room to feel when I walk into it, whether that’s calm and minimal or bold and layered.
A mood board keeps the process honest.
I save anything that pulls me in without worrying yet about specific colors or furniture pieces. If I love a room except for one table, I still pin it, because the overall vibe is what matters at this stage.
Once I have fifteen or twenty images saved, patterns start to show up: lots of natural wood and linen, or saturated color and pattern, or clean lines with almost nothing on the surfaces.
That’s the visual direction, and it’s worth defining before I spend a dollar or move a single piece of furniture.
3. Assess the Room and What You Already Own
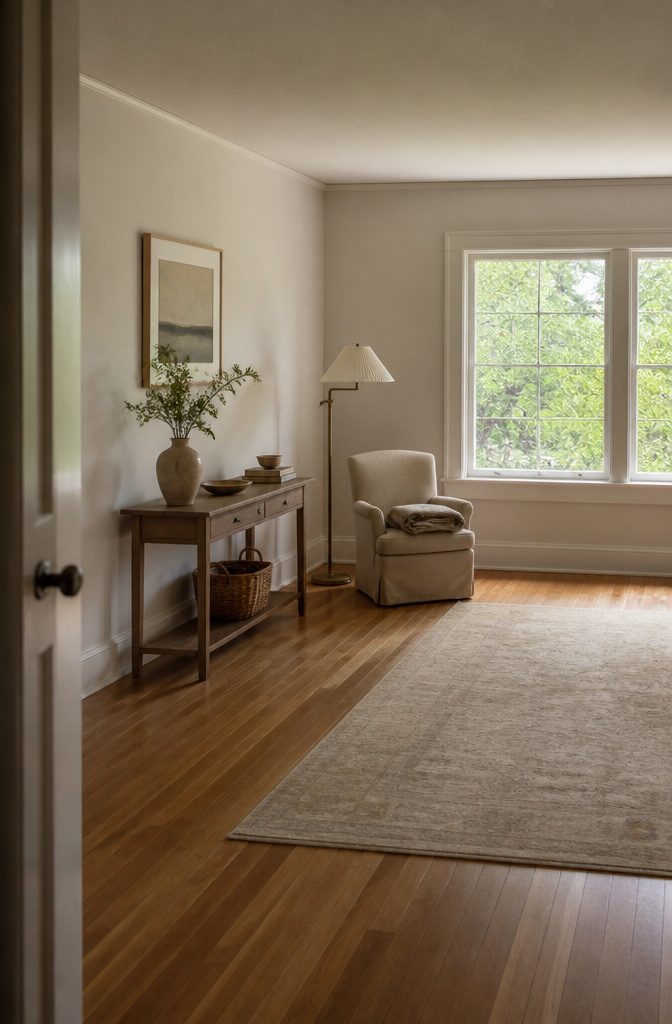
Start by listing what you already own and whether each piece stays, moves to another room, or leaves the house.
Walk through the space and note which items you actually use, which ones you love enough to keep even if they sit idle, and which ones are taking up room for no good reason.
If you haven’t touched something in years, it can go.
Decluttering before you buy anything gives you a clear picture of what the room can become.
A dining table you rarely use can be stored or sold, freeing the space for a home office or a play area that fits how you live now.
Remove excess so that when you do add something new, it has room to work and the space feels intentional rather than crowded.
Once the clutter is gone, shop your own home. Pieces from other rooms can often be reimagined where they’re needed more.
A console table from the hallway might work better in the bedroom, or a chair gathering dust in the spare room could fill a gap in the living area.
Moving what you already have costs nothing and sometimes solves the problem faster than starting from scratch.
4. Set a Realistic Budget and Priorities
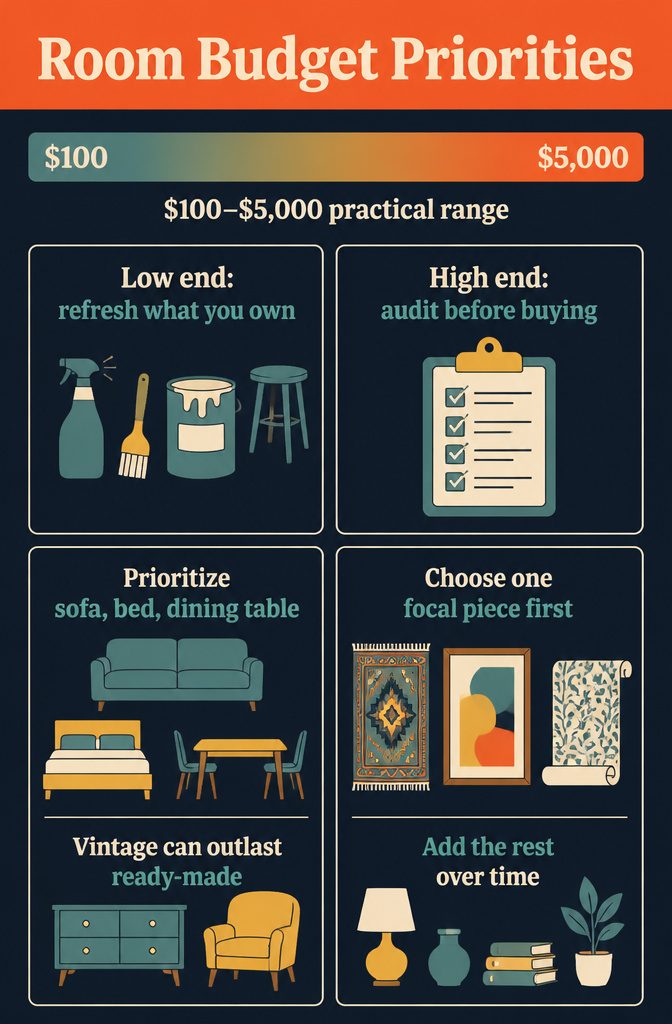
I start every project by asking what I can actually spend and where that money will do the most work.
The practical range lands anywhere from $100 to $5,000, and inside that span the strategy shifts completely. At the low end, I focus on what I already own that can be cleaned, moved, or painted into new life.
At the high end, I still begin with the same audit, because even a generous budget benefits from keeping pieces that already fit the plan.
Foundation pieces come first: the sofa, the bed frame, the dining table. These anchor the room and take the most punishment, so I buy the best quality I can afford.
Vintage often beats new ready-made furniture on both durability and cost. Once the bones are in place, I look for one focal piece that sets the direction for everything else.
That might be a rug with colors I want to pull through the room, a piece of art, or a wallpaper sample that sparks the whole palette. The rest can be added over time as the budget allows.
5. Plan Zones, Layout, and Flow
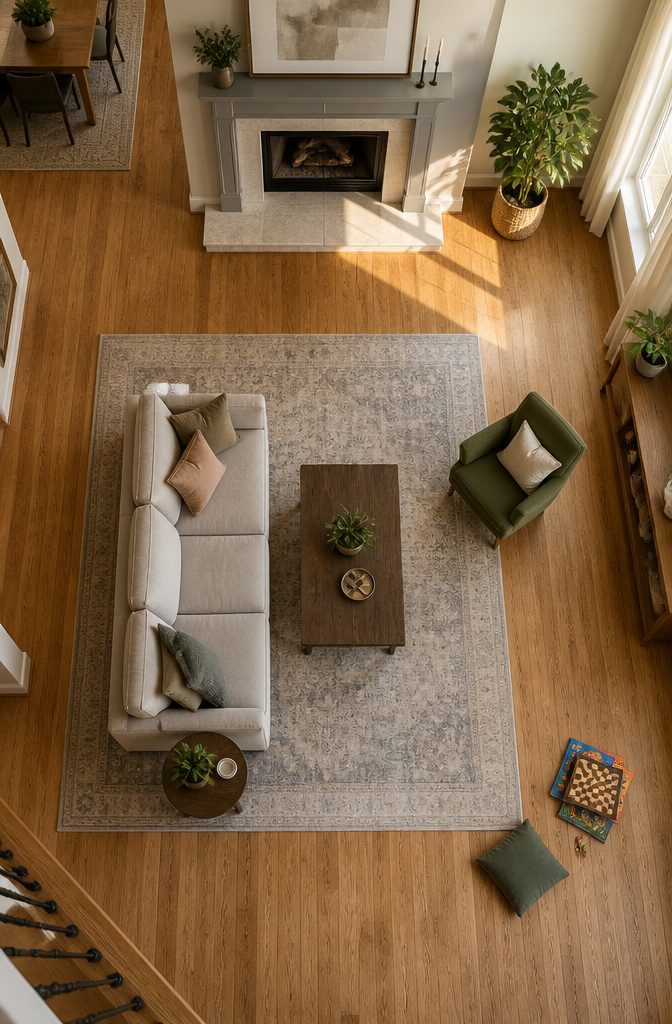
Once you know what the room needs to do, group those activities into zones and give each one the space and furniture it needs.
A family room might split into a sitting area for reading and watching TV, a table or floor space for games, and open floor for exercise. Placing large furniture first makes the rest easier.
The sofa faces the TV and sits close enough to a side table for drinks. An accent chair goes where it supports conversation without blocking the view of the focal point.
The focal point decides where everything else lands.
If it’s a fireplace, the sofa and chairs face it. If it’s a window with a view, arrange seating to take advantage of that.
Keep the sight line clear. Chairs that sit directly in front of a fireplace or TV break the room’s pull, so shift them to the side and let the focal point stay visible.
Before you commit, check the flow.
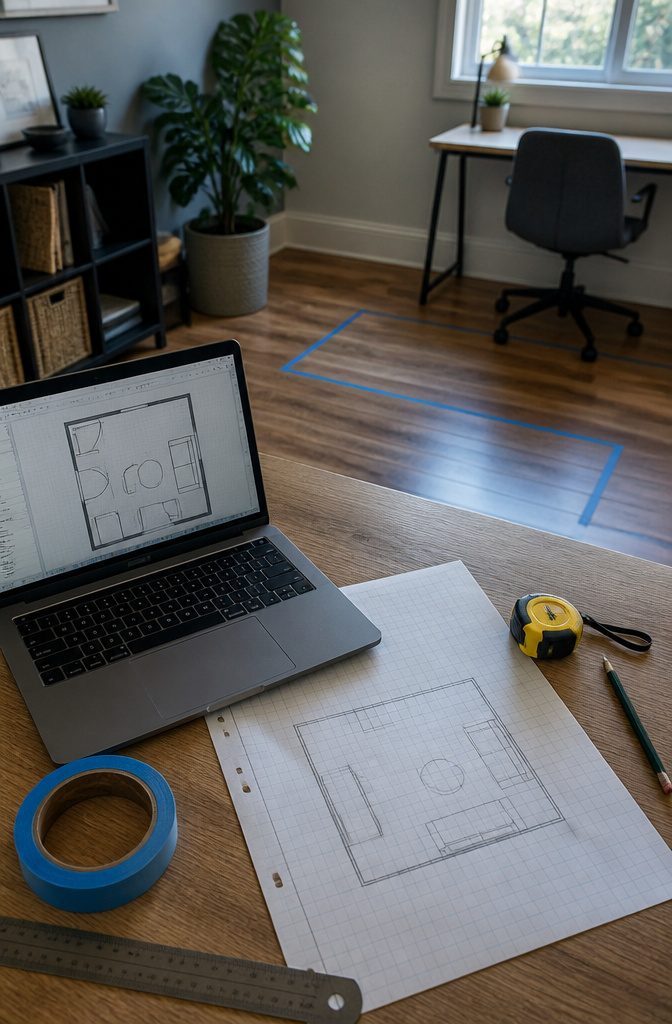
Furniture that worked in one room can feel too large in another, and swapping pieces between rooms often solves the problem faster than buying new. Sketch the layout on paper or mark placements with painter’s tape on the floor.
Measure before you buy, and walk the paths people will actually take through the room. If you have to turn sideways to pass the coffee table, the layout isn’t done yet.
6. Choose Colors and Finishes
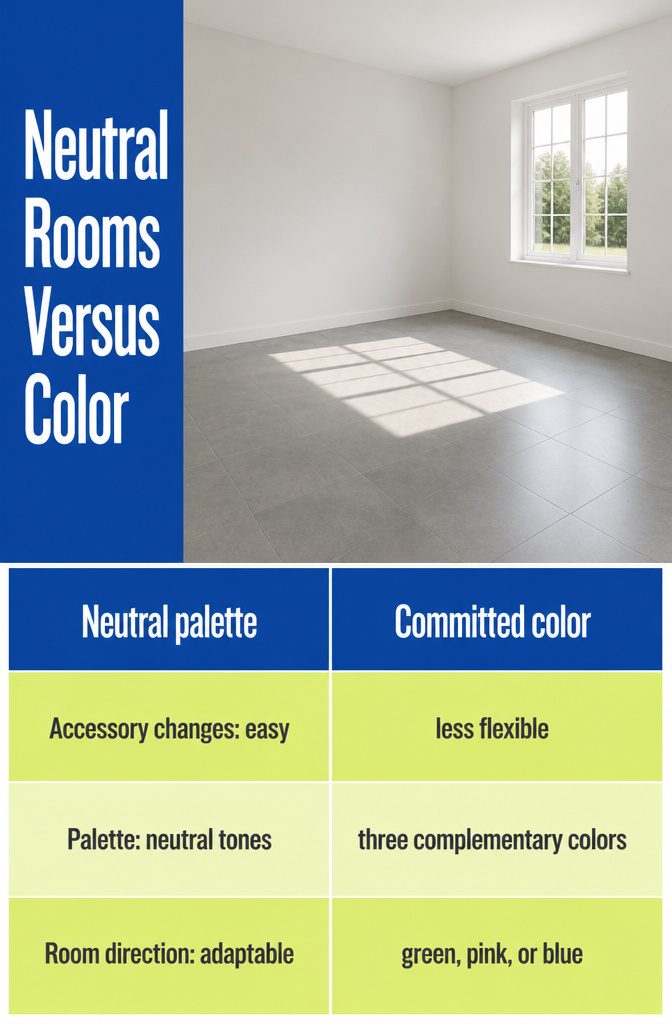
I pick a palette before anything arrives, because color decisions get harder once furniture is in the room. If you’re working with existing floors, wall paint, or built-in fixtures, those set the boundaries.
A warm oak floor pushes me toward neutrals or muted tones; cool gray tile opens up bolder choices. I start by deciding whether the room stays neutral or commits to color.
Neutral rooms let you swap accessories easily. If you want a room built around green, pink, or blue, choose three complementary colors so the space stays interesting without fighting itself.
Lighting changes how a color reads, and what works in one house can look wrong in another even with identical paint.
I check samples in morning light and again at night before committing. If you have mismatched furniture and the room feels scattered, unifying a few pieces through color pulls it together—dining chairs, side tables, anything repeated.
Some continuity across rooms helps too: carrying one color or material into the next space makes the whole house feel intentional instead of random.
7. Select Furniture and Textiles
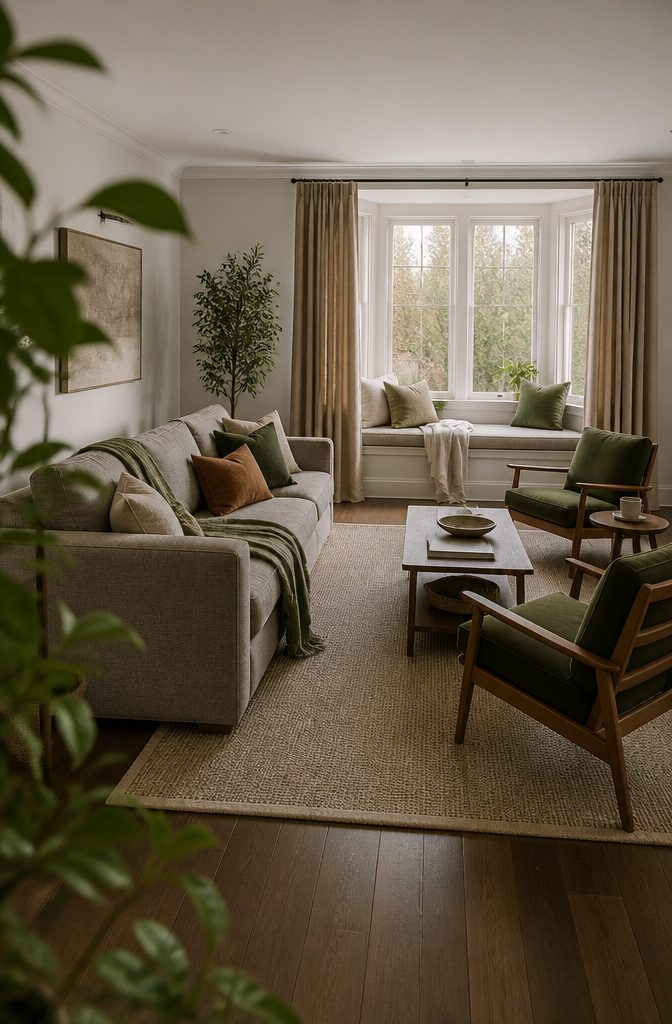
Start with anchor pieces first: the sofa, bed, or dining table that takes up the most visual and physical weight. Once those are placed, you can judge how much room remains and what scale the next layer needs to be.
A common balance that works in living rooms pairs one sofa with two accent chairs, one sectional with one accent chair, or two sofas with two accent chairs.
Fill the room without crowding it; those combinations keep the furniture from looking either sparse or jammed together.
After the main pieces are settled, bring in rugs to define each zone.
A rug with straight edges and clear dimensions instantly anchors a seating group or dining area, and the definition helps guests read the room the way you intended.
Curtains come next, followed by pillows, throws, and any other textiles that add softness or color. This order keeps you from guessing at fabric choices before you know what the furniture actually needs.
8. Plan and Layer Lighting
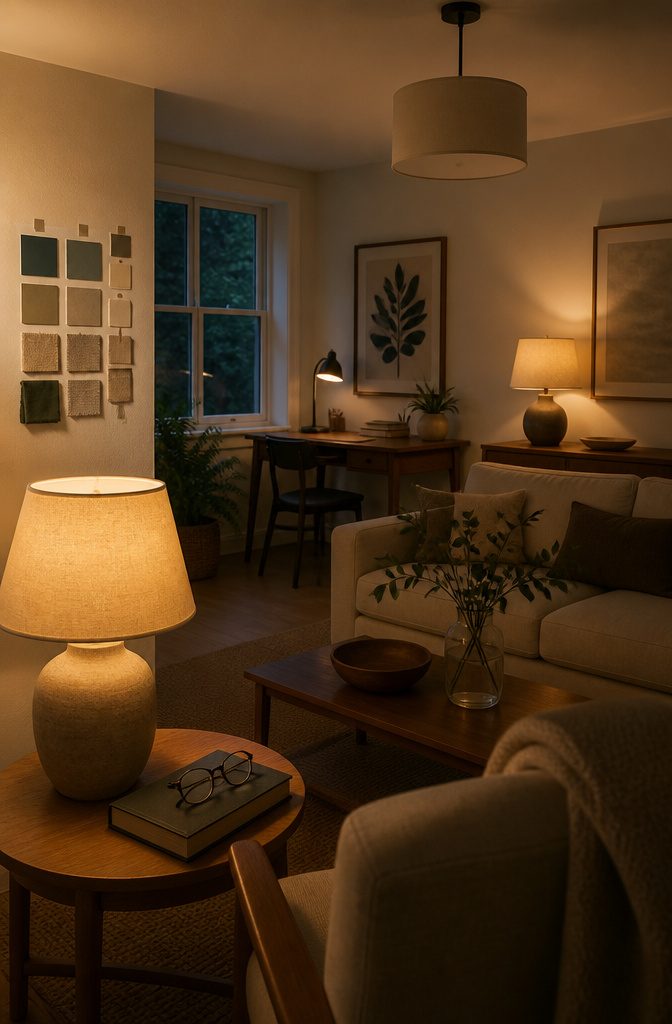
Natural light changes how color and finish read in a room, so check paint samples and fabric swatches at different times of day before committing to anything permanent.
I tape samples to the wall and revisit them in morning light, midday sun, and late afternoon shadow.
A color that looks soft and balanced at noon can turn muddy or cold once evening hits, and that shift matters more in a room you use all day.
For evening, I layer multiple types of lighting instead of relying on a single overhead fixture.
Task lighting goes where work happens, table lamps or sconces add warmth at eye level, and a pendant or sculptural fixture can double as a design moment.
Lighting all four corners of the room after dark keeps shadows from collecting and makes the space feel more complete.
Different lights suit different tasks and times, so the plan should account for how the room functions throughout the day, not just how it photographs at one moment.
9. Add Purposeful Accessories and Personal Details
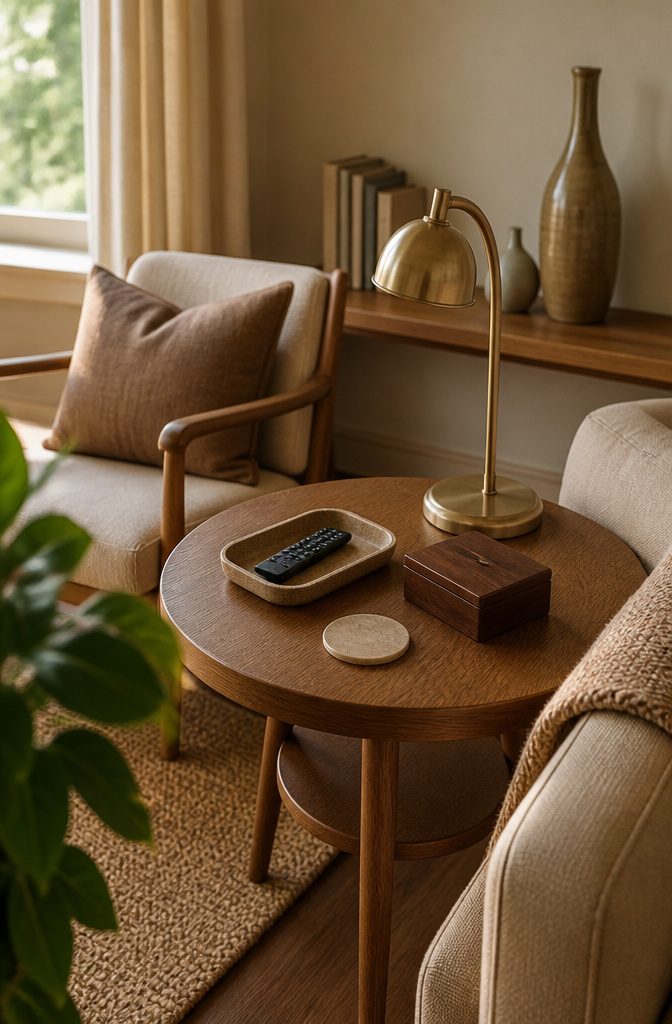
Accessories work when they do something beyond sitting on a surface. I choose items that support the room’s function first, then match the style I’ve already set with color and finishes.
A reading lamp next to a chair, a tray to corral remotes, coasters that protect the table, a decorative box that hides clutter—each one serves a purpose and adds to the look at the same time.
The mistake is filling space just to fill it. If an object doesn’t help you use the room or strengthen the visual direction, it’s decoration for decoration’s sake, and that reads as clutter no matter how carefully it’s arranged.
The intentional arrangement of such items is the difference between clutter and decor.
That means surfaces need editing, not filling.
Art, photographs, mirrors, plants, books—these personalize a room and add dimension, but only when they’re chosen deliberately. I style surfaces by grouping a few things that belong together, leaving space around them, and making sure the scale varies.
A tall vase, a stack of books, one small object. The grouping holds your eye; the negative space keeps it from feeling busy.
10. Edit, Adjust, and Live With the Result
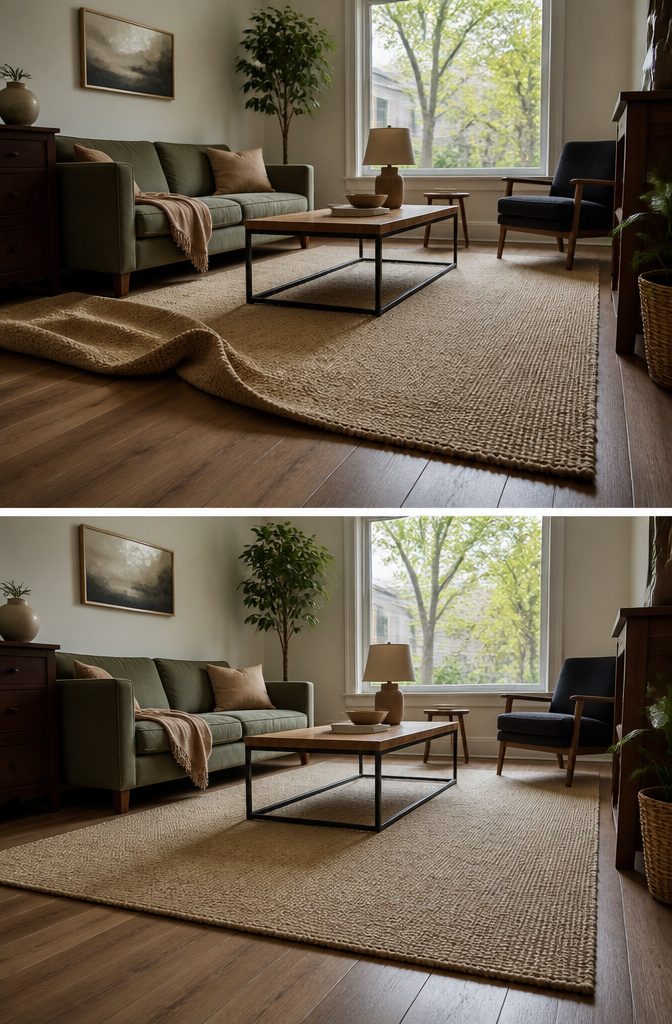
The first day in a newly designed room is never the finished result.
I move furniture a few inches at a time until the sight lines feel right, and I’ve found that what looked balanced in plan view sometimes reads too heavy or too light once you’re standing in it.
Give yourself a few weeks to notice what works — whether the coffee table sits too far from the sofa, whether the rug edge trips you every morning, whether you actually use that chair you thought would anchor the corner.
Clutter will undo good design faster than bad furniture will. I clear surfaces down to what gets touched daily, and anything that hasn’t been used or even dusted in years leaves the room.
The inspiration photos you saved don’t show clutter because clutter was removed or hidden before the shot. Living without the excess makes the design choices you did make visible.
Resist buying furniture in matching sets. A room works when pieces fit together without looking like they arrived on the same truck, and it’s better to live without an item temporarily than settle for something that isn’t right.
The room improves as you use it and see what it needs, not all at once but as you find things you genuinely want in it.
Online Room-Planning Tools
I’ve tested a handful of free room-planning platforms, and Homestyler is the one I return to — it runs in a browser, lets you drag walls and furniture to exact dimensions, and has over 20 million registered users behind it.
The interface assumes no design background, so you can drop in a sofa, adjust its width, and see whether the coffee table still clears the walkway.
Most of these tools let you save layouts for later, which matters when you’re comparing three arrangements and need to step away before deciding.
If software feels like overkill, a sheet of graph paper and a roll of painter’s tape on the floor will get you the same answer: whether the bed blocks the closet door, whether the desk fits under the window.
I’ve done it both ways, and the tape method wins for speed in a single small room.
Surface Styling
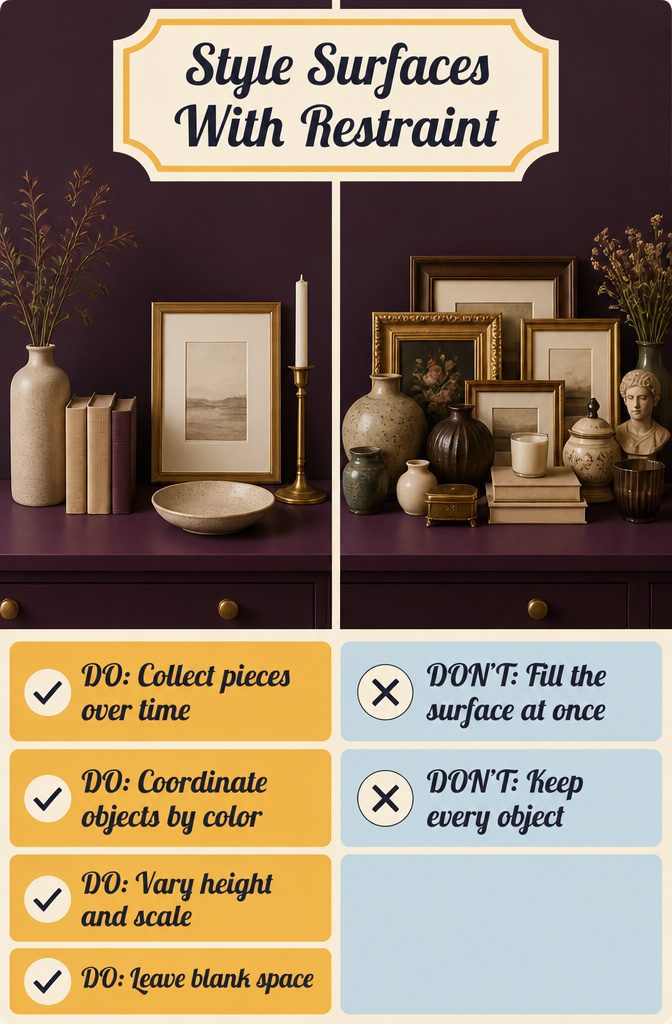
The objects you arrange on a shelf or tabletop deserve the same planning you gave the layout. A good vignette starts with collecting items over time rather than staging an entire surface in one shopping trip.
That patience matters because the personality of a room shows most clearly in the small, deliberate details you gather as you find them.
When you style a surface, work through these moves:
- Coordinate color across objects. Group books, ceramics, and frames by tone so each vignette tells a single color story instead of competing for attention.
- Vary scale and height. Mix a tall candlestick with a low bowl and a midsize frame. Uniform height reads flat.
- Leave blank space. Negative space separates clusters and keeps the arrangement from looking like clutter.
- Keep it simple. The arrangement is only as strong as the objects themselves, so edit ruthlessly and let a few good pieces carry the surface.
Professional-Looking Decorative Details
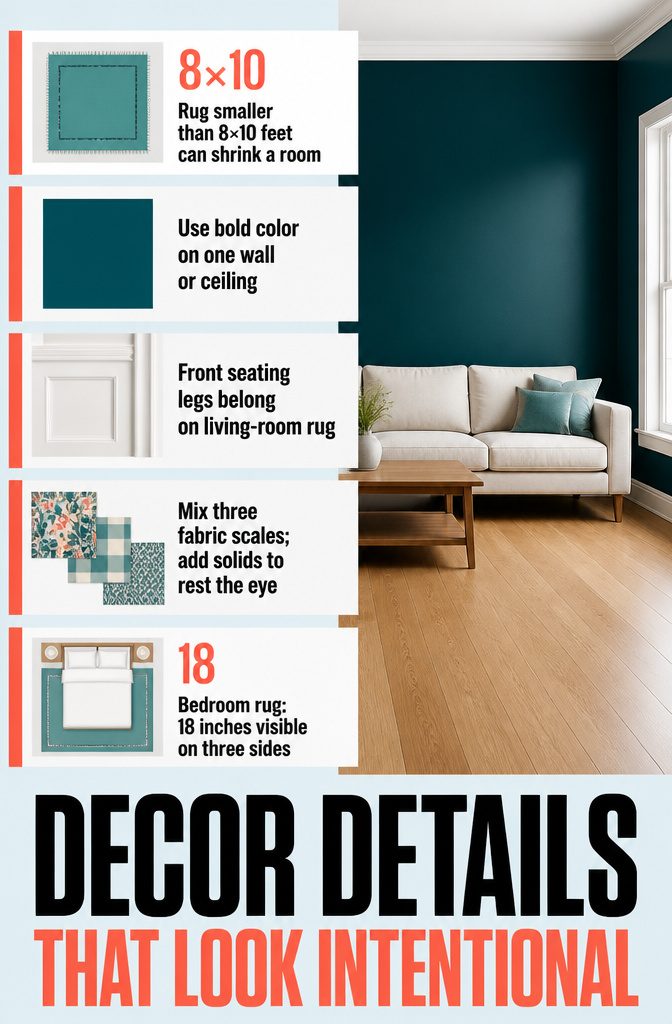
A few small moves separate a room that looks put-together from one that feels a little off, and most come down to scale and repetition.
- Rugs smaller than 8×10 feet tend to shrink a room visually rather than anchor it. In a living room, the front legs of each seating piece should sit on the rug. In a bedroom, aim for at least 18 inches of rug visible on three sides of the bed.
- Bold wall or ceiling color gives a room weight. I reach for a saturated tone on one wall or overhead when the furniture itself is light or neutral, which keeps the drama focused without overwhelming the space.
- Trim and paneling add dimension. Even painted the same color as the wall, the shadow lines break up flat surfaces and read as intentional rather than unfinished.
- Start a pattern mix with three fabrics and vary their scale: a large floral, a mid-scale plaid or geometric, and a smaller coordinating print. Break them up with solid pillows or borders so the eye has somewhere to rest.
Furniture Placement and Clearance
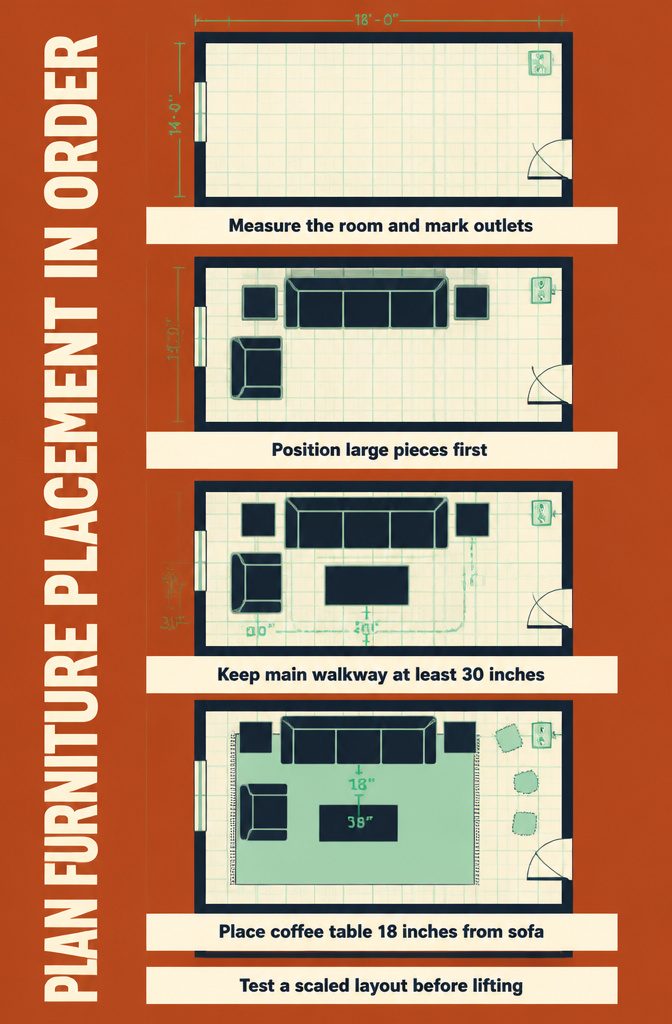
I measure the room before I buy anything, because a sofa that works on a screen rarely works the same way when it arrives.
Start with walkway clearances of at least 30 inches around the main path through the room, then position large pieces first.
A coffee table sits 18 inches from the front of the sofa, close enough to reach but far enough that you don’t scrape your shins every time you stand.
If the room allows it, I use a rug at least 8×10 feet to anchor the seating, with all the front legs of each piece sitting on it so the grouping reads as one zone instead of furniture scattered across a floor.
I also mark outlet locations on my rough floor plan, because discovering that the only plug sits behind a bookcase you can’t move is the kind of problem that shows up too late.
Draw the room to scale on grid paper, cut out furniture shapes to the same scale, and test layouts without lifting anything heavy. That low-tech approach catches mistakes a 3D app sometimes hides.
Personal Style and Character
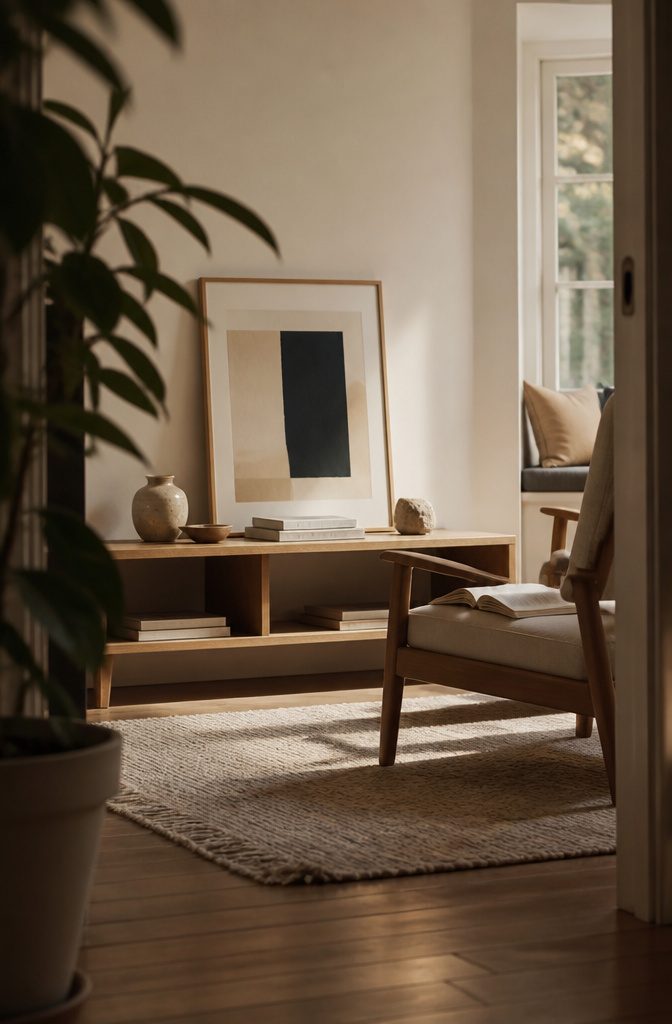
A room that feels personal isn’t decorated with someone else’s taste in mind.
I start by looking at what already matters to you: books you’ve collected over time, objects that came from a trip or a gift, art you chose because it meant something.
These pieces anchor a space in your actual life rather than in a catalog.
The difference shows immediately. A room assembled from trend lists feels like a showroom; one built around your collection reads as home.
The objects themselves matter more than how many you own.
Patience beats speed here. Rousseau, an interior designer, points to the value of building a collection gradually rather than buying everything at once—acquiring future heirlooms instead of filling shelves in a weekend.
I’ve seen rooms where every surface holds something, but nothing connects, and the result is clutter dressed as decor.
Better to place fewer items with intention, grouping them by color or scale, leaving space around each vignette so the eye can rest.
Frequently Asked Questions
How do you plan a room that functions exactly the way you need it to?
List the activities the room must support and who will use it, then create zones for each function and choose furniture that serves those uses.
A living room for three kids after school needs different seating than one where you work alone. Match the layout to how you actually live instead of decorating around a look.
Is it really possible to design a room layout online at no cost?
Yes.
Free platforms like Homestyler let you drag walls and furniture to exact dimensions in a browser, with no design background required. Most tools let you save layouts for later, which helps when you’re comparing arrangements before deciding.
How do I make my rooms look professionally decorated?
Use rugs at least 8×10 feet to anchor seating, leave 30 inches of walkway clearance, and layer multiple types of lighting instead of relying on overhead fixtures alone.
Mix patterns at 3 different scales, vary height on styled surfaces, and carry at least one color or material between rooms.
Is there an AI room designer available?
Yes.
Homestyler runs in a browser and has over 20 million registered users. It lets you place furniture, adjust dimensions, and see whether the layout clears walkways before you move anything heavy.
What is the 60/30/10 rule for bedrooms?
This rule splits color across 60% dominant, 30% secondary, and 10% accent.
In a bedroom, 60% might be wall color and bedding, 30% furniture and rugs, and 10% pillows and accessories. It keeps one color from overwhelming the space while still letting the palette register as deliberate.
What is the 3-5-7 rule in decorating?
Group accessories in odd numbers because they read as more natural and less formal than pairs.
A shelf styled with 3 books, a vase, and a small object holds your eye better than 2 or 4 items evenly spaced. The rule applies to vignettes on tables and surfaces throughout the room.